Homemade Chocolate Covered Cherries: A Sweet Holiday Treat
There’s something truly special about homemade chocolate covered cherries. These little bites of heaven have a way of making any day feel like a celebration. Whether you’re crafting them for the holidays, as a gift for loved ones, or just because, these cherries are a labor of love—and totally worth it.
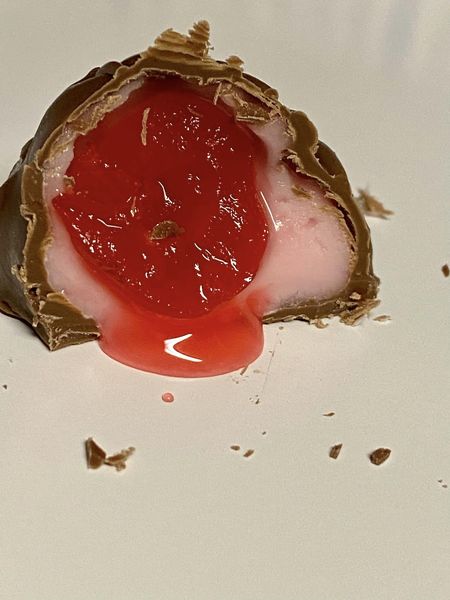
The best part? These sweet treats develop that irresistible liquid center over time. The process may seem a little messy, but trust me, the taste will blow you away. Let’s get into how to make these classic confections step-by-step!
Why Make Chocolate Covered Cherries at Home?
Store-bought chocolate covered cherries are great, but there’s nothing like the flavor of homemade. The creamy, sweet filling paired with juicy maraschino cherries and rich chocolate is pure perfection. Plus, making them from scratch means you control every ingredient—no additives, just pure deliciousness.
And let’s be honest—there’s something deeply satisfying about seeing your tray of hand-dipped cherries, knowing they were made with care.
Ingredients You’ll Need
For the Filling:
- 3 cups powdered sugar (plus ½ cup extra for dusting)
- 3 tablespoons corn syrup
- 2 tablespoons maraschino cherry juice
- 1 tablespoon water
- 1 jar maraschino cherries
For the Coating:
- Chocolate for dipping (milk, dark, or semi-sweet—your choice!)
Step-by-Step Instructions
1. Prepare the Filling
- In a mixing bowl, combine powdered sugar, corn syrup, cherry juice, and water. Mix until a thick, dough-like consistency forms.
- Sprinkle about ½ cup of powdered sugar over the dough but don’t mix it completely—this helps prevent the filling from sticking to your fingers.
2. Wrap the Cherries
- Drain the juice from the jar of maraschino cherries but use the cherries right away to retain their natural moisture.
- Pinch off a small amount of the filling dough and flatten it with your fingers.
- Wrap the flattened dough around a cherry, completely covering it, then roll it gently into a ball.
- Lightly roll the cherry ball in the powdered sugar and place it on a cookie sheet lined with wax paper.
- Repeat until all cherries are covered.
3. Freeze the Cherry Balls
Place the tray of cherry balls in the freezer for at least 2 hours. This helps firm up the filling and makes dipping easier.
4. Dip in Chocolate
- Melt your chocolate in a double boiler or microwave, stirring until smooth.
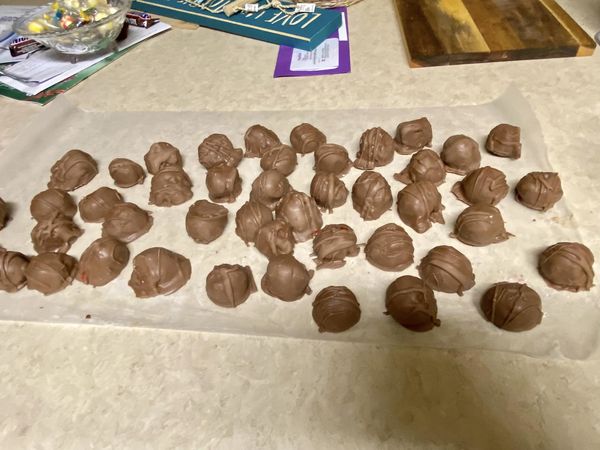
- Using a fork or toothpick, dip each frozen cherry ball into the melted chocolate, ensuring it’s fully coated.
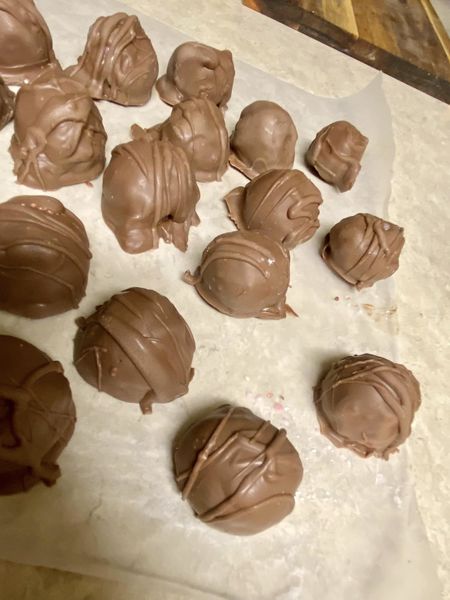
- Place the dipped cherries back onto the wax paper-lined tray.
Tips for Perfect Chocolate Covered Cherries
- Prevent Leaks: If the filling starts to seep out after dipping, use a little melted chocolate to patch up the hole.
- Patience Pays Off: The longer these cherries sit, the more the center liquefies. After two hours, you’ll see some liquid forming, but letting them sit overnight makes them even better.
- Choose Your Chocolate: Milk chocolate gives a sweet finish, but dark chocolate provides a balanced bitterness to complement the sweetness of the filling.
Serving and Storing
These homemade chocolate covered cherries are perfect for gifting or enjoying as a decadent treat. Store them in an airtight container at room temperature or in the fridge for up to a week.
They make an excellent addition to holiday dessert platters, but honestly, they’re so delicious you might want to keep them all to yourself!
A Sweet Conclusion
Homemade chocolate covered cherries are more than just a dessert—they’re a tradition worth sharing. Each bite delivers a burst of flavor, from the juicy cherry to the creamy filling and luscious chocolate coating. And the satisfaction of creating these treats from scratch? Unbeatable.
Take your time, enjoy the process, and let these sweet little gems bring joy to your holiday table (or snack drawer). Trust me—once you try one, you’ll want another!

