Cafeteria Lunch Lady Yeast Rolls – Just Like the Ones from Childhood
Some flavors just take you right back to childhood, and for me, it’s these soft, buttery yeast rolls—the same kind I used to eat in the school cafeteria over 60 years ago. The ladies in our cafeteria were unbelievably good cooks, and their rolls were always perfect, like my mama had just made them. It took me 20 years to get my yeast rolls to taste just like those from my childhood, and now, they’ve earned the name Cafeteria Lunch Lady Yeast Rolls among my friends.
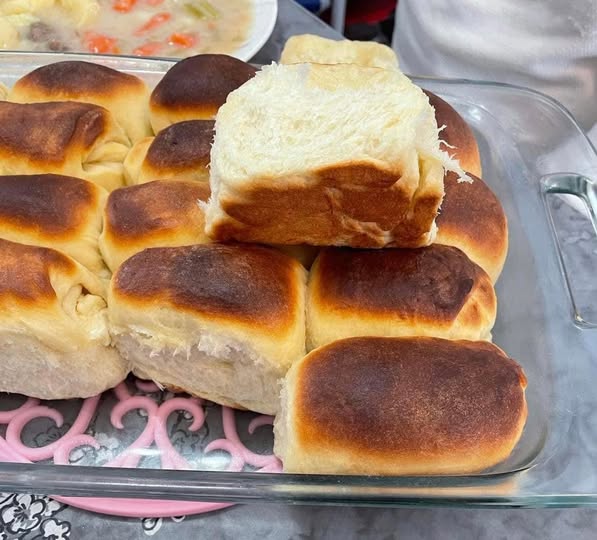
So today, I’m not just sharing my tried-and-true yeast roll recipe, but also walking you through every step with pictures of the process. These rolls are light, fluffy, and have just the right amount of chewy texture and golden brown crust. Let’s get baking!
Why You’ll Love These Yeast Rolls
✔ Soft and fluffy – Perfectly airy inside with a golden brown top.
✔ Classic cafeteria flavor – Just like those warm rolls from childhood.
✔ Sweetened with honey – A touch of raw honey gives them extra flavor.
✔ Perfect for any meal – Serve with butter, jam, or alongside soups and stews.
Ingredients
- 4 cups all-purpose flour
- 2 tablespoons wheat gluten (for extra chewiness, optional but recommended!)
- 1/4 cup butter (1/2 stick), softened
- 3 tablespoons active dry yeast
- 1 1/4 cups lukewarm milk (not too hot, or it will kill the yeast!)
- 1 large egg
- 1/3 cup raw honey (or sugar, if preferred)
- 1 teaspoon salt
- Melted butter for brushing tops
Instructions
Step 1: Mix the Dough
- Sift flour, wheat gluten, and salt together into a large mixing bowl.
- Make a well in the center and add the egg, lukewarm milk, and honey.
- Mix everything together until combined. The dough will be sticky at this stage.
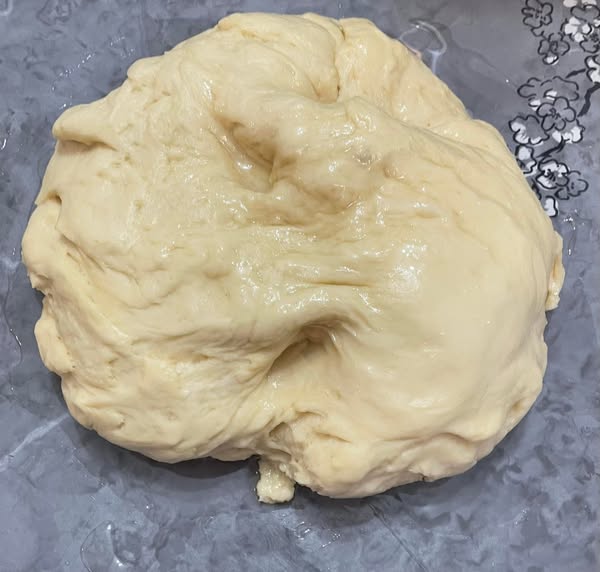
Step 2: Knead & First Rise
- Knead the dough on a lightly greased surface until smooth and elastic. This should take about 10 minutes.
- Place the dough in an oiled glass or wooden bowl and cover it with a cotton cloth.
- Let the dough rise in a warm place until almost triple in size, about 1 to 2 hours.
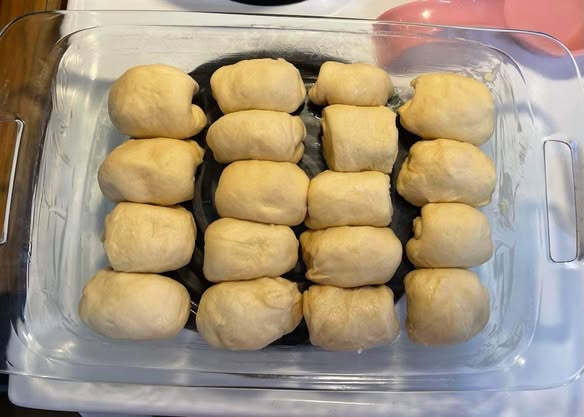
Step 3: Shape the Rolls
- Turn the dough onto a greased working surface.
- Using kitchen scissors or a knife, cut the dough into equal-sized pieces.
- Knead each piece in your hand once or twice, then tuck the edges under to form smooth rolls.
- Place the rolls in a greased glass baking dish or lasagna pan.
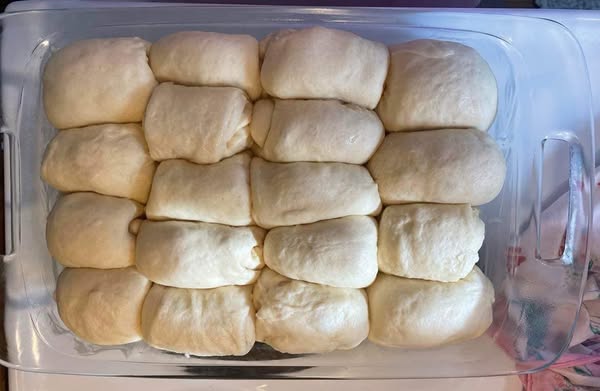
Step 4: Second Rise & Bake
- Cover the dish with a cotton cloth and let the rolls rise until 2 1/2 times in size.
- Preheat the oven to 400°F.
- Bake the rolls until golden brown on top, about 15-18 minutes.

Step 5: Brush with Butter & Serve
- While the rolls are still hot, brush the tops with melted butter to keep them soft.
- Serve warm and enjoy with butter, jam, or as a side to your favorite meal!
A Taste of Nostalgia
There’s something about these yeast rolls that just feels like home. Whether it’s the fluffy texture, the golden crust, or the touch of honey in every bite, they’re a true reminder of the warmth and love that cafeteria ladies put into their cooking all those years ago.
I hope you’ll give these rolls a try and experience the same comfort and nostalgia that I do every time I bake them. Let me know in the comments—what’s a school cafeteria meal you remember fondly?