Old Fashioned 10 Layer Chocolate Cake Recipe (Family Favorite Fudge Frosting)
Get ready for a slice of pure nostalgia and chocolate heaven! This isn’t just any chocolate cake; this is the 10-Layer Chocolate Cake recipe passed down in my family, a true showstopper reserved for special occasions, or honestly, whenever a serious chocolate craving hits.
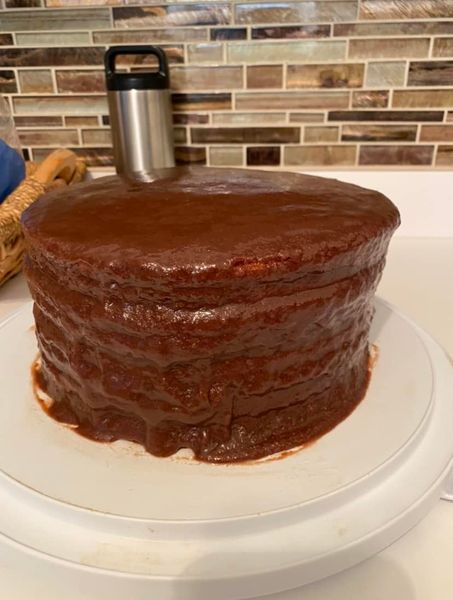
What makes it so special? Imagine ten incredibly thin, tender cake layers stacked high, each one slathered with a rich, cooked chocolate frosting that cools into a soft, fudge frosting texture. It literally melts in your mouth. This old fashioned 10 layer chocolate cake is a labor of love, but every single step is worth it for that final, breathtaking result. Look at those layers dripping with that glorious frosting! Forget dense, heavy cakes – this one is all about delicate layers and maximum frosting coverage!
Why You’ll Fall in Love with This Recipe
- Unforgettable Texture: The thin cake layers combined with the generous amount of melt-in-your-mouth fudge frosting is pure magic.
- Deep Chocolate Flavor: Using quality semi-sweet chocolate and a cooked frosting method creates an intensely rich chocolate taste.
- Stunning Presentation: Ten layers! Need I say more? This multi-layer chocolate cake is guaranteed to impress.
- Unique Cooked Fudge Frosting: This isn’t your standard buttercream. Cooking the frosting to the soft ball stage gives it a unique, stable, yet soft texture unlike anything else.
- A Taste of Tradition: There’s something special about making an old family recipe from scratch.
Ingredients You’ll Need
Ready to bake this masterpiece? Here’s what you’ll gather for the cake layers (like White Lily Flour, Crisco, jumbo eggs, buttermilk) and the divine cooked chocolate frosting (evaporated milk, butter, Baker’s chocolate, sugar). Full ingredient amounts are in the printable recipe card below!
Equipment Needed
- Several 9-inch round cake pans (Using at least 5 makes the process faster)
- Electric Mixer (Stand or Handheld)
- Sifter or fine-mesh sieve
- Large Mixing Bowls
- Heavy-bottomed Saucepan (at least 4-quart size for frosting)
- Candy Thermometer (Recommended)
- Whisk & Heatproof Spatula
- Double Boiler (or a heatproof bowl set over a saucepan with simmering water)
- Offset Spatula or knife for icing
- Measuring Cups & Spoons
- Cake Plate or Stand
Let’s Bake! Step-by-Step Instructions
1. Prepare the Cake Pans & Oven:
- Preheat oven to 350°F (175°C).
- Thoroughly grease and flour your 9-inch cake pans. Good preparation is crucial for thin layers!
2. Mix Dry & Wet Ingredients:
- Sift flour and baking powder. Set aside.
- Mix baking soda into buttermilk. Set aside.
- Cream sugar and Crisco until fluffy using the creaming method.
- Beat in eggs one at a time.
- Alternate adding flour mixture and buttermilk mixture to the creamed mixture, starting and ending with flour. Add vanilla with the last flour addition. Mix until just combined – don’t overmix!
3. Make the Cooked Chocolate Frosting:
- Combine evaporated milk, butter, chopped Baker’s chocolate, and sugar in a large, heavy-bottomed saucepan.
- Cook over medium heat, stirring constantly, until it reaches the soft ball stage (235-245°F / 112-118°C). Use a candy thermometer or the cold water test. This step is key for the perfect fudge frosting texture.
- Remove from heat; stir in vanilla.
4. Bake the Thin Cake Layers:
- Spread 5-6 Tbsp batter evenly in each prepared pan for thin cake layers.
- Bake 10-12 minutes until set and edges are golden. Watch carefully! Repeat until all batter is used (makes 10 layers).
5. Assemble and Ice:
- Keep frosting warm over a double boiler (a heatproof bowl set over a saucepan of simmering water, ensuring the bottom of the bowl doesn’t touch the water).
- As each cake layer comes out of the oven, carefully invert it onto a wire rack, then immediately place it on your cake plate or stand.
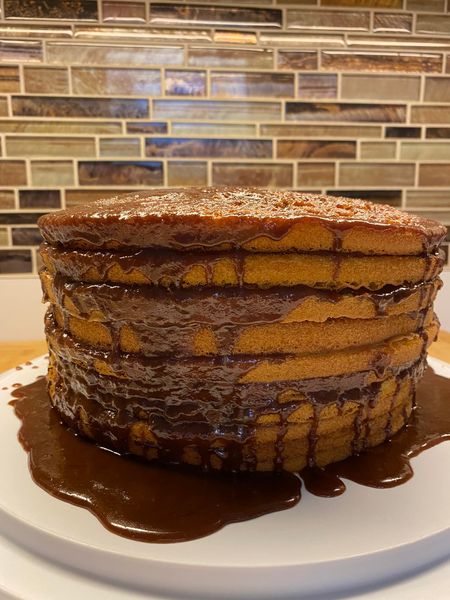
- While the layer is still warm, spread a generous layer of the warm cooked chocolate frosting over it, letting it drip down the sides naturally as seen in the assembly picture.
- Place the next warm layer directly on top and repeat the icing warm cake layers process until all 10 layers are stacked and iced.
- Allow any remaining frosting in the double boiler to cool slightly – it will thicken as it cools. Once it’s a good spreading consistency, use it to generously frost the top and ensure the sides are well-coated, encouraging those beautiful drips.
Tips for 10-Layer Success
- Measure Batter Carefully: Consistency = even layers. Aim for that 5-6 Tbsp range.
- Don’t Overbake: Thin layers bake fast! Keep a close eye on them.
- Master the Soft Ball Stage: Use a candy thermometer if possible! This defines the final fudge frosting texture – not too runny, not too hard.
- Work Quickly While Icing: Icing the layers while warm helps the frosting adhere and create that slightly soaked-in goodness. Keep the frosting warm!
- Patience is Key: Yes, it takes time, but making this homemade chocolate cake is immensely satisfying!
How to Store Your 10 Layer Chocolate Cake
Due to the cooked frosting, this cake holds up surprisingly well. Store it covered at room temperature for 2-3 days (if it lasts that long!). You can refrigerate it if your kitchen is very warm, but allow it to come to room temperature before serving for the best texture and melt-in-your-mouth frosting experience.
Enjoy every single decadent bite of this special occasion chocolate cake. It’s more than just dessert; it’s a delicious piece of family history, ready to be shared. Let me know if you try this 10 layer chocolate cake recipe in the comments below – I’d love to hear how it turns out!
Old Fashioned 10-Layer Chocolate Cake
Ingredients
- For the 10 Thin Cake Layers:
- 3 cups White Lily Self-Rising Flour sifted (or other SR flour)
- 1 tsp Baking Powder
- 2 cups Granulated Sugar
- ¾ cup Crisco All-Vegetable Shortening room temperature
- 7 Jumbo Eggs room temperature
- 1 cup Full-Fat Buttermilk room temperature
- 1 tsp Baking Soda
- 1 Tbsp Vanilla Extract
- For the Cooked Chocolate Fudge Frosting:
- 2 12 oz cans Evaporated Milk
- 2 sticks 1 cup / 226g Unsalted Butter
- 2 4 oz boxes Baker's Semi-Sweet Chocolate, chopped
- 6 cups Granulated Sugar
- 1 tsp Vanilla Extract
Instructions
- Prep: Preheat oven to 350°F (175°C). Thoroughly grease & flour at least five 9-inch round cake pans. Sift flour & baking powder together; set aside. Stir baking soda into buttermilk; set aside.
- Cream: In a large bowl, cream sugar and shortening with an electric mixer until light and fluffy (3-5 mins).
- Add Eggs: Beat in eggs one at a time, mixing well after each.
- Combine: On low speed, alternate adding flour mixture and buttermilk mixture (begin & end with flour). Add 1 Tbsp vanilla with last flour addition. Mix until just combined. Do not overmix.
- Make Frosting: In a large, heavy-bottomed saucepan, combine evaporated milk, butter, chopped chocolate, and sugar. Cook over medium heat, stirring constantly (scrape bottom!), until mixture reaches soft ball stage (235-245°F / 112-118°C) on a candy thermometer. Remove from heat; stir in 1 tsp vanilla.
- Bake Layers: Measure 5-6 Tbsp batter into each prepared pan. Spread evenly to edges. Bake 10-12 mins until set & edges are golden. Repeat until all batter is used (makes 10 layers total).
- Assemble: Keep frosting warm over a double boiler (pot over simmering water, not touching). As each cake layer comes out of the oven, invert onto rack, then place on serving plate. Spread warm frosting generously over the warm layer. Stack next warm layer on top & repeat for all 10 layers.
- Finish Frosting: Let remaining frosting cool slightly until thickened but still spreadable. Generously frost top and sides of the cake, allowing it to drip.
Notes
Ensure eggs, buttermilk, and shortening are at room temperature for best results.
A candy thermometer is highly recommended for achieving the correct soft ball stage for the frosting texture.
Stir the frosting constantly, especially scraping the bottom, to prevent scorching.
Grease and flour pans VERY well, as layers are thin and delicate.
Store cake covered at room temperature for 2-3 days.