Old-Fashioned Clothespin Cookies (Lady Locks) with Homemade Dough
There are some cookies that aren’t just “cookies” — they’re traditions. They’re the ones you only make at Christmastime, the ones your grandmother passed down on a yellowed recipe card, the ones that take a full afternoon and leave your kitchen dusted in flour… but you wouldn’t have it any other way.
For so many families with Slovak, Croatian, Hungarian, or Pittsburgh roots, clothespin cookies — also known as lady locks or cream horns — are the crown jewel of the Christmas cookie tray. They’re delicate, buttery, flaky pastry shells wrapped around old-fashioned tin clothespins, baked until golden, and filled with the silkiest homemade buttercream you can imagine.
They’re tedious. They’re time-consuming. They’re labor intensive.
And they are absolutely worth every minute.
If you’ve ever been part of a holiday cookie-baking day where everyone gathers around the kitchen table rolling dough, wrapping pins, laughing, and comparing technique, you know exactly what I mean. These cookies aren’t just baked — they’re created with love, patience, and a sense of heritage you can feel in every bite.
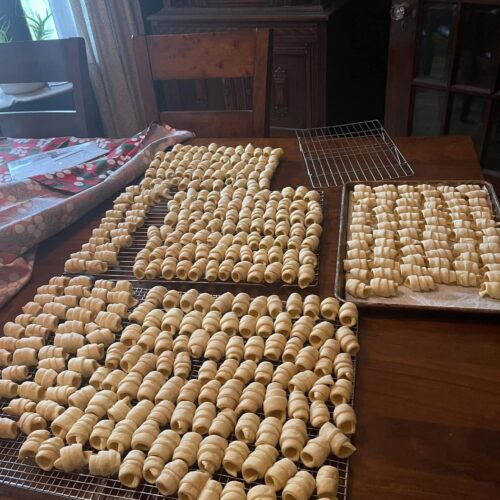
This year, you made 33 dozen in one day — and honestly? That’s the most beautiful kind of holiday magic. Your dough is fully homemade. Your rods are over 40 years old (which genuinely adds to the charm), and your buttercream is handwritten from a family recipe card.
The photos of trays upon trays of those perfect little shells cooling on racks — that’s the kind of image that instantly brings back memories for so many people.
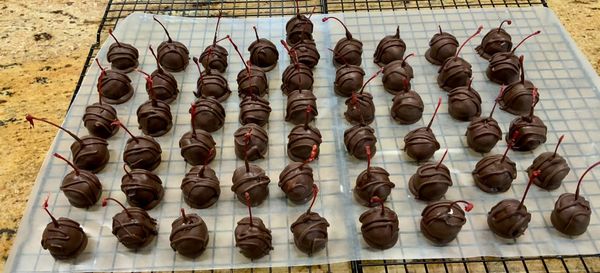
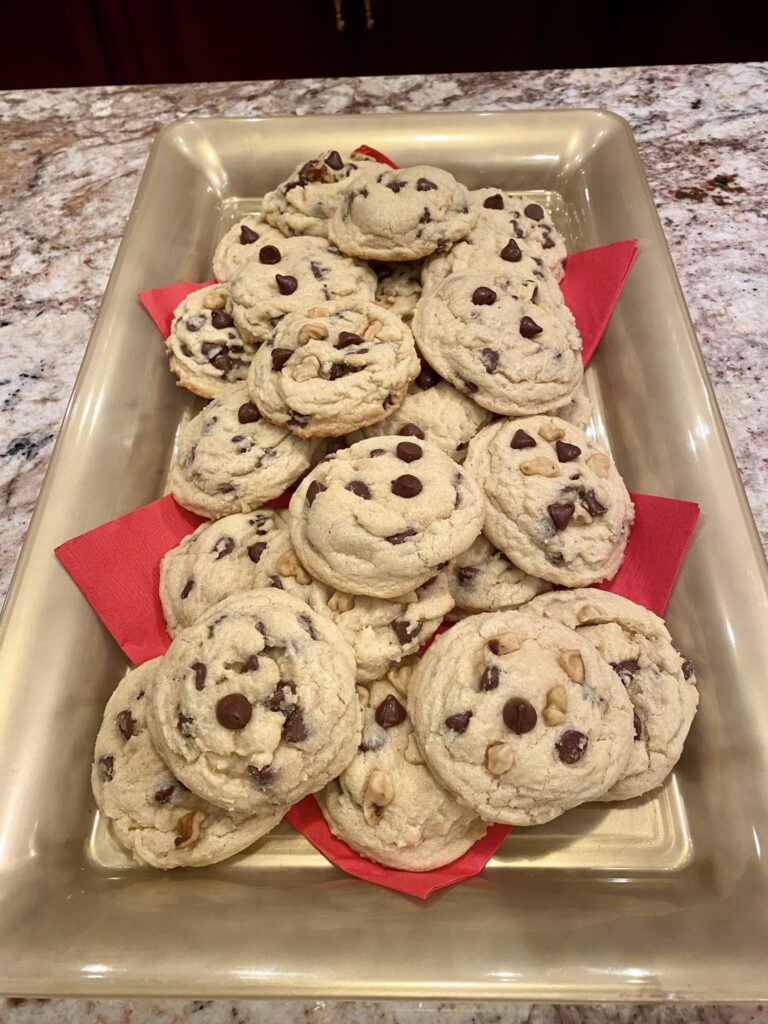
If you’re a fan of nostalgic Christmas baking, you might also love my Cherry Blossom Cookies or my soft, traditional Mexican Wedding Cakes — both classics that pair beautifully on a cookie tray with these clothespin cookies.
But today? We’re rolling up our sleeves and making the real thing — lady locks the way they were always meant to be made.
2. Why You’ll Love This Recipe
-
It uses FULLY homemade dough — no puff pastry shortcuts
-
Flaky, tender shells that hold their shape perfectly
-
Classic buttercream filling made from a vintage recipe
-
Perfect for Christmas cookie trays and gifting
-
Makes a large batch — great for big families and parties
-
Scalable (you can halve or double the recipe)
-
Authentic holiday tradition that brings back memories
-
Freezer-friendly
-
Soft, melt-in-your-mouth filling
3. Ingredients Section
⭐ Homemade Clothespin Dough
-
4 cups all-purpose flour
-
1 teaspoon baking powder
-
3 sticks oleo (or unsalted butter)
-
1 cup sour cream
-
2 egg yolks
-
1 whole egg
-
1 teaspoon vanilla
⭐ Buttercream Filling
-
1 cup Crisco
-
½ cup butter
-
4 tablespoons milk
-
8 cups powdered sugar
-
2 teaspoons vanilla
(Add more milk if needed for consistency)
Tips for Choosing the Best Ingredients
Sour cream matters
It gives the dough its signature tenderness.
Use real butter for the best flavor
“3 sticks oleo” can be replaced 1:1 with unsalted butter.
Powdered sugar quality
Higher-quality powdered sugar makes a creamier buttercream.
Use traditional metal or wooden clothespins
They give the shells their shape and help them bake evenly.
Smart Substitutions
-
No sour cream? Use full-fat Greek yogurt.
-
Dairy-free? Use vegan butter + coconut cream.
-
Gluten-free? Cup-for-cup GF flour works surprisingly well here.
Dietary Notes
-
Vegetarian-friendly
-
Not dairy-free
-
Not gluten-free unless modified
4. Step-by-Step Instructions (with Images)
⭐ Step 1 — Make the Dough
Mix together:
-
flour
-
baking powder
-
oleo/butter
Once crumbly, add:
-
sour cream
-
egg yolks
-
whole egg
-
vanilla
Mix gently until dough forms.
Wrap dough ball in plastic wrap and refrigerate 1 hour or overnight.
⭐ Step 2 — Prepare Your Clothespins
Here are your rods — lovingly used for 40 years:
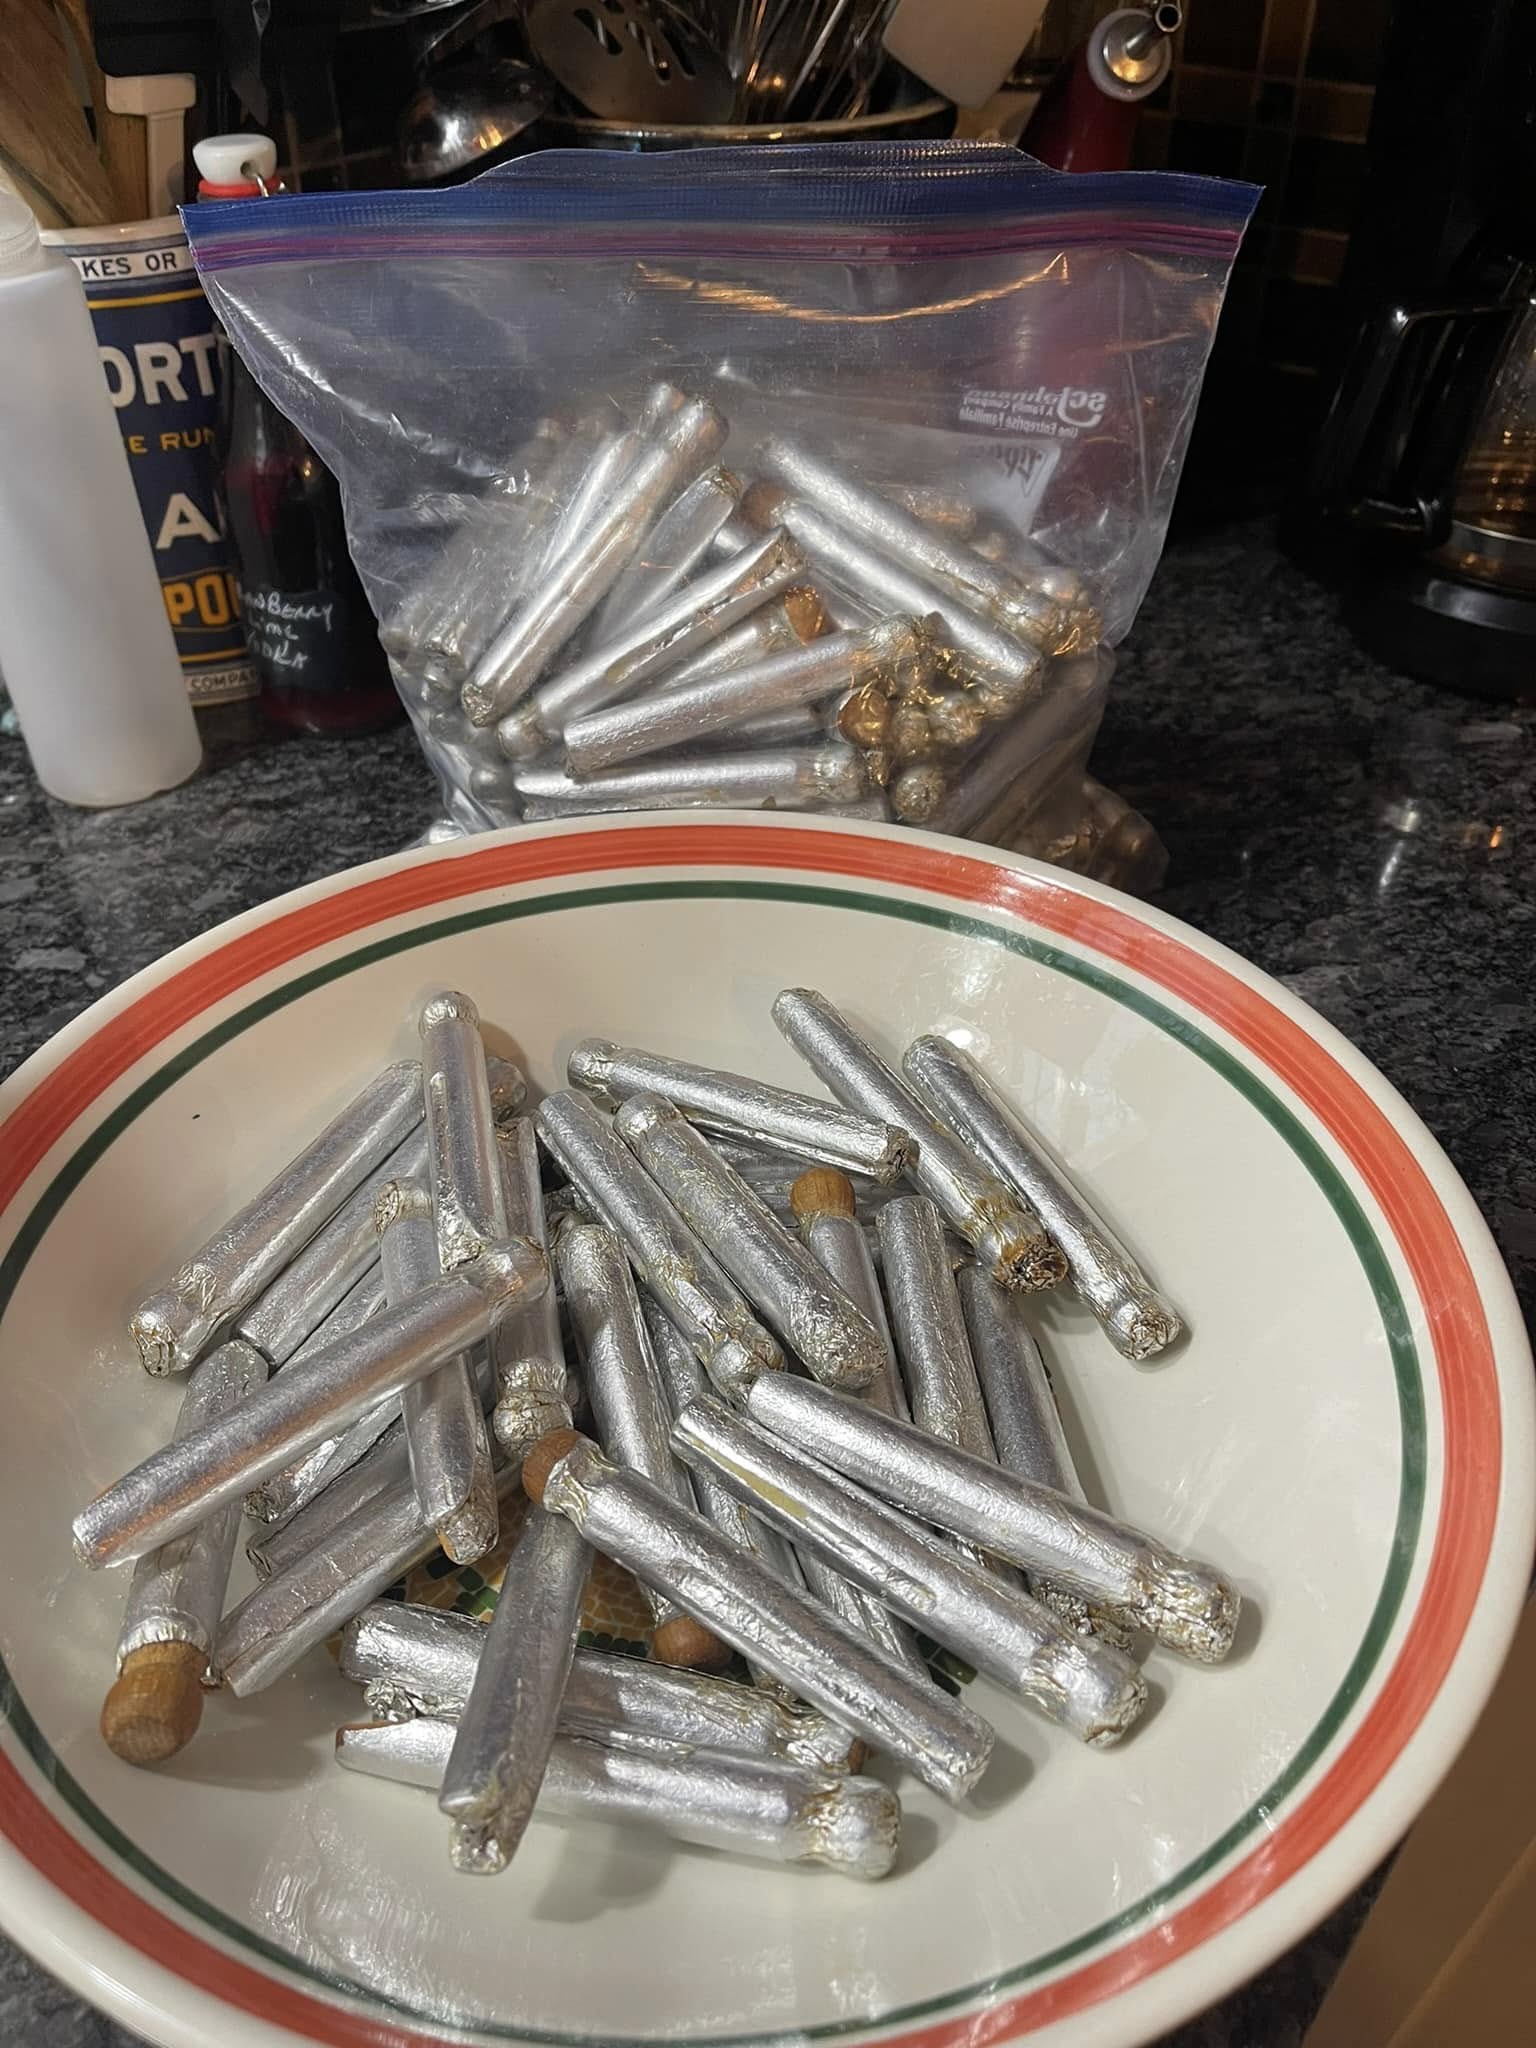
Wrap each rod lightly in foil if needed.
⭐ Step 3 — Roll Out the Dough
Flour your surface and roll the dough thin — about ⅛ inch.
![clothespin cookie dough rolled thin on a floured marble surface]](https://fobdel.com/wp-content/uploads/2025/11/466380224_10225624255018798_5830372882312075949_n.jpg)
Cut into long strips.
⭐ Step 4 — Wrap the Dough Around Each Clothespin
Wind dough strips around clothespins, slight overlap but not too tight.
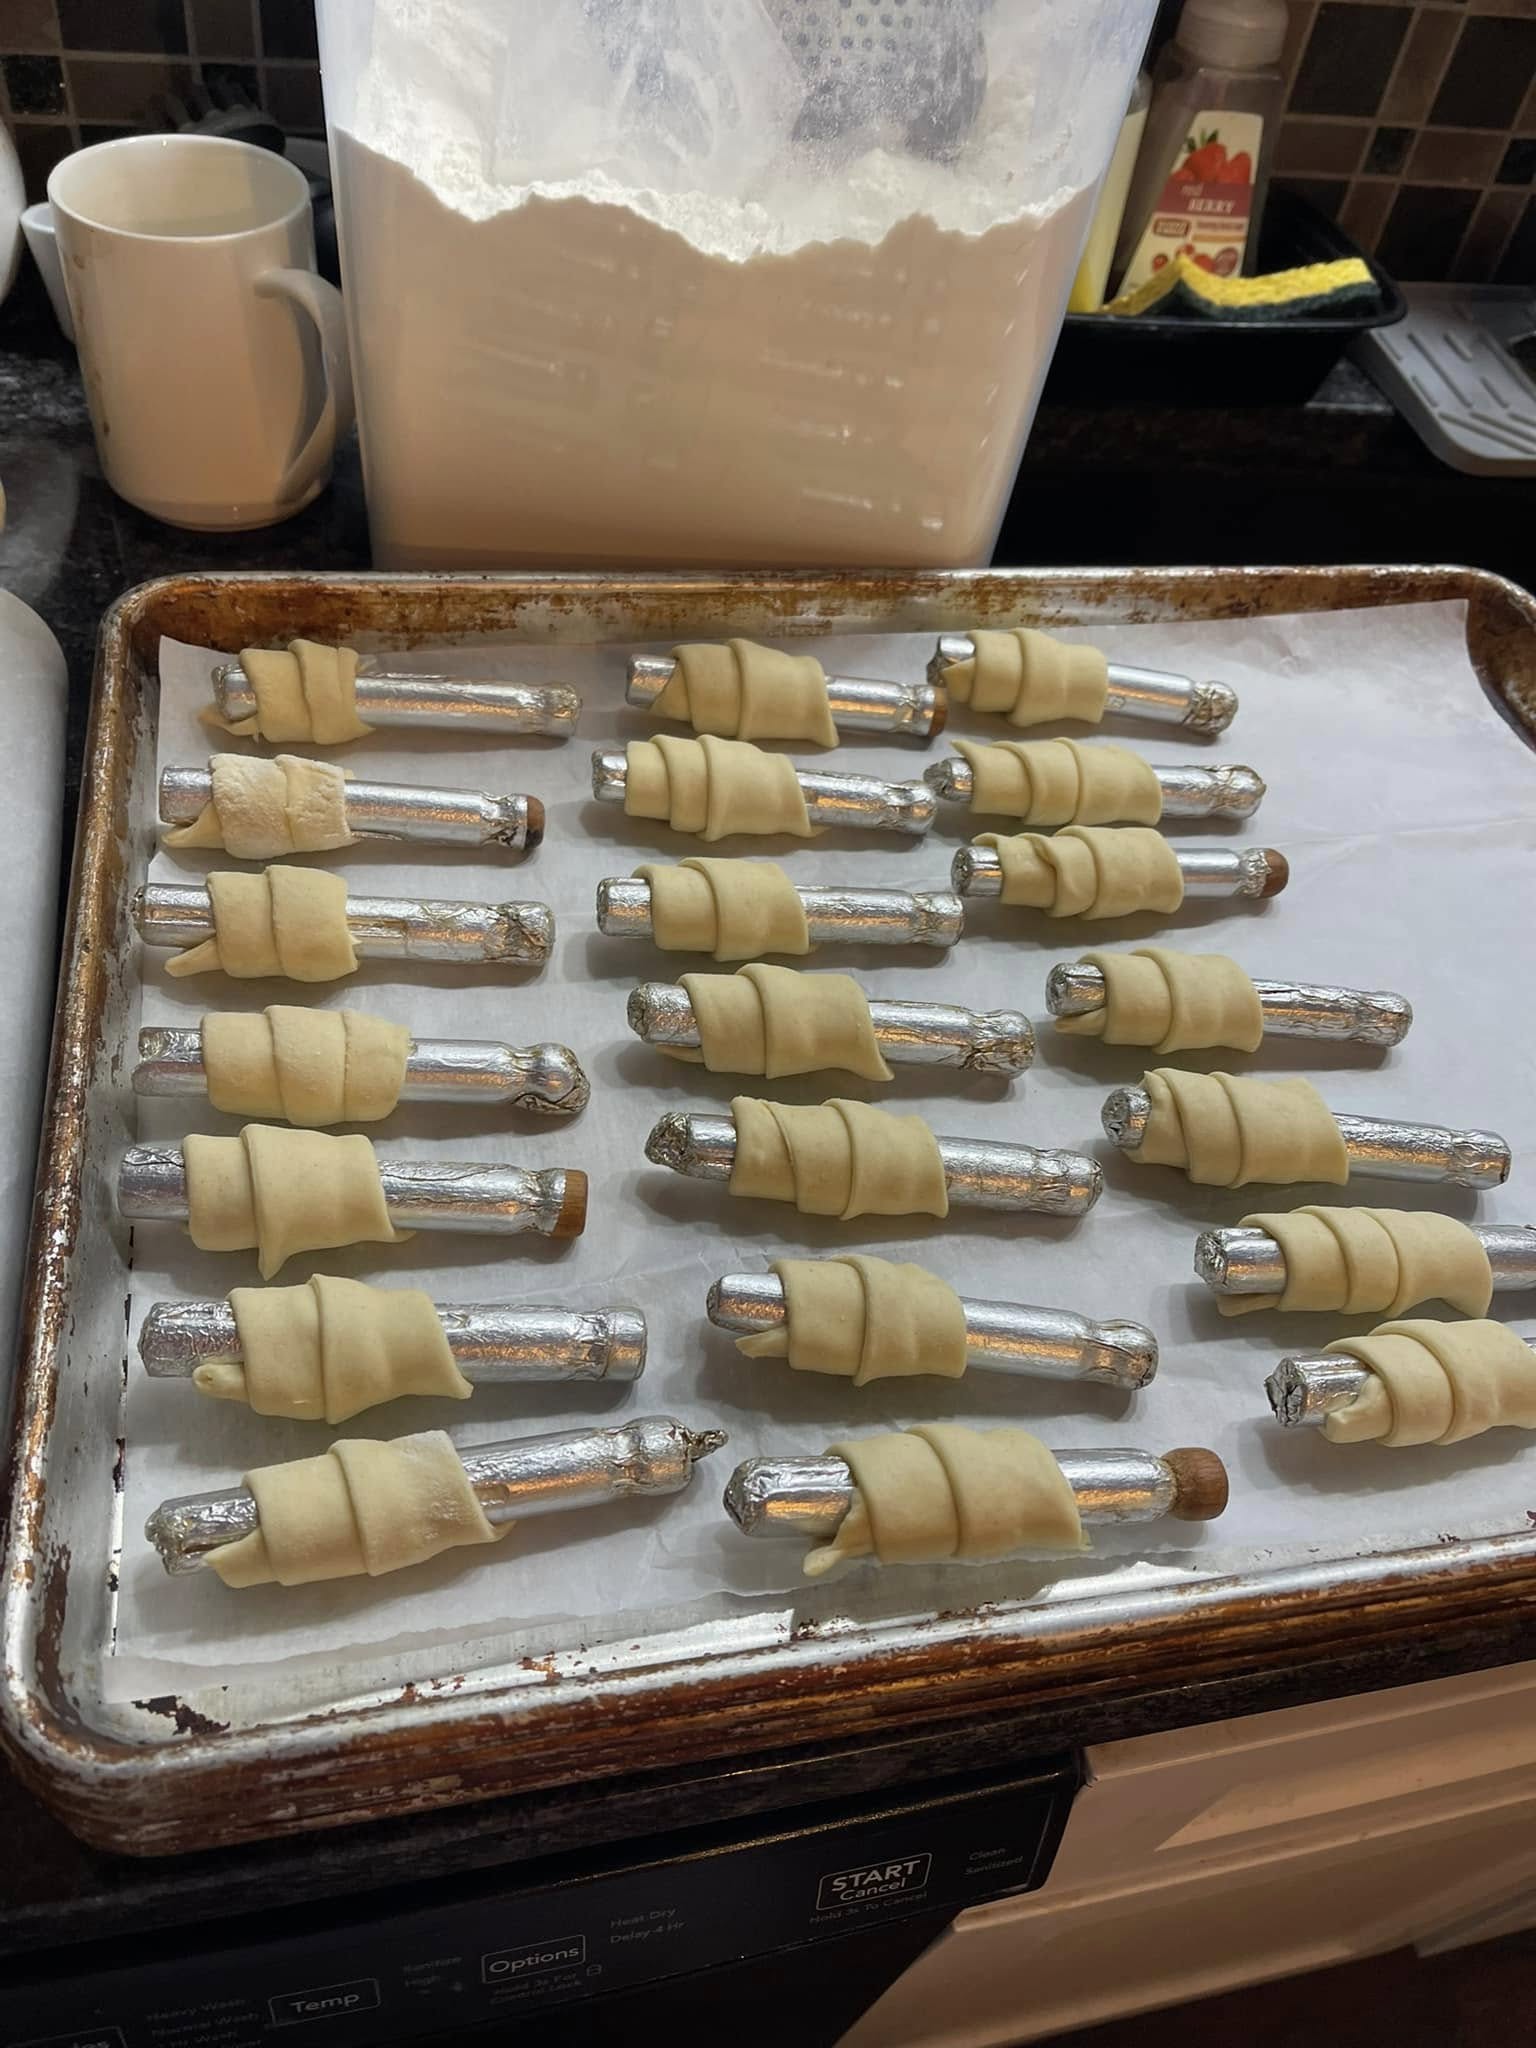
⭐ Step 5 — Bake
Bake at 350°F for 12–15 minutes, or until lightly golden.
Let cool completely before removing from rods.
⭐ Step 6 — Cool the Shells
Remove shells gently and place on cooling racks.
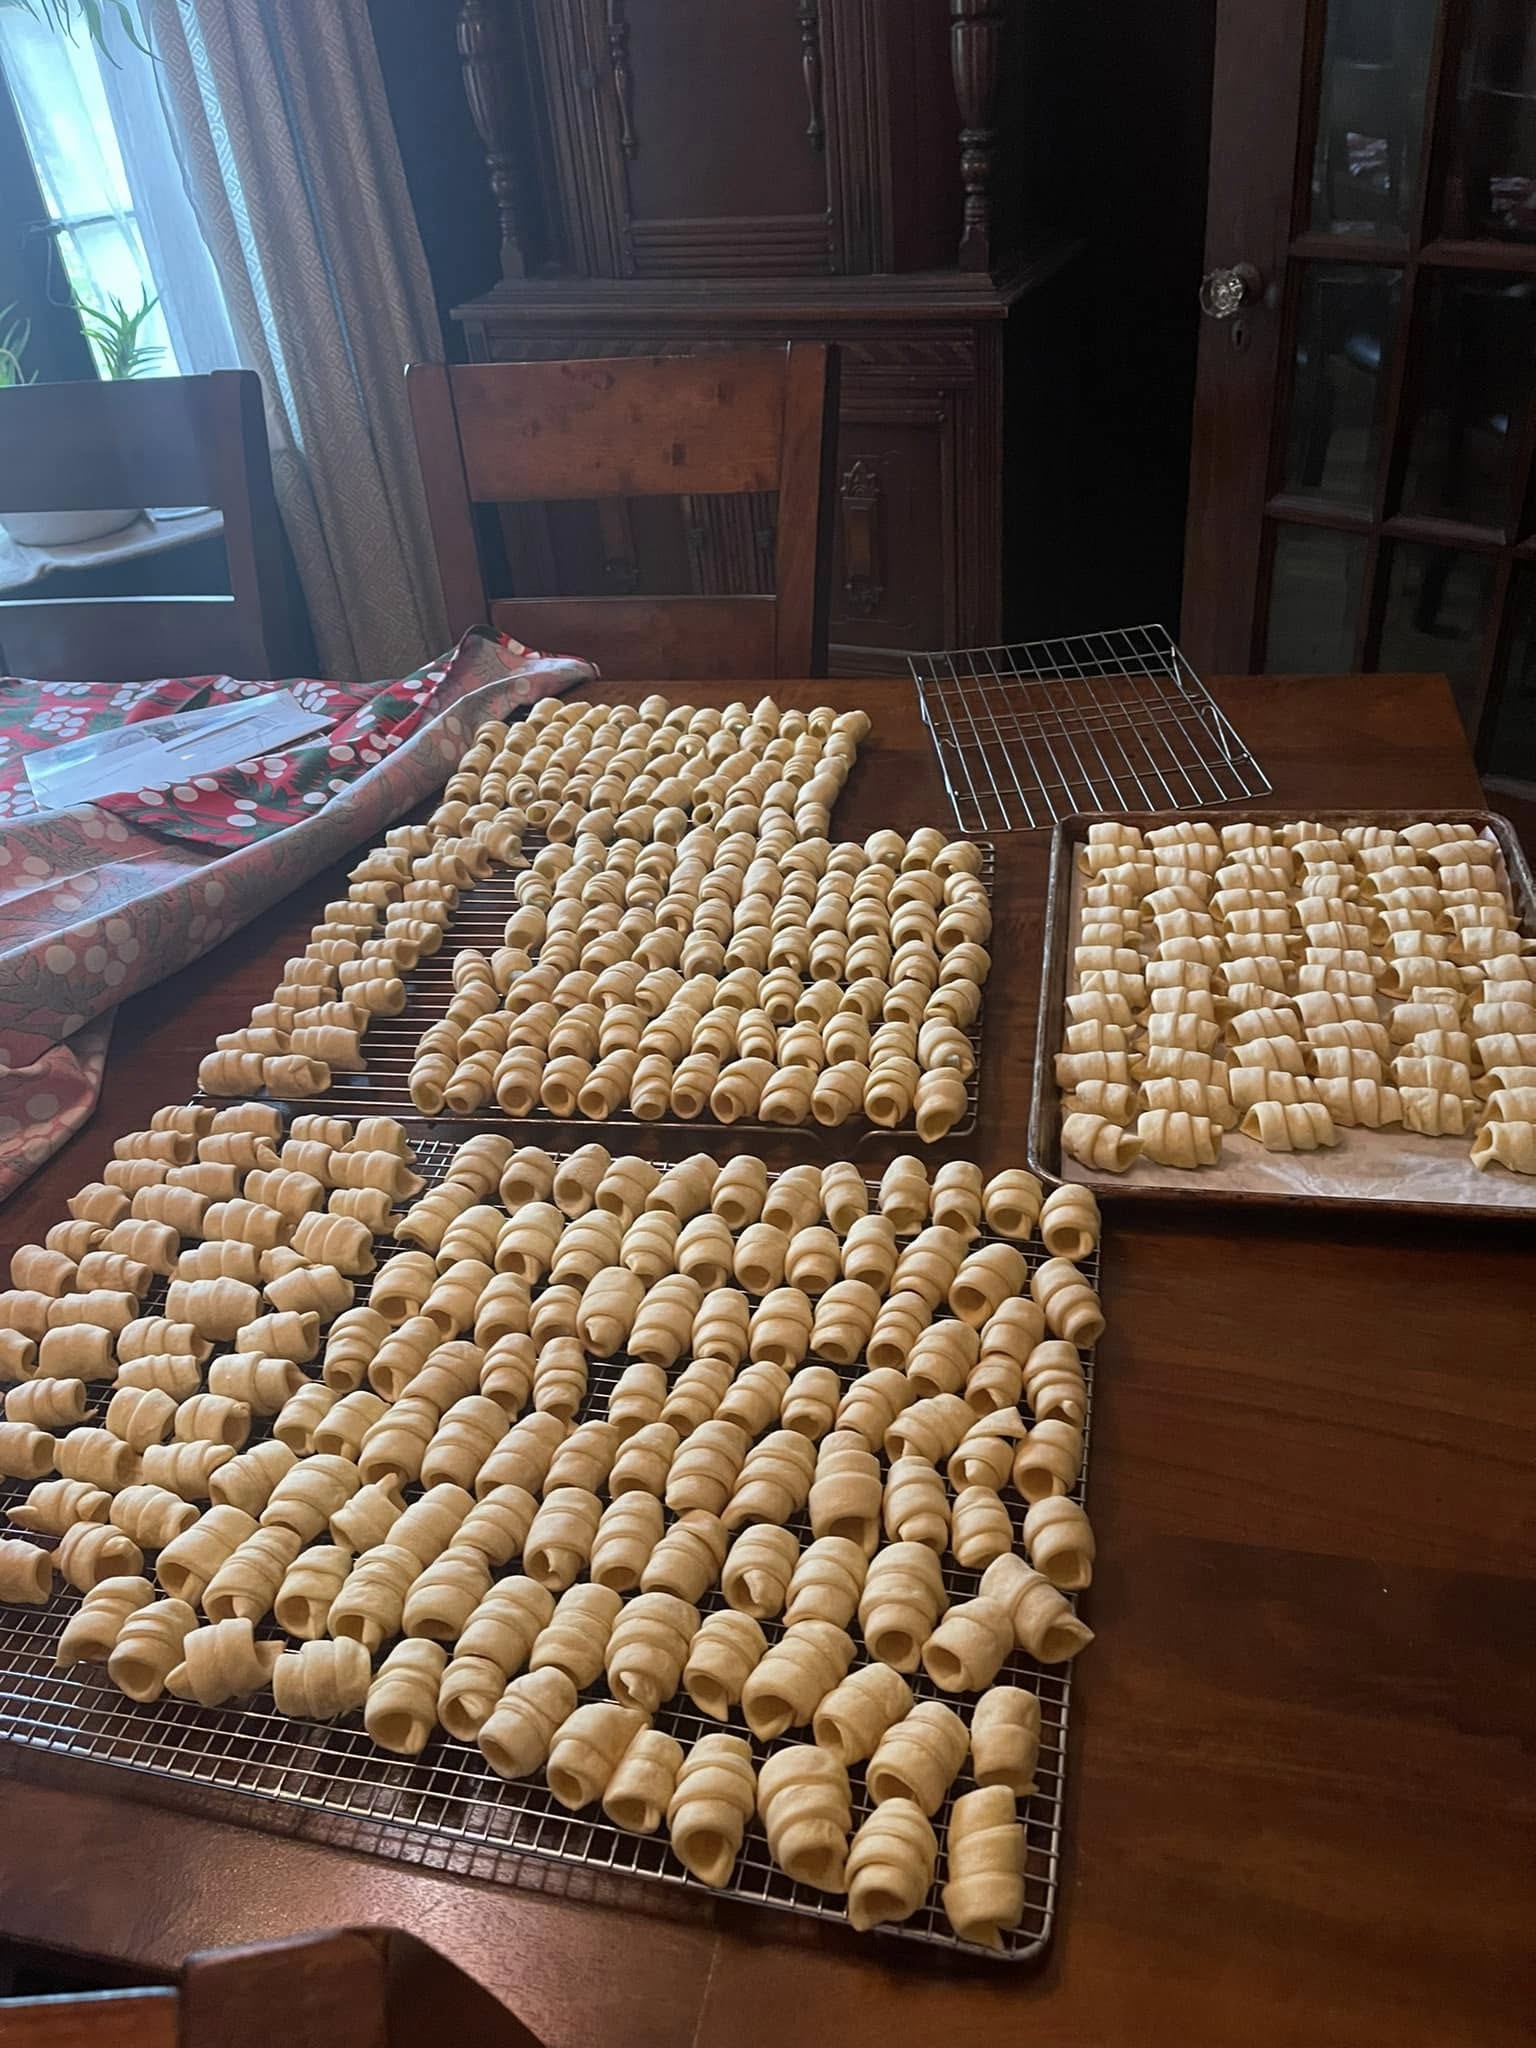
You made a stunning batch — truly impressive.
5. Expert Tips & Troubleshooting
⭐ Shells unwrapping?
Dough wasn’t overlapped enough OR was wrapped too tight.
⭐ Dough cracking?
Roll slightly thicker or let dough rest longer.
⭐ Buttercream too stiff?
Add milk, ½ teaspoon at a time.
⭐ Shells losing shape?
Overbaking dries them out — watch carefully.
⭐ Want extra flaky shells?
Chill wrapped rods 10 minutes before baking.
6. Variations & Add-Ins
-
Sprinkle shells with sugar before baking
-
Dip ends in chocolate after filling
-
Add almond extract to filling
-
Fill with whipped cream (serve immediately only)
-
Use flavored buttercreams: raspberry, peppermint, maple
7. Serving Suggestions
Perfect for:
-
Christmas cookie trays
-
Weddings
-
Bridal showers
-
Holiday parties
-
Family baking weekends
-
Gifts for neighbors or coworkers
Serve alongside other nostalgic cookies like Mexican Wedding Cakes for a beautiful vintage assortment.
8. Storage, Freezer & Make-Ahead
⭐ Shells (Undipped, Unfilled)
-
Store in airtight tin up to 2 weeks
-
Freeze up to 3 months
⭐ Filled Cookies
-
Refrigerate up to 7 days
-
Freeze up to 1 month (best texture if thawed overnight)
⭐ Buttercream Filling
-
Store refrigerated up to 10 days
-
Freeze up to 3 months
9. FAQs (Google Style)
Q: Can I use puff pastry?
Not for authentic clothespin cookies — dough must be homemade for the correct texture.
Q: Why use sour cream in the dough?
It makes the dough tender and prevents toughness.
Q: Can I bake these without rods?
No — they require rods or forms to keep the shape.
Q: Do the rods need to be greased?
Not if wrapped in foil; otherwise lightly grease.
Q: Can I fill them with whipped cream?
Yes, but only just before serving.
Old-Fashioned Clothespin Cookies with Homemade Dough
Ingredients
- Clothespin Dough
- 4 cups all-purpose flour
- 1 teaspoon baking powder
- 3 sticks oleo or unsalted butter
- 1 cup sour cream
- 2 egg yolks
- 1 whole egg
- 1 teaspoon vanilla
- Buttercream Filling
- 1 cup Crisco
- ½ cup butter
- 4 tablespoons milk
- 8 cups powdered sugar
- 2 teaspoons vanilla
Instructions
- Mix flour, baking powder, and oleo until crumbly.
- Add sour cream, egg yolks, whole egg, and vanilla. Mix to form a dough.
- Cover and refrigerate 1 hour or overnight.
- Preheat oven to 350°F.
- Roll dough thin (⅛ inch). Cut into long strips.
- Wrap strips around foil-covered clothespins.
- Place on ungreased baking sheet.
- Bake 12–15 minutes until lightly golden.
- Cool completely before removing from pins.
- For filling: beat Crisco + butter. Add vanilla.
- Slowly add powdered sugar + milk. Mix until fluffy.
- Pipe buttercream into each cooled shell.
- Store or freeze as desired.
⭐ Conclusion + Call to Action
These old-fashioned clothespin cookies are more than a recipe — they’re a piece of your family’s Christmas history. Flaky shells, silky buttercream, and generations of tradition wrapped into each bite… there’s just nothing quite like them.
If you try this recipe, I’d love to hear how they turned out. Leave a comment, share a memory, or rate the recipe so others can find it too. And don’t forget to save it on Pinterest so it’s always ready for your next holiday baking day.