🇮🇹 Traditional Italian Pizzelles (Crisp Anise Cookies)
1. Nostalgic, Conversational Introduction
There are certain recipes that feel like they belong to winter itself—the ones that fill the whole house with warmth, sweetness, and a smell so comforting that it instantly pulls you back into your childhood.
For many families, pizzelles are that recipe.
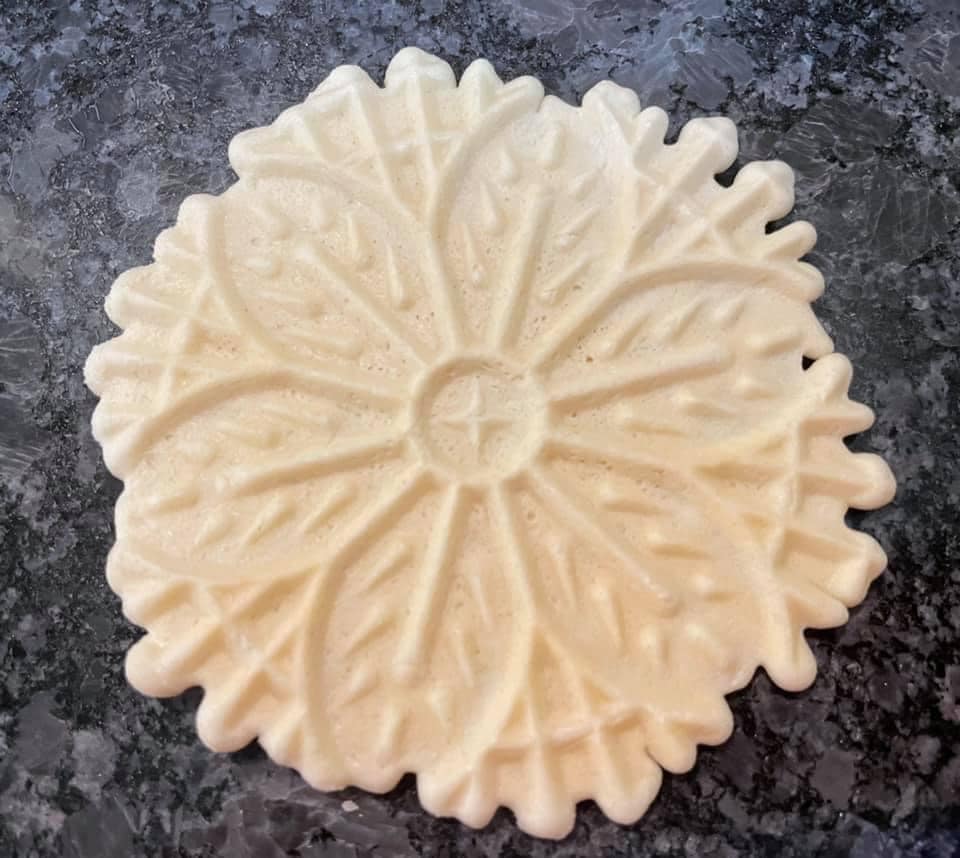
That whisper of anise in the air, the warm patterned iron heating on the counter, and the soft “click” of the press opening and releasing another delicate, lacy cookie… it all feels like a moment suspended in time. Making pizzelles isn’t just about baking—it’s a day. A tradition. A ritual that fills the kitchen with love and fills tins with crisp, paper-thin cookies that disappear faster than you can make them.
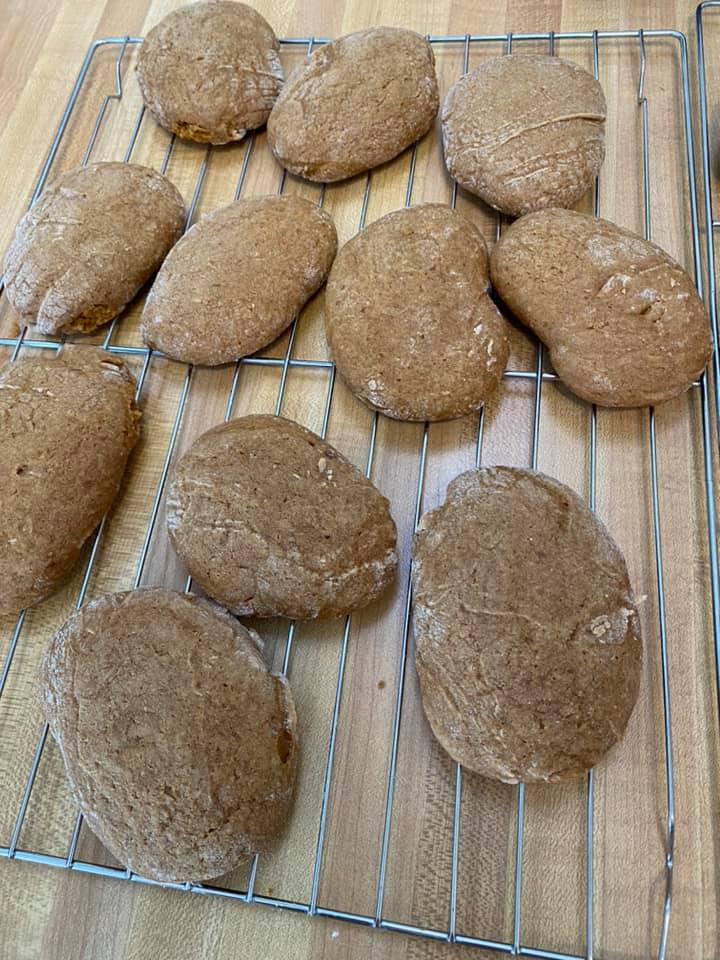
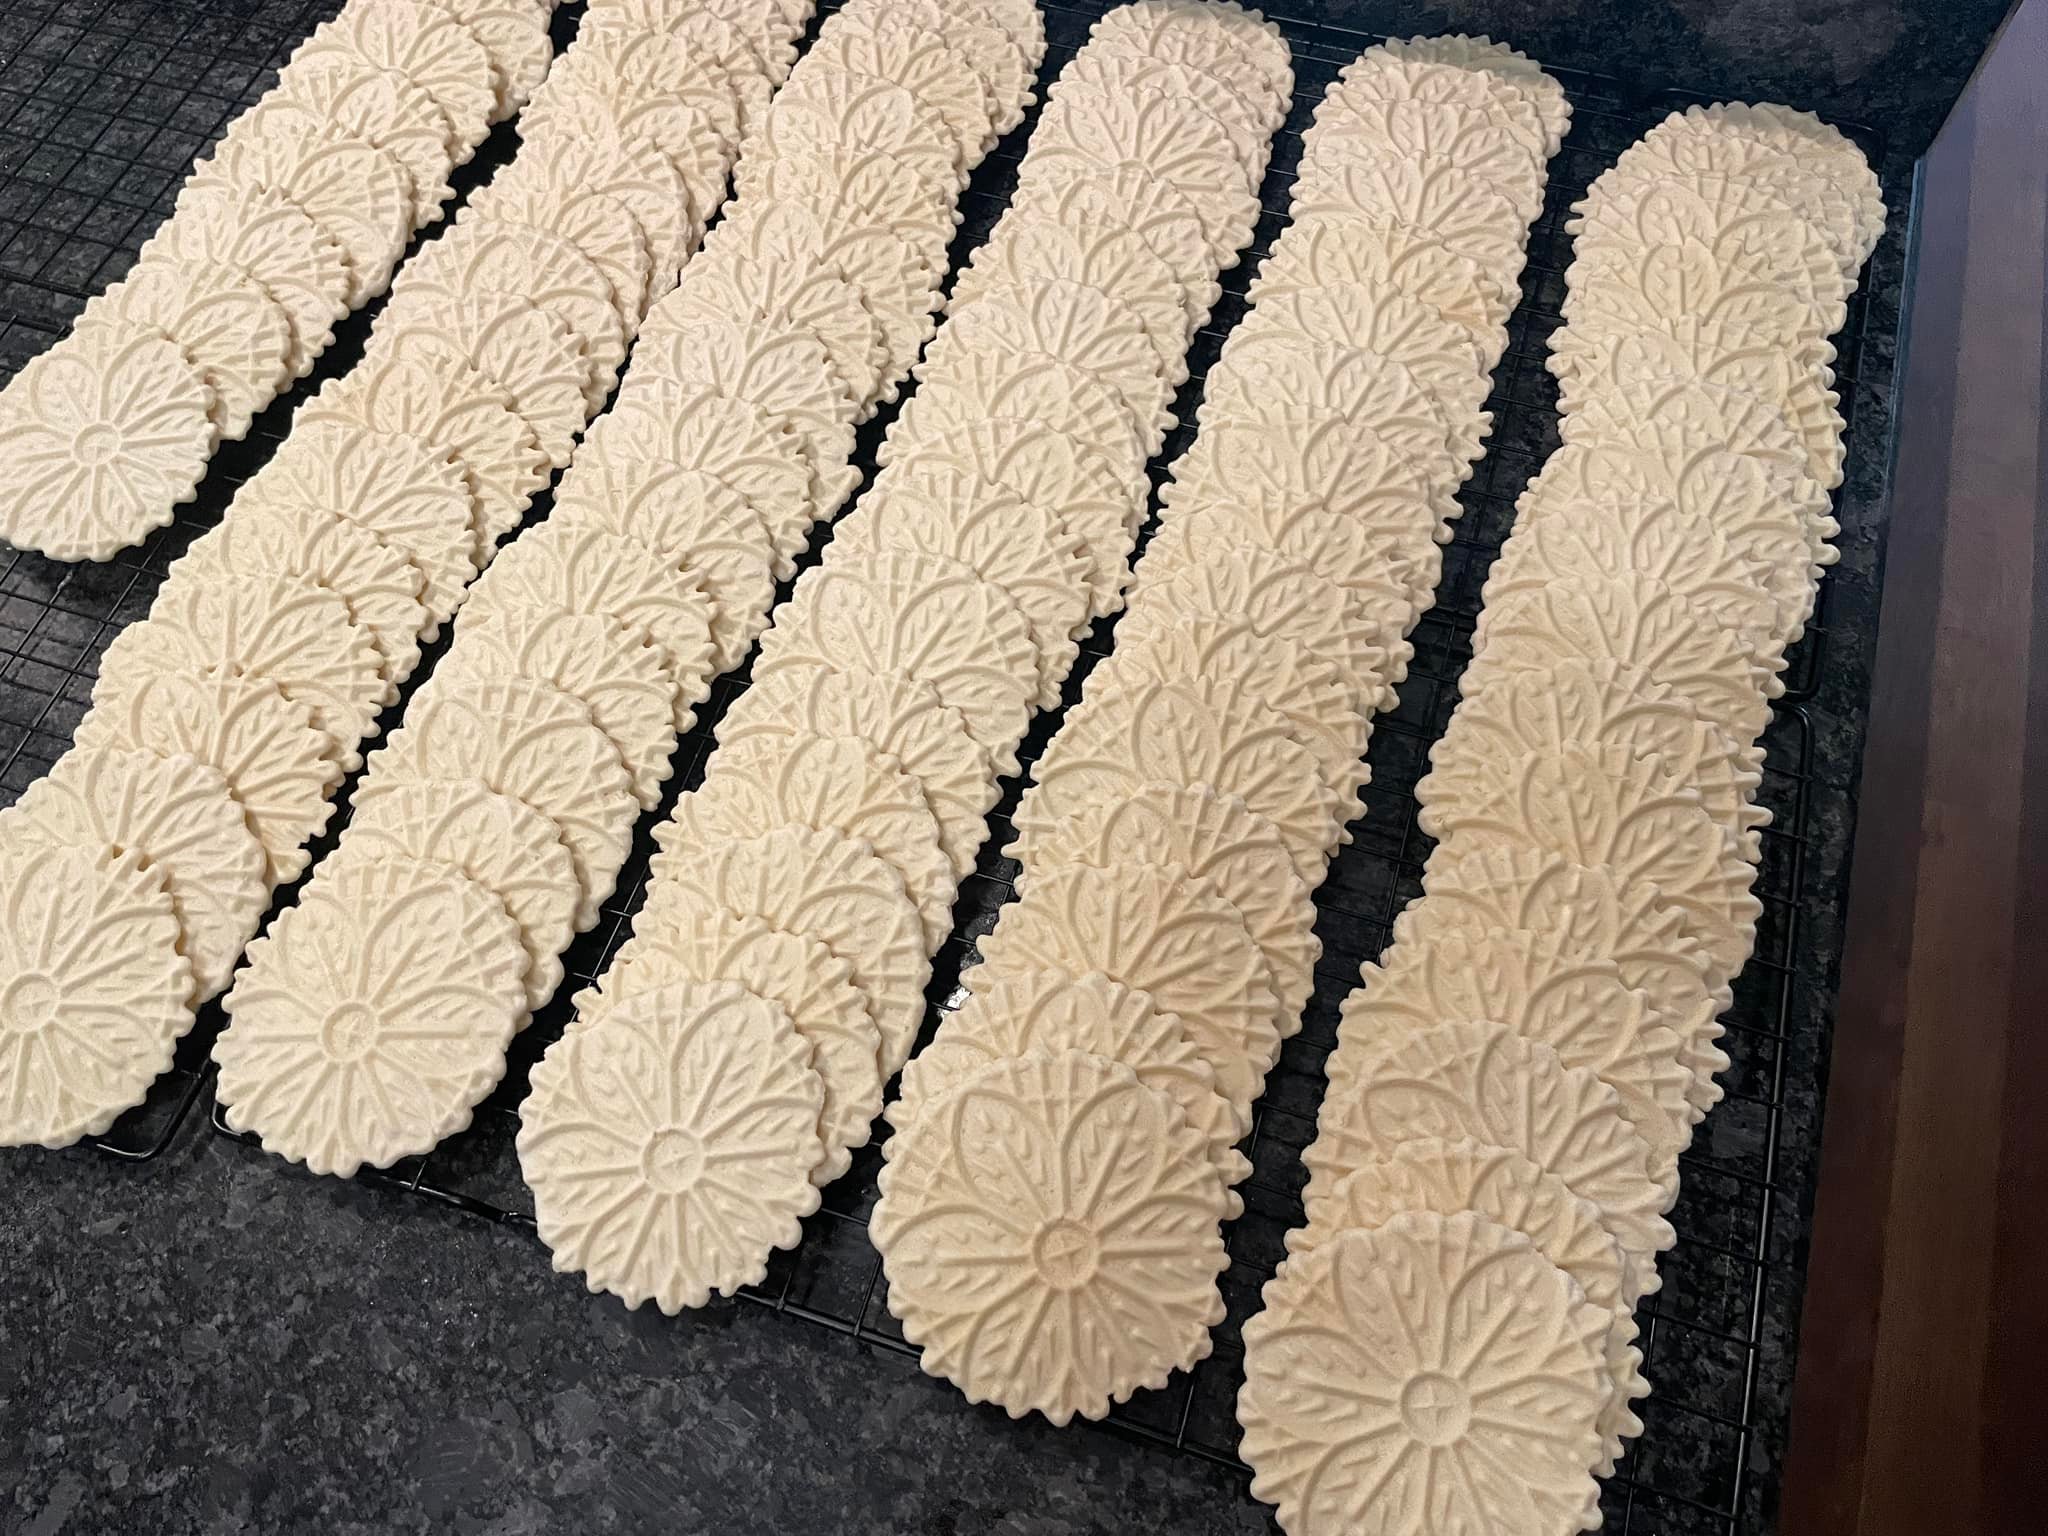
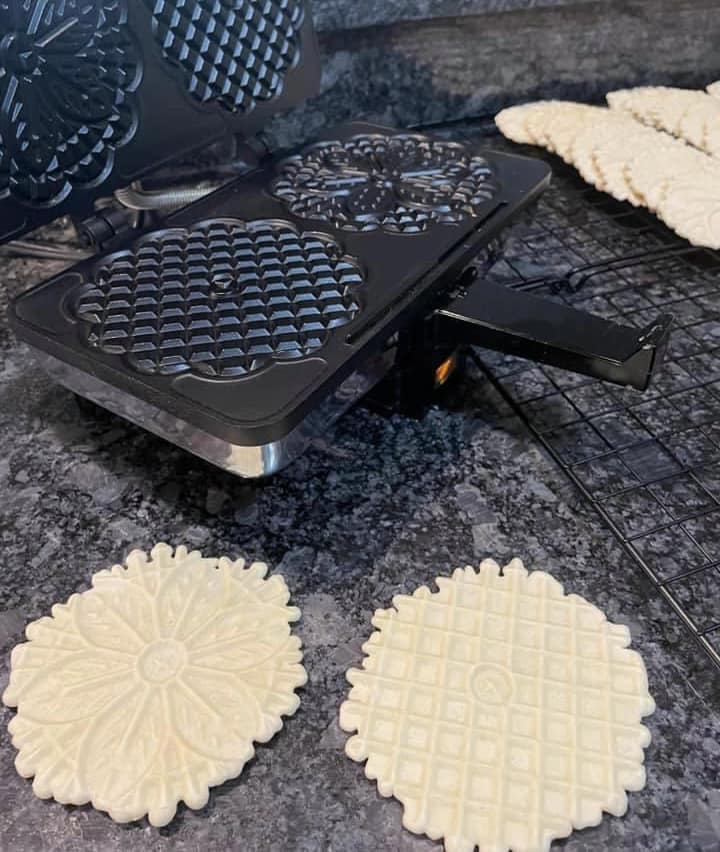
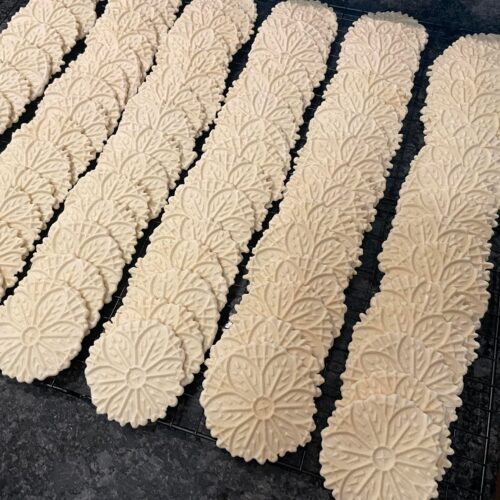
Your photos capture that perfectly: rows and rows of freshly made pizzelles cooling on wire racks, each cookie stamped with a beautiful design… and the pizzelle maker ready for the next scoop of batter. The moment I saw them, it reminded me of the same process so many Italian (and Italian-American) families follow every Christmas—hours spent making the cookies that fill cookie trays, gift boxes, and pantry tins until the holiday season winds down.
What I especially love is the story you shared—how the original recipe in the pizzelle-maker booklet had a huge misprint, calling for tablespoons instead of teaspoons of baking powder, resulting in pizzelles that puffed, stuck, and made you want to throw the iron out the window. Every seasoned pizzelle baker has had at least one “sticky disaster,” but your persistence paid off. Once you corrected the recipe, the pizzelles turned out perfect: crisp, light, beautifully patterned, and full of that classic anise aroma.
⭐ 2. Why You’ll Love This Recipe
-
Makes a BIG batch — about 90 pizzelles
-
Perfectly crisp (never soft or cakey)
-
Authentic flavor thanks to anise oil and real vanilla
-
Beautiful patterned cookies ideal for gifting
-
Holiday classic for Christmas, weddings, and celebrations
-
No special technique needed—just mix, scoop, press, and cool
-
Makes the whole house smell heavenly for days
If you’re new to pizzelles, this recipe will turn you into a lifelong fan. And if your family already makes them?
You’ll appreciate how dependable and flawless this recipe is.
⭐ 3. Ingredients (With Tips & Substitutions)
Dry Ingredients
-
6 cups all-purpose flour
-
4 teaspoons baking powder
(NOT tablespoons — this is the recipe-saving correction!)
Wet Ingredients
-
6 eggs
-
2 cups sugar
-
½ cup vegetable oil
-
½ cup softened butter
-
2 teaspoons pure vanilla extract
(Avoid imitation—vanilla adds depth.) -
1½ teaspoons anise oil
(Not extract. Oil is stronger, more traditional, and gives that classic aroma.)
Ingredient Notes
-
Anise oil vs anise extract: Oil has 3–4× stronger flavor and is traditional for Italian pizzelles.
-
Butter + oil combination: Creates crisp cookies that don’t break too easily.
-
Sugar amount: Necessary for crispness—do not reduce.
⭐ 4. Step-By-Step Instructions
Step 1 — Prepare Your Workspace
Set up:
-
pizzelle iron
-
cooling racks
-
small cookie scoop
-
bowl for batter
Pizzelle making goes quickly once you begin.
Step 2 — Mix the Batter
-
Beat eggs and sugar until thick and pale.
-
Add oil, softened butter, vanilla, and anise oil.
-
In a separate bowl, whisk flour and baking powder.
-
Add dry ingredients into wet ingredients gradually.
-
Mix just until combined—batter will be thick and sticky.
Step 3 — Heat the Pizzelle Iron
Plug it in and let it fully preheat.
Do NOT grease the iron unless manufacturer requires it.
Most modern irons are nonstick.
Step 4 — Scoop & Press
Use your smallest cookie scoop to drop a perfect portion into the center of each design.
Close the iron gently and count to 60 for pale, crisp pizzelles.
If you prefer golden pizzelles, count to 80–90.
Step 5 — Transfer to Cooling Racks
Use a thin spatula to lift each pizzelle onto cooling racks.
Let them cool completely (1–2 hours minimum).
They will crisp as they cool.
Step 6 — Store Properly
After cooling:
-
Stack in an aluminum lasagna tray
-
Cover with paper towels
-
Store in pantry for weeks (if they last!)
They stay perfectly crisp this way.
⭐ 5. Expert Tips & Troubleshooting
✔ Pizzelles sticking to the iron?
-
Iron not hot enough
-
Too much baking powder
-
Using extract instead of oil
-
Greasing the iron (usually makes sticking worse)
✔ Pizzelles too soft?
-
Humid environment → store with dry paper towels
-
Underbaked → cook 10–20 seconds longer
-
Batter too thick → add a tablespoon of oil
✔ Want them extra crisp?
Let them cool in a single layer, untouched.
✔ Want them pale like yours?
Count to 60 outside the iron.
This produces the perfect color.
⭐ 6. Variations & Add-Ins
🍋 Lemon Pizzelles
Add 2 teaspoons lemon extract + zest of one lemon.
🍫 Chocolate Pizzelles
Add ¼ cup cocoa + 1 extra tablespoon sugar.
🌰 Almond Pizzelles
Replace vanilla with almond extract.
🎄 Holiday Spice
Add cinnamon + nutmeg for Christmas tins.
If you enjoy warm holiday baking, try my Quick & Easy Sugar Cookies for another festive favorite.
⭐ 7. Serving Suggestions
-
Serve plain (traditional)
-
Dust with powdered sugar
-
Dip edges in chocolate
-
Sandwich with hazelnut spread
-
Roll into cannoli shells while hot
⭐ 8. Storage, Freezer & Make-Ahead
Room Temperature (Best):
3+ weeks in aluminum pans with paper towels.
Freezer:
Freeze in airtight tin up to 3 months.
Make Ahead:
Batter can be refrigerated 24 hours.
⭐ 9. FAQs
Can I use anise extract instead of oil?
Yes, but the flavor will be weaker—use 2–3× more.
Can pizzelles be made soft instead of crisp?
Yes—remove early and store in an airtight container.
Do I need a pizzelle iron?
Yes. The pattern and thinness require it.
Why are my pizzelles puffy?
Too much baking powder.
These traditional Italian pizzelles are everything a holiday cookie should be—simple, crisp, beautifully patterned, and unbelievably fragrant. They’re the kind of cookie that sparks memories, traditions, and warm conversation in every home.
If you make this recipe, I’d love to hear about it!
Leave a comment, give it a star rating, and let me know your favorite pizzelle flavor. And don’t forget to save it on Pinterest so you can make them every holiday season.
Traditional Italian Pizzelles
Ingredients
- 6 cups all-purpose flour
- 4 teaspoons baking powder
- 6 eggs
- 2 cups sugar
- ½ cup vegetable oil
- ½ cup softened butter
- 2 teaspoons pure vanilla extract
- 1½ teaspoons anise oil
Instructions
- Preheat pizzelle iron.
- Beat eggs and sugar until pale.
- Add oil, butter, vanilla, and anise oil.
- Whisk flour and baking powder; add gradually.
- Scoop small portions into heated iron.
- Close and cook 60 seconds for pale pizzelles.
- Transfer to cooling racks.
- Cool completely before storing.
Notes