Peddler’s Cheesecake Recipe (Dense, Creamy & Perfect for Gifting)
I recently took on a baking challenge that I wasn’t entirely sure I would survive. A local business reached out with a corporate order for Christmas gifts: 48 homemade cheesecakes.
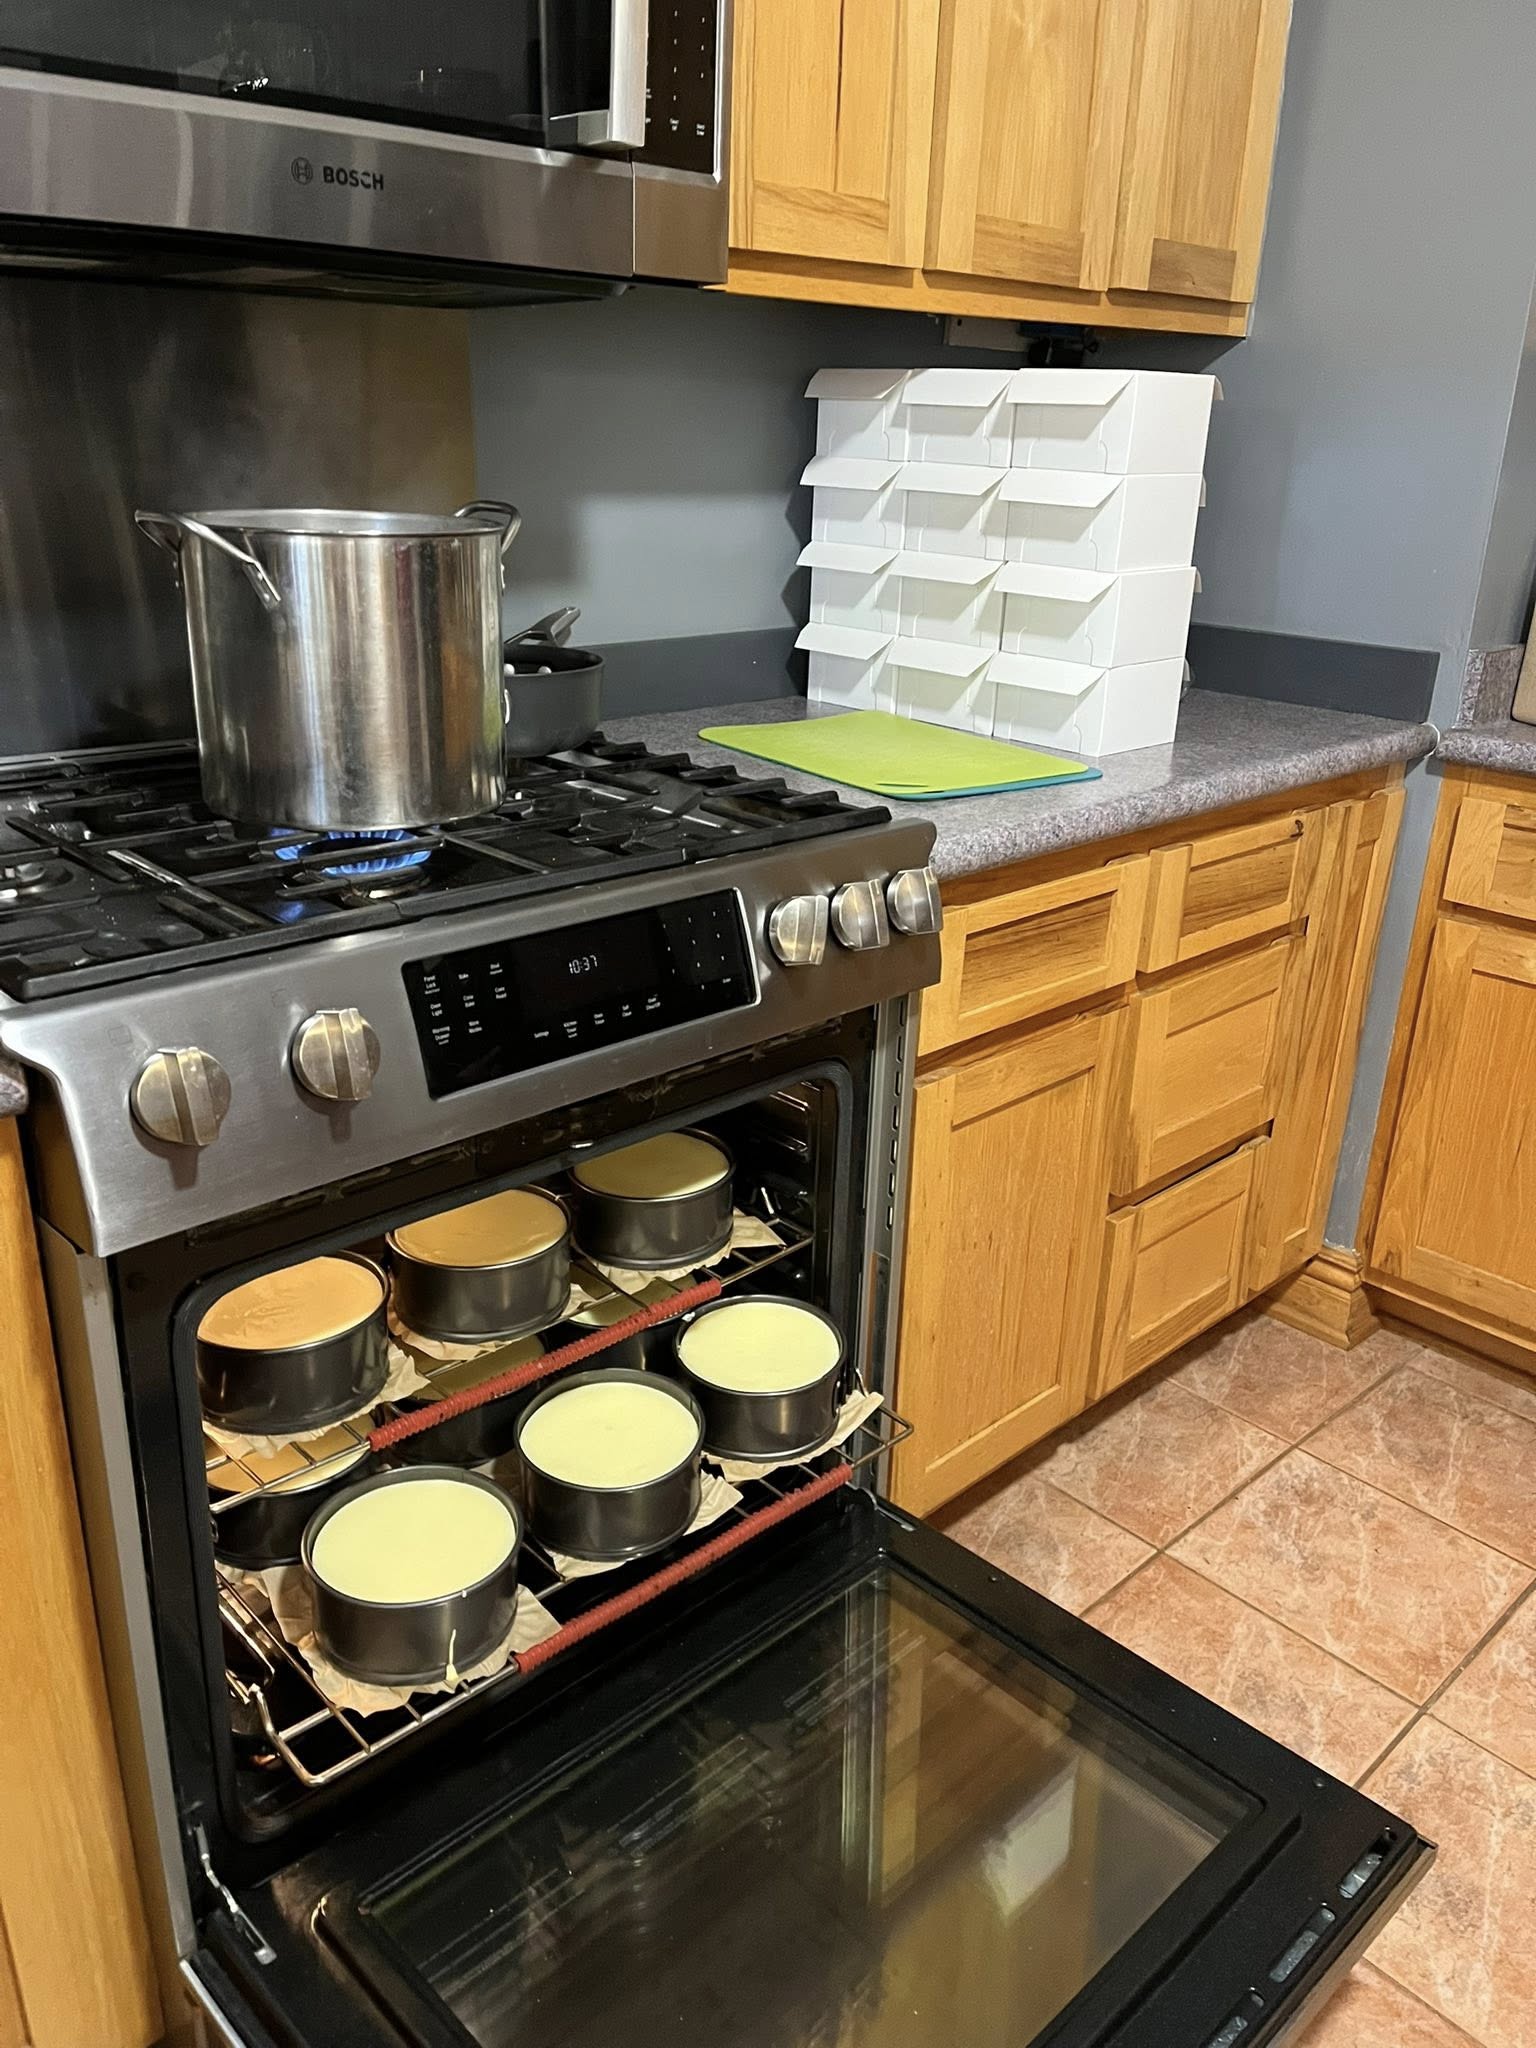
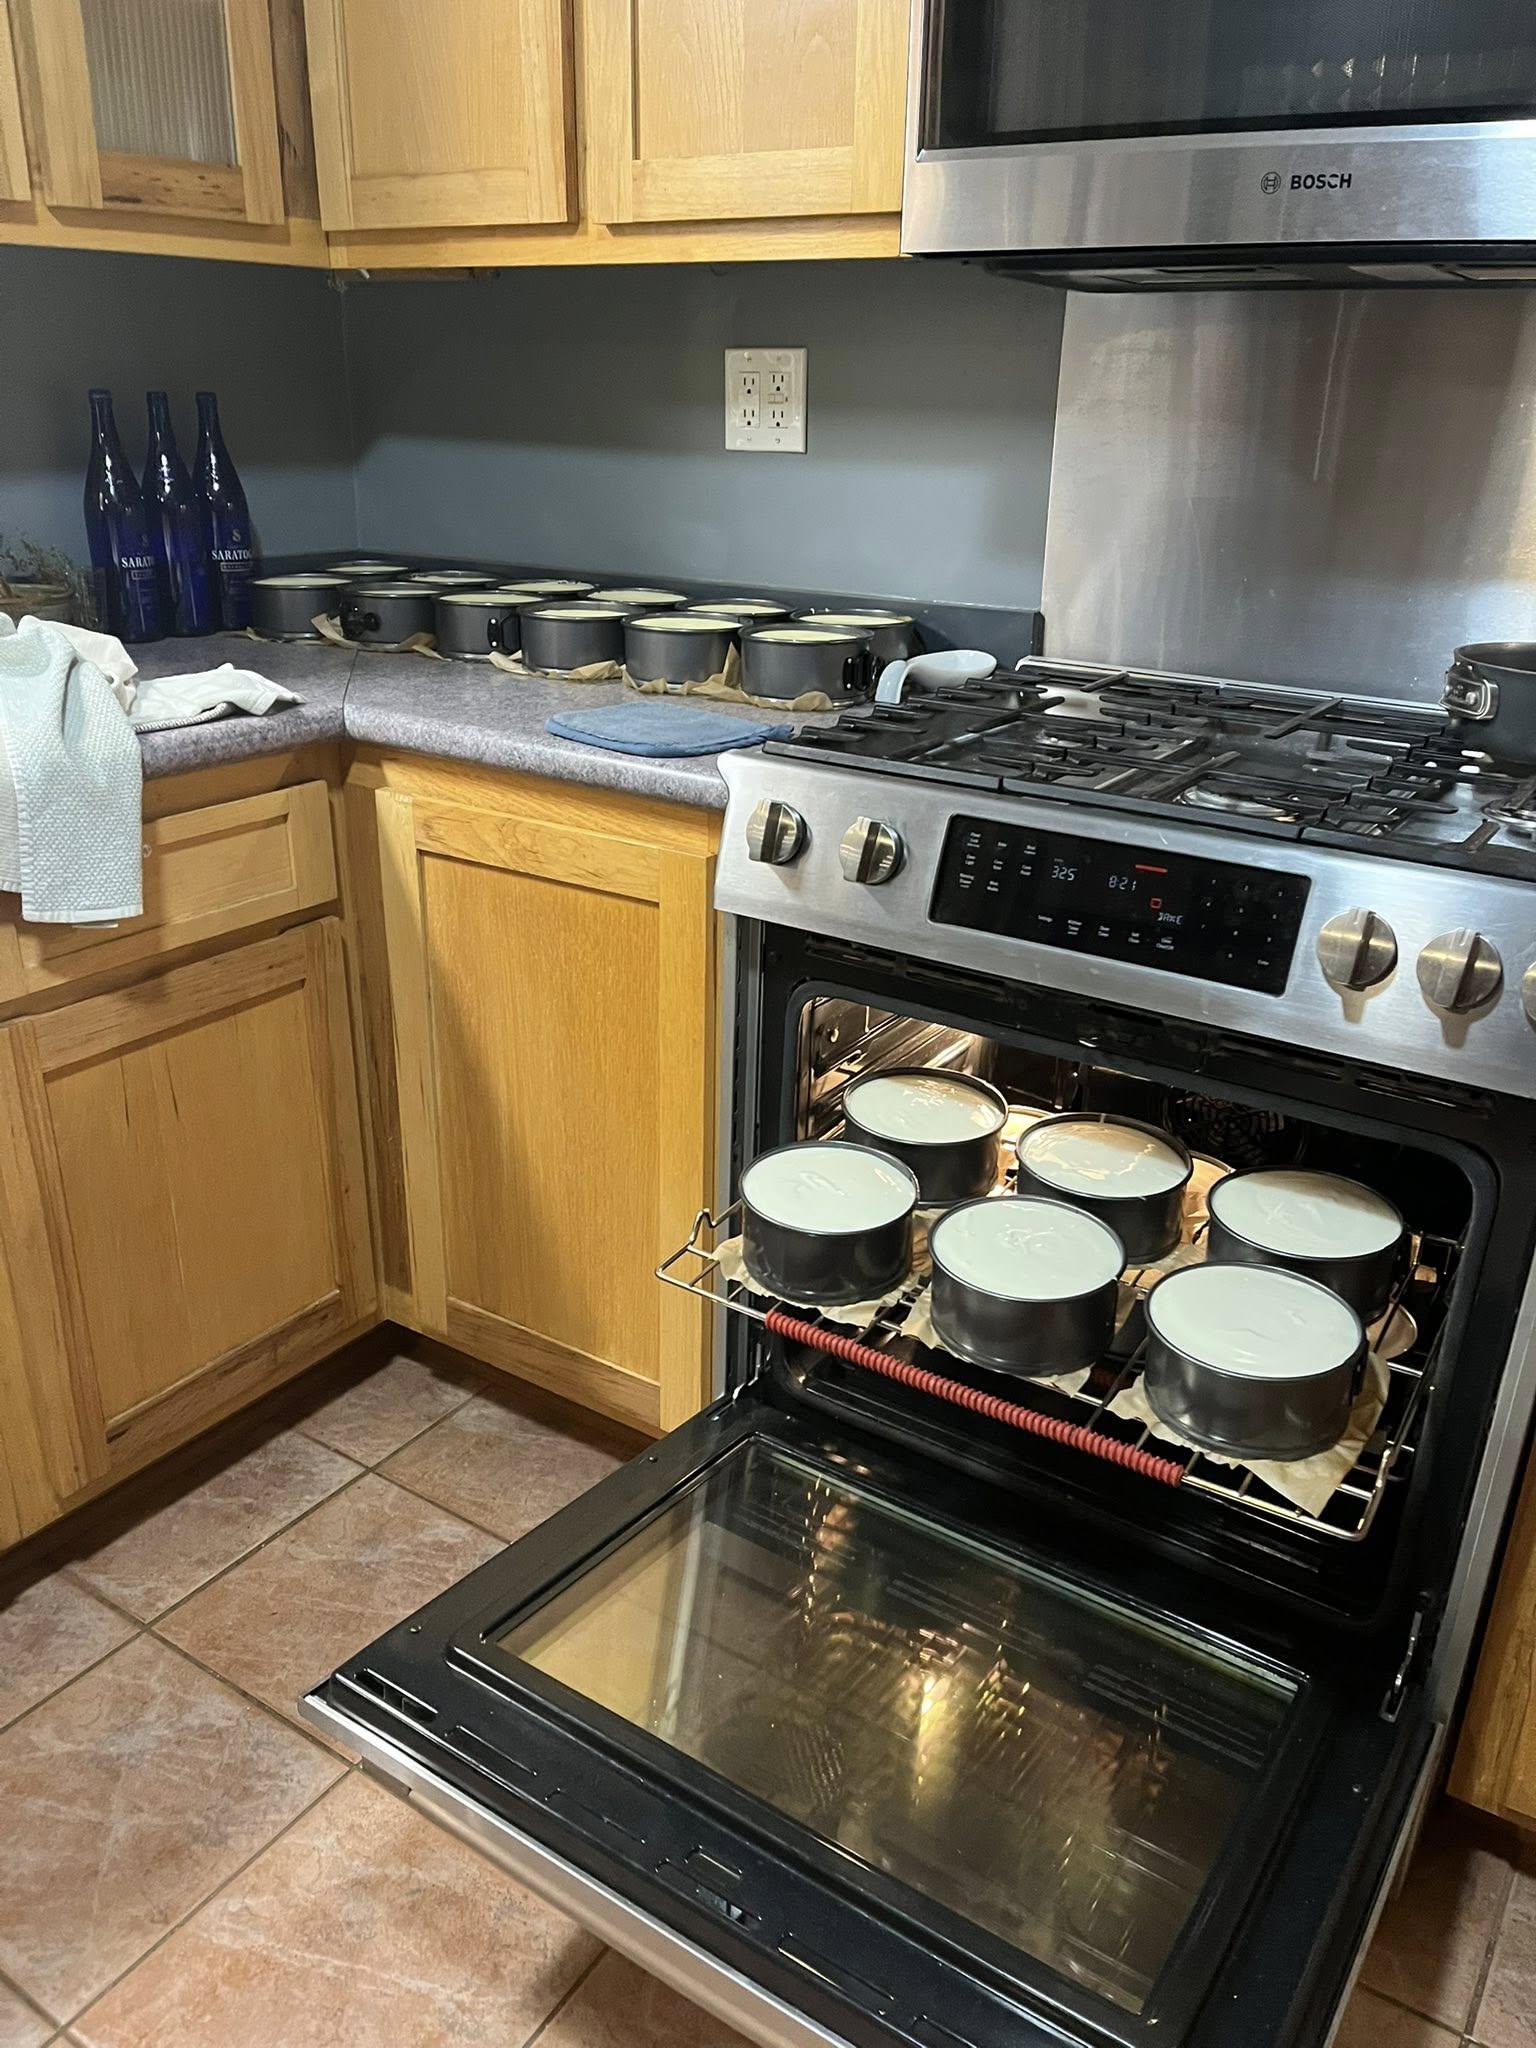
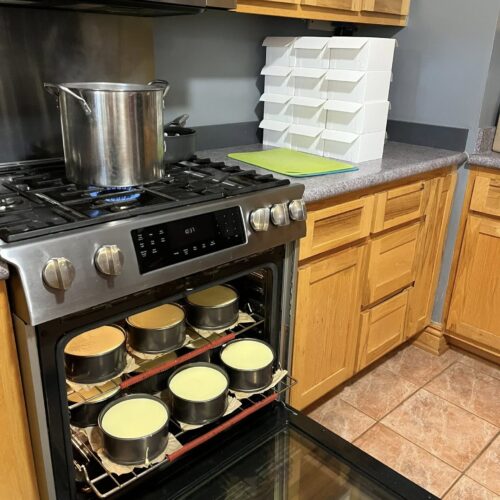
Now, I love baking, but baking forty-eight cakes in two days? That is a marathon. My kitchen turned into a production line. I was baking 12 at a time, running multiple batches two times a day for two days straight. The house smelled absolutely incredible—like warm vanilla and graham crackers—but by the time I folded the last white bakery box, I was ready to put my feet up!
“Whew, I’m finished,” was the understatement of the year.
But here is the thing: when you are baking in that kind of bulk, you need a recipe that is bulletproof. You need a cheesecake that comes out dense, creamy, and perfect every single time. That is where this Peddler’s Cheesecake Recipe comes in.
Unlike lighter, fluffier versions, this recipe uses six eggs. Yes, six! That extra protein creates a luxurious, dense custard texture that holds up beautifully, whether you are making a standard 9-inch cake for Sunday dinner or dozens of 6-inch cakes for holiday gifts.
If you are looking for the ultimate rich and creamy cheesecake that slices like a dream, this is the one.
Why You’ll Love This Recipe
There are a million cheesecake recipes out there, but this one has earned a permanent spot in my rotation for a few key reasons:
-
The “6-Egg” Texture: Most standard recipes call for 3 or 4 eggs. By using 6, this cheesecake bridges the gap between a creamy New York style and a rich custard. It is incredibly satisfying and not “airy” or dry.
-
Ideal for Gifting: As you can see from my kitchen takeover, this recipe scales beautifully. It is sturdy enough to be boxed up and gifted without falling apart.
-
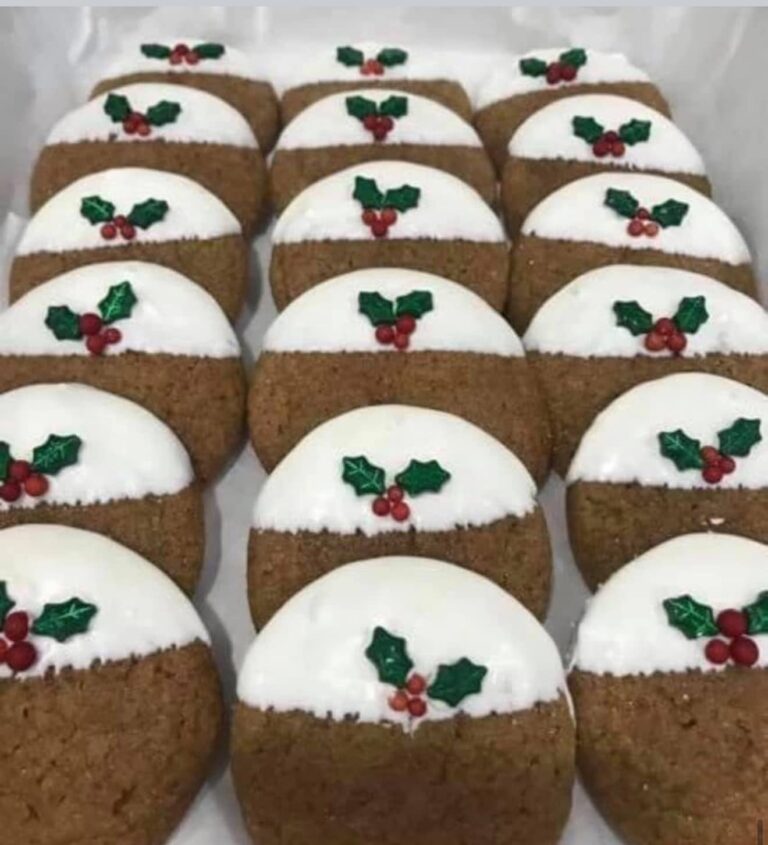
The Classic Sour Cream Topping: This recipe includes that old-school sweetened sour cream topping. It adds a tangy, glossy white finish that hides any minor imperfections and balances the sweetness of the filling.
-
Versatility: While the recipe instructions are for a standard 9-inch springform pan, I used this exact batter to make my 6-inch mini cakes. It works in almost any size pan if you adjust the time.
Ingredients Breakdown
You don’t need fancy gourmet ingredients to make a bakery-quality cheesecake. It’s all about the ratios.
The Crust
-
Graham Cracker Crumbs: You’ll need about 1 1/2 cups. You can crush your own or buy the box of crumbs to save time (which I definitely recommend if you are making 48 of them!).
-
Melted Butter: This binds the crust.
-
Sugar & Cinnamon: A little sugar helps the crust crisp up, and the optional cinnamon adds a warmth that smells like Christmas.
The Filling
-
Cream Cheese: You need 4 blocks (8 ounces each).
-
Crucial Tip: It must be softened to room temperature. If your cheese is cold, you will get lumps in your batter, and no amount of mixing will get them out. I leave mine on the counter for at least 4 hours before starting.
-
-
Sugar: 1 cup of white granulated sugar provides just the right amount of sweetness without overpowering the tang of the cheese.
-
Vanilla Extract: Use pure vanilla extract for the best flavor.
-
Eggs: The star of the show. You need 6 large eggs, also at room temperature. Cold eggs can shock the batter and cause separation.
The Topping
-
Sour Cream, Sugar, Vanilla: This simple trio creates a stark white, tangy layer that goes on for the last 10 minutes of baking. It gives the cheesecake a professional, finished look.
Step-by-Step Instructions
Baking a cheesecake is a labor of love, but if you follow the steps, it is actually quite simple.
Step 1: Prepare the Crust
Preheat your oven to 325°F (160°C). In a medium bowl, mix your graham cracker crumbs, sugar, and cinnamon. Pour in the melted butter and stir until it looks like wet sand. Press this mixture firmly into the bottom of a 9-inch springform pan. I like to use the bottom of a measuring cup to pack it down tight. Bake for 10 minutes. This “blind bake” ensures your crust stays crisp and doesn’t get soggy under the filling. Set it aside to cool.
Step 2: The Perfect Batter
In a large bowl (or your stand mixer), beat the softened cream cheese and sugar together.
-
Tip: Beat this stage really well until it is completely smooth and creamy. Scrape down the sides of the bowl often. Beat in the vanilla extract.
Step 3: Adding the Eggs
Add the eggs one at a time.
-
Crucial Step: Beat on low speed just until each egg is incorporated. Do not overmix. Overmixing whips air into the batter, which causes the cheesecake to puff up in the oven and then collapse and crack when it cools. You want a dense, air-free batter.
Step 4: The Water Bath
Pour the batter over your cooled crust. For a crack-free cheesecake, I highly recommend a water bath. Wrap the bottom of your springform pan in heavy-duty aluminum foil (I use two layers to be safe). Place the pan inside a larger roasting pan and fill the roasting pan with hot water until it comes about 1 inch up the sides of the cheesecake pan.
-
Why do this? The water generates gentle steam, cooking the custard evenly and preventing the top from drying out and cracking.
Step 5: Bake
Bake at 325°F for 55–60 minutes. The Jiggle Test: The cake is done when the edges are set and puffy, but the center still jiggles slightly like Jell-O when you gently shake the pan. It will firm up as it cools.
Step 6: The Sour Cream Topping (Optional)
Remove the cake from the oven (and water bath) and let it cool for about 15 minutes. Mix the sour cream, sugar, and vanilla. Spread this over the warm cheesecake. Pop it back in the oven (at 375°F this time) for just 10 minutes to set the topping.
Step 7: The Slow Cool
Let the cheesecake cool completely on a wire rack at room temperature. Do not rush this! Once cool, cover and refrigerate for at least 4 hours, preferably overnight. This “curing” time allows the flavors to meld and the texture to set.
Expert Tips for Bulk Baking
Since I just finished baking 48 of these, I learned a few things about efficiency!
-
Assembly Line: If you are making multiple cakes, prep all your crusts first. Then make a massive batch of batter (or several batches back-to-back).
-
Pan Size Conversions: The recipe below is for a 9-inch pan. However, one batch of this batter makes approximately three 6-inch cheesecakes (depending on how deep your pans are). When baking the smaller 6-inch cakes shown in my photos, check them around the 40-45 minute mark.
-
Invest in Boxes: If you are gifting these, buy bulk bakery boxes. It makes transport easier and looks so professional.
What to Serve with Cheesecake
This Peddler’s Cheesecake is rich enough to stand on its own, but a little garnish never hurts.
-
Fresh Fruit: Strawberries, raspberries, or blueberries cut through the richness.
-
Sauces: A homemade salted caramel sauce or a strawberry coulis is delicious. If you want to try a different flavor profile, check out my Homemade Cheesecake with Salted Caramel Pecan Topping for inspiration on toppings.
-
Coffee: Serve a slice with a hot cup of coffee or tea.
Storage Instructions
Refrigeration: Keep the cheesecake in the springform pan (or transferred to a platter) covered tightly with plastic wrap in the fridge. It stays fresh for up to 5 days.
Freezing: Cheesecake freezes wonderfully!
-
Cool the cake completely and chill it in the fridge overnight.
-
Remove the outer ring of the springform pan.
-
Wrap the entire cake (including the bottom pan plate if you like) in two layers of plastic wrap, followed by a layer of aluminum foil.
-
Freeze for up to 3 months. Thaw in the refrigerator overnight before serving.
If you enjoy classic desserts like this, you might also want to try my Classic No-Bake Cheesecake for summer days when you don’t want to turn on the oven, or perhaps a Festive Fruit Cake Recipe for another traditional holiday option.
FAQs
Why did my cheesecake crack? Cracks usually happen for two reasons: overmixing the eggs (adding too much air) or cooling it too fast. The water bath helps prevent this, as does running a knife around the edge of the pan after baking to loosen it as it shrinks.
Can I skip the water bath? Technically yes, but the texture won’t be as silky. Without the steam, the edges tend to overcook and become grainy before the center is done. If you skip it, try placing a pan of water on the rack beneath the cheesecake to add moisture to the oven.
What is the difference between this and New York Style? New York style relies heavily on cream cheese and sometimes heavy cream or sour cream in the batter. This “Peddler’s” style uses a high ratio of eggs (6 of them!), which gives it a slightly yellower tint and a denser, almost custard-like mouthfeel.
Can I make this gluten-free? Absolutely. Just swap the graham cracker crumbs for crushed gluten-free graham crackers or a nut-based crust (like almond flour and butter). The filling itself is naturally gluten-free.
Conclusion
Baking 48 of these Peddler’s Cheesecakes was a marathon I won’t soon forget, but the feedback from the recipients made every cracked egg worth it. There is just nothing like a homemade gift during the holidays.
Whether you are baking one for your family or a dozen for your neighbors, I hope this recipe serves you well. If you try it, I’d love to hear how it turned out! Leave a comment below, and if you are feeling ambitious with your holiday baking, share a photo of your oven tetris on Pinterest!
Peddler's Cheesecake Recipe
Ingredients
- Crust:
- 1 1/2 cups graham cracker crumbs
- 1 tbsp white granulated sugar
- 1/3 cup melted butter
- 1/2 tsp ground cinnamon optional
- Filling:
- 4 packages 8 oz each cream cheese, softened to room temperature
- 1 cup white granulated sugar
- 1 tsp vanilla extract
- 6 large eggs room temperature
- Topping Optional:
- 1 cup sour cream
- 2 tbsp sugar
- 1 tsp pure vanilla extract
- Fresh berries or fruit for serving
Instructions
- Prep & Crust: Preheat oven to 325°F (160°C). Combine graham cracker crumbs, 1 tablespoon sugar, cinnamon, and melted butter. Press firmly into the bottom of a 9-inch springform pan. Bake for 10 minutes, then cool.
- Make Filling: In a large bowl or stand mixer, beat the softened cream cheese and 1 cup sugar until completely smooth and creamy. Scrape down the sides. Beat in 1 teaspoon vanilla.
- Add Eggs: Add the eggs one at a time, beating on low speed just until incorporated. Do not overmix.
- Water Bath: Pour batter over the crust. Wrap the bottom of the springform pan in foil and place it in a larger roasting pan. Fill the roasting pan with hot water 1 inch up the sides.
- Bake: Bake at 325°F for 55-60 minutes. The center should still jiggle slightly when shaken.
- Topping: Remove from oven. Mix sour cream, 2 tablespoons sugar, and 1 teaspoon vanilla. Spread over the hot cheesecake. Return to oven (increase temp to 375°F) for 10 minutes to set.
- Cool: Cool on a wire rack completely, then refrigerate for at least 4 hours or overnight.
Notes