Quick and Easy 10-Minute Candied Maple Peanuts
The Ultimate Two-Ingredient Snack
Making homemade candied nuts often feels like a complicated holiday chore involving candy thermometers, multiple baking sheets, and hours of cooling time. This brilliant recipe for candied maple peanuts completely changes the rules of homemade confections. Originally shared by a fellow home cook named Joe Hebert, this incredibly simple method requires exactly two ingredients and just ten minutes from start to finish. The entire process happens on the stovetop, transforming everyday roasted nuts into an irresistible, sweet, and crunchy treat.
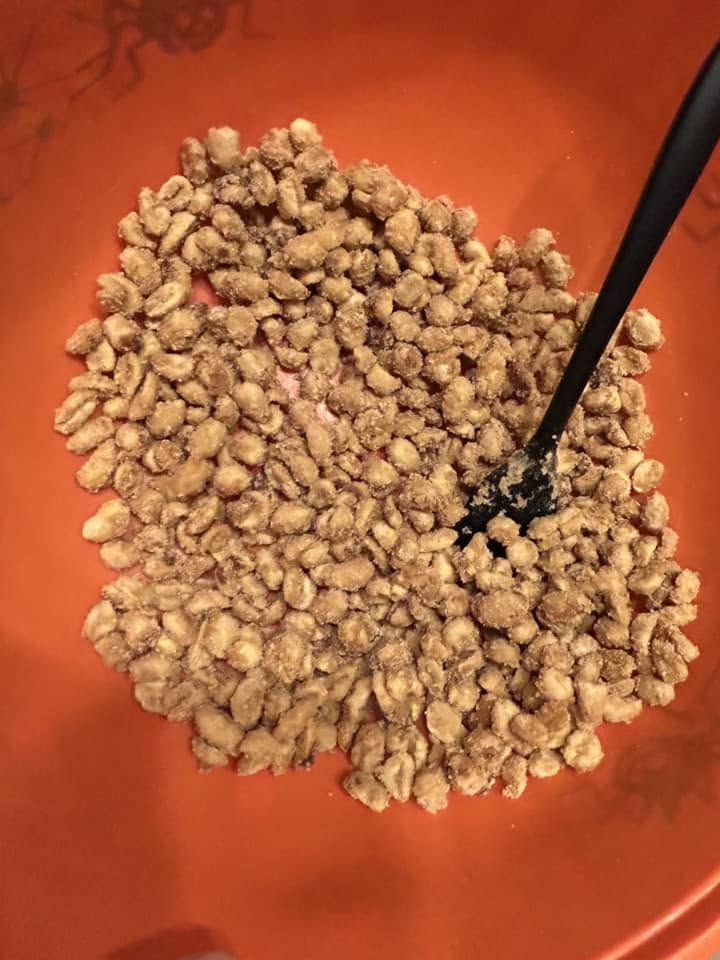
The magic of this recipe lies in the rapid caramelization of the maple syrup. By simply cooking the nuts and syrup together in a skillet, you get to witness a fascinating visual transformation as the liquid boils down from a watery glaze into a thick, sticky coating, before finally crystallizing into a beautiful, sugary crust. It is a foolproof snack that is guaranteed to impress; in fact, it easily earns rave reviews from husbands and their coworkers alike. Whether you need a quick homemade gift, a sweet addition to a charcuterie board, or just a fast afternoon treat, these stovetop maple peanuts deliver massive flavor with virtually zero effort.
Why You’ll Love This Recipe
-
The entire cooking and cooling process takes a mere 10 minutes of your time.
-
It only requires two simple ingredients: 12 ounces of peanuts and 2/3 cup of maple syrup.
-
You do not need to turn on your oven or dirty a baking sheet; everything happens in a single nonstick pan.
-
It is a tried-and-true crowd-pleaser that regularly receives rave reviews from friends, family, and coworkers.
-
The recipe teaches you exactly what visual cues to look for, eliminating the need for a complicated candy thermometer.
-
The finished nuts are naturally gluten-free and vegan, making them a perfect snack for almost any dietary restriction.
Ingredients
-
12 oz peanuts (roasted and lightly salted peanuts work beautifully to balance the sweetness)
-
2/3 cup pure maple syrup
-
Optional: A pinch of flaky sea salt for sprinkling at the very end
-
Optional: 1/2 teaspoon of ground cinnamon for a warm, spiced flavor profile
Step-by-Step Instructions
Step 1: Combine the Ingredients in the Pan
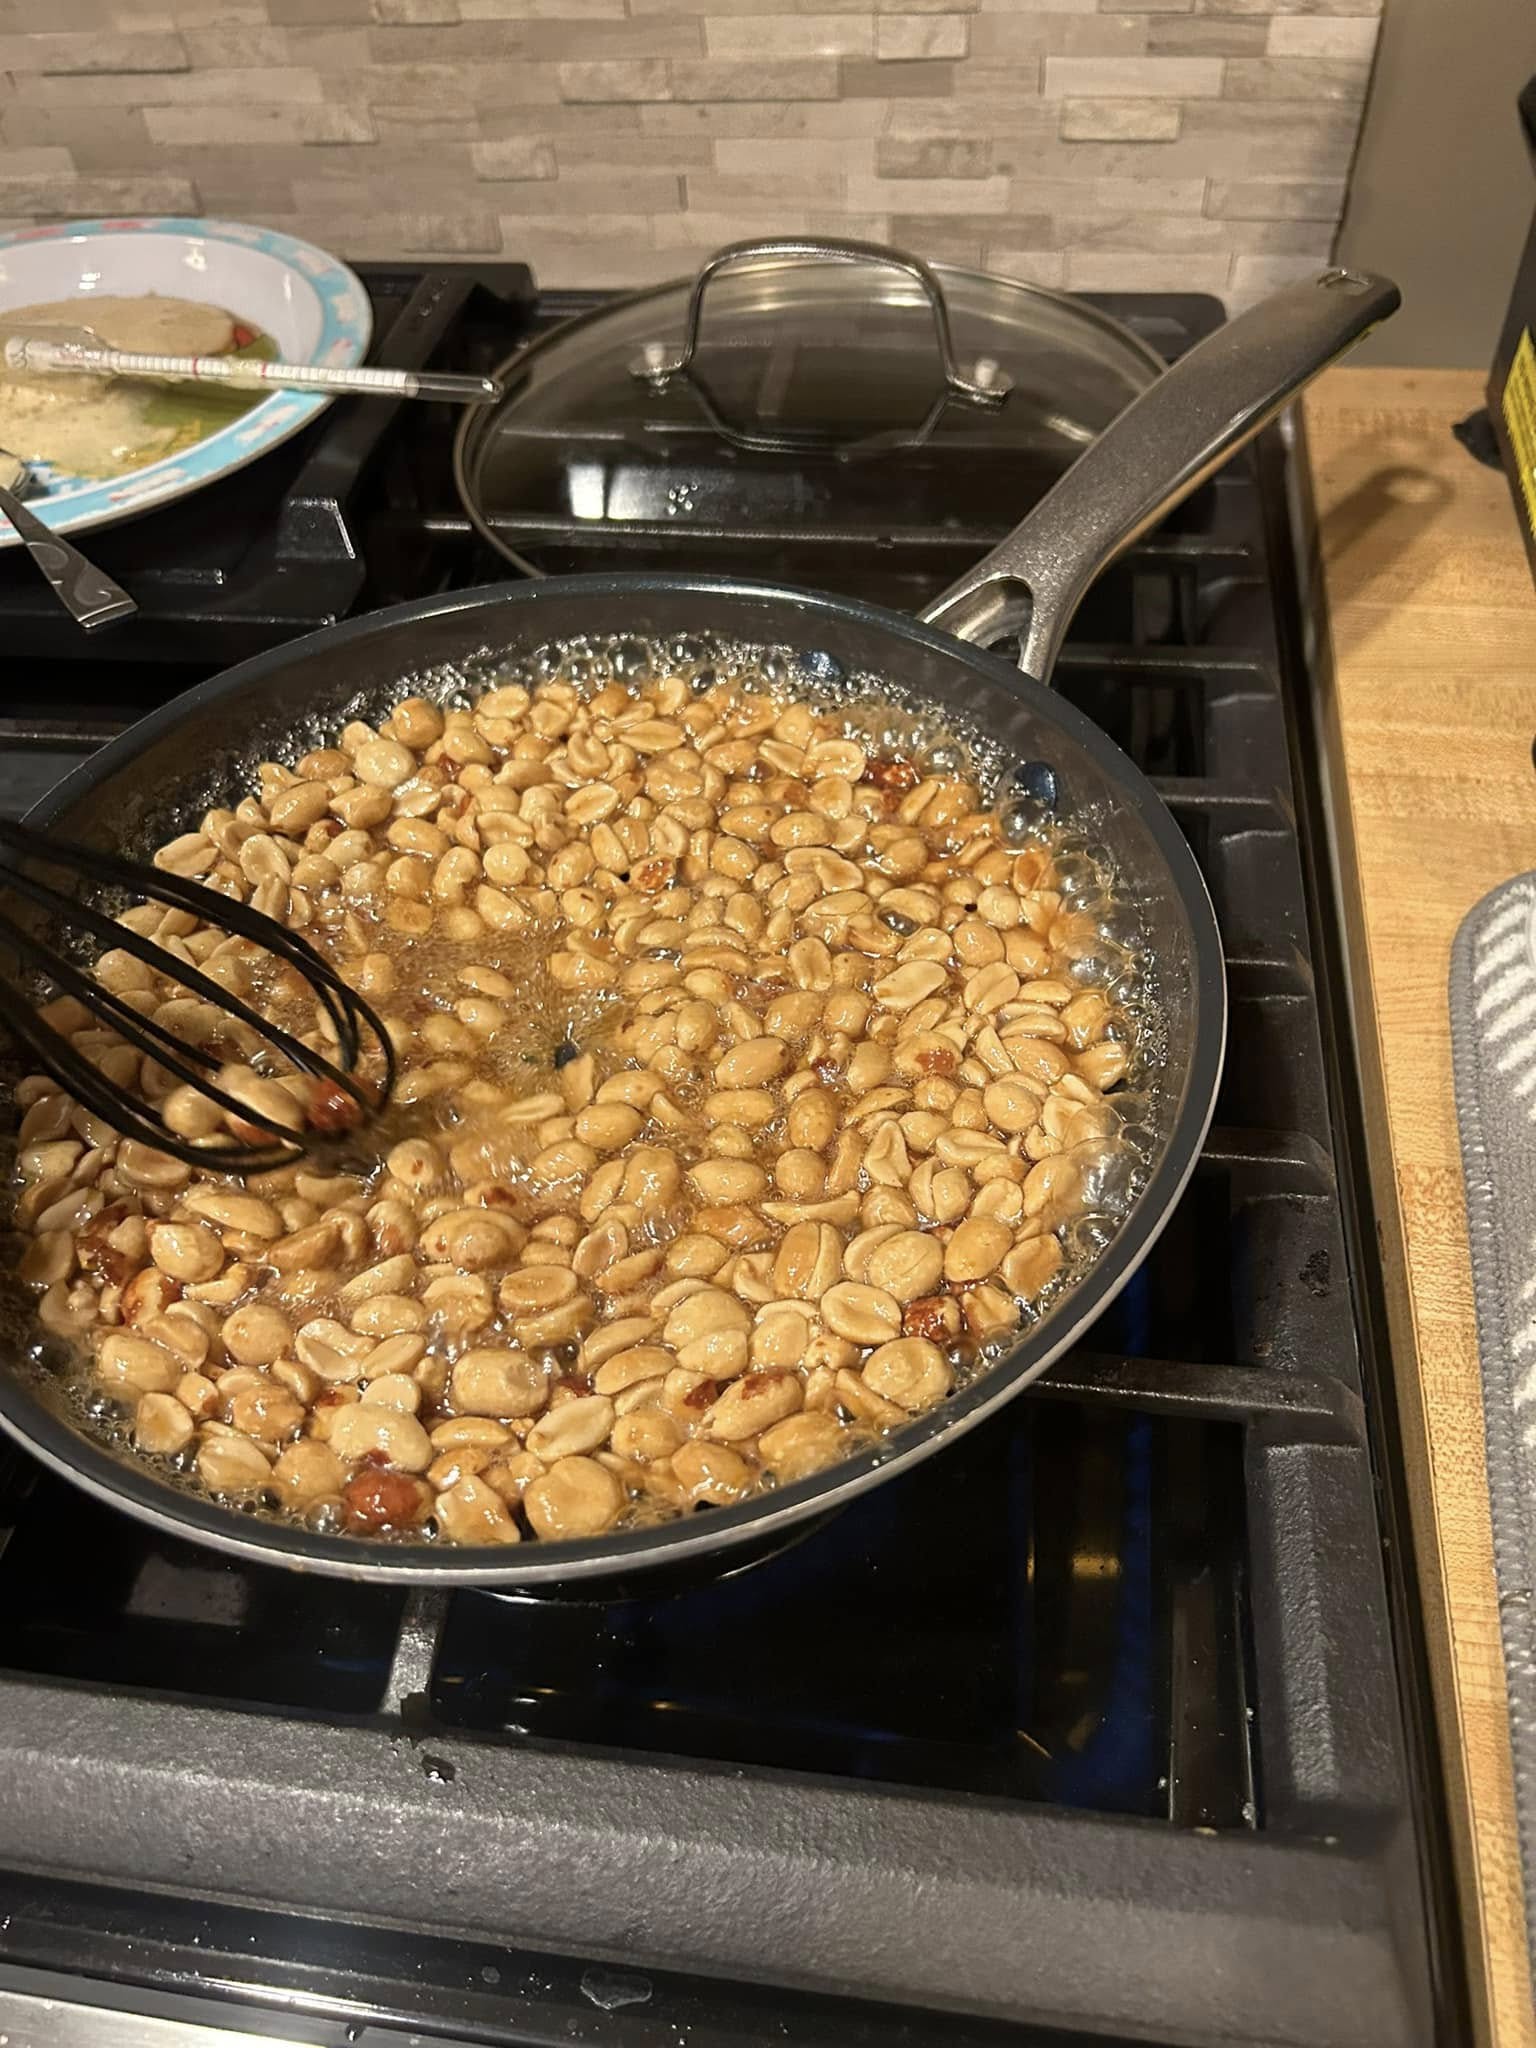
Grab a large nonstick pan and place it on your stovetop. Pour the 2/3 cup of maple syrup directly into the cold pan, followed immediately by dumping in the 12 ounces of peanuts. Begin stirring the mixture immediately to ensure every single nut is coated in the sweet syrup.
Step 2: Increase Heat and Monitor the Consistency
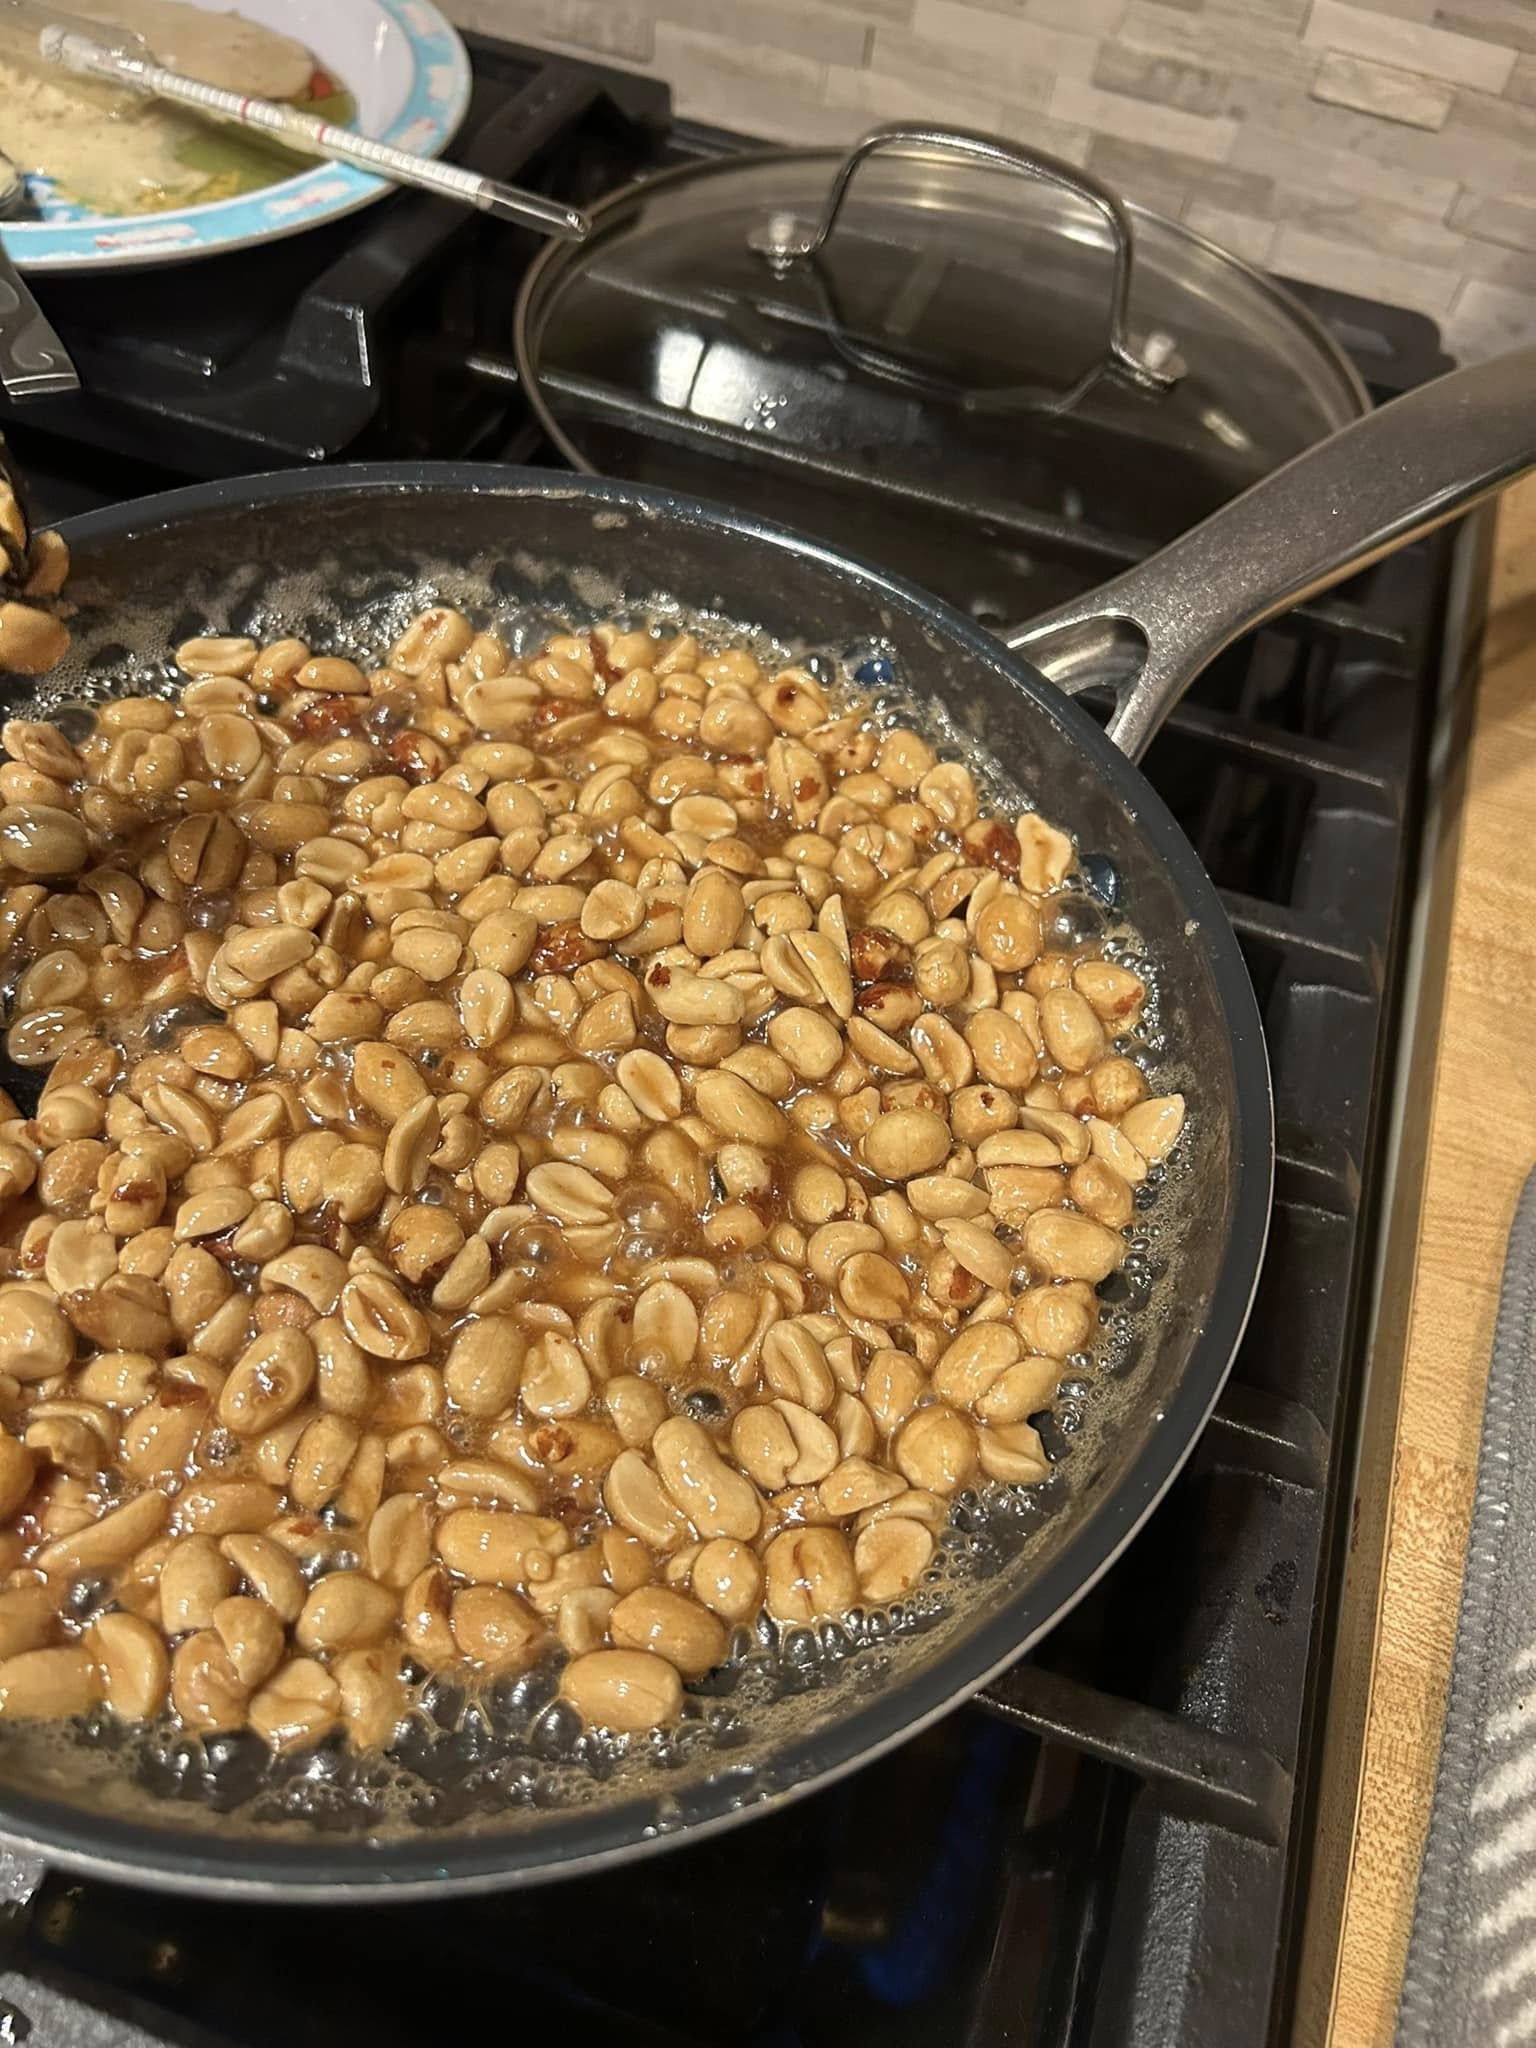
Turn your stovetop heat up to medium-high (roughly 3/4 high heat). As the pan heats up, the syrup will begin to bubble vigorously. You must stir the peanuts constantly during this stage. Pay close attention to the consistency of the boiling liquid in the pan; it will start out quite watery, but as the water evaporates, the syrup will noticeably transition into a much thicker, heavier texture.
Step 3: Watch for Sugar Crystallization
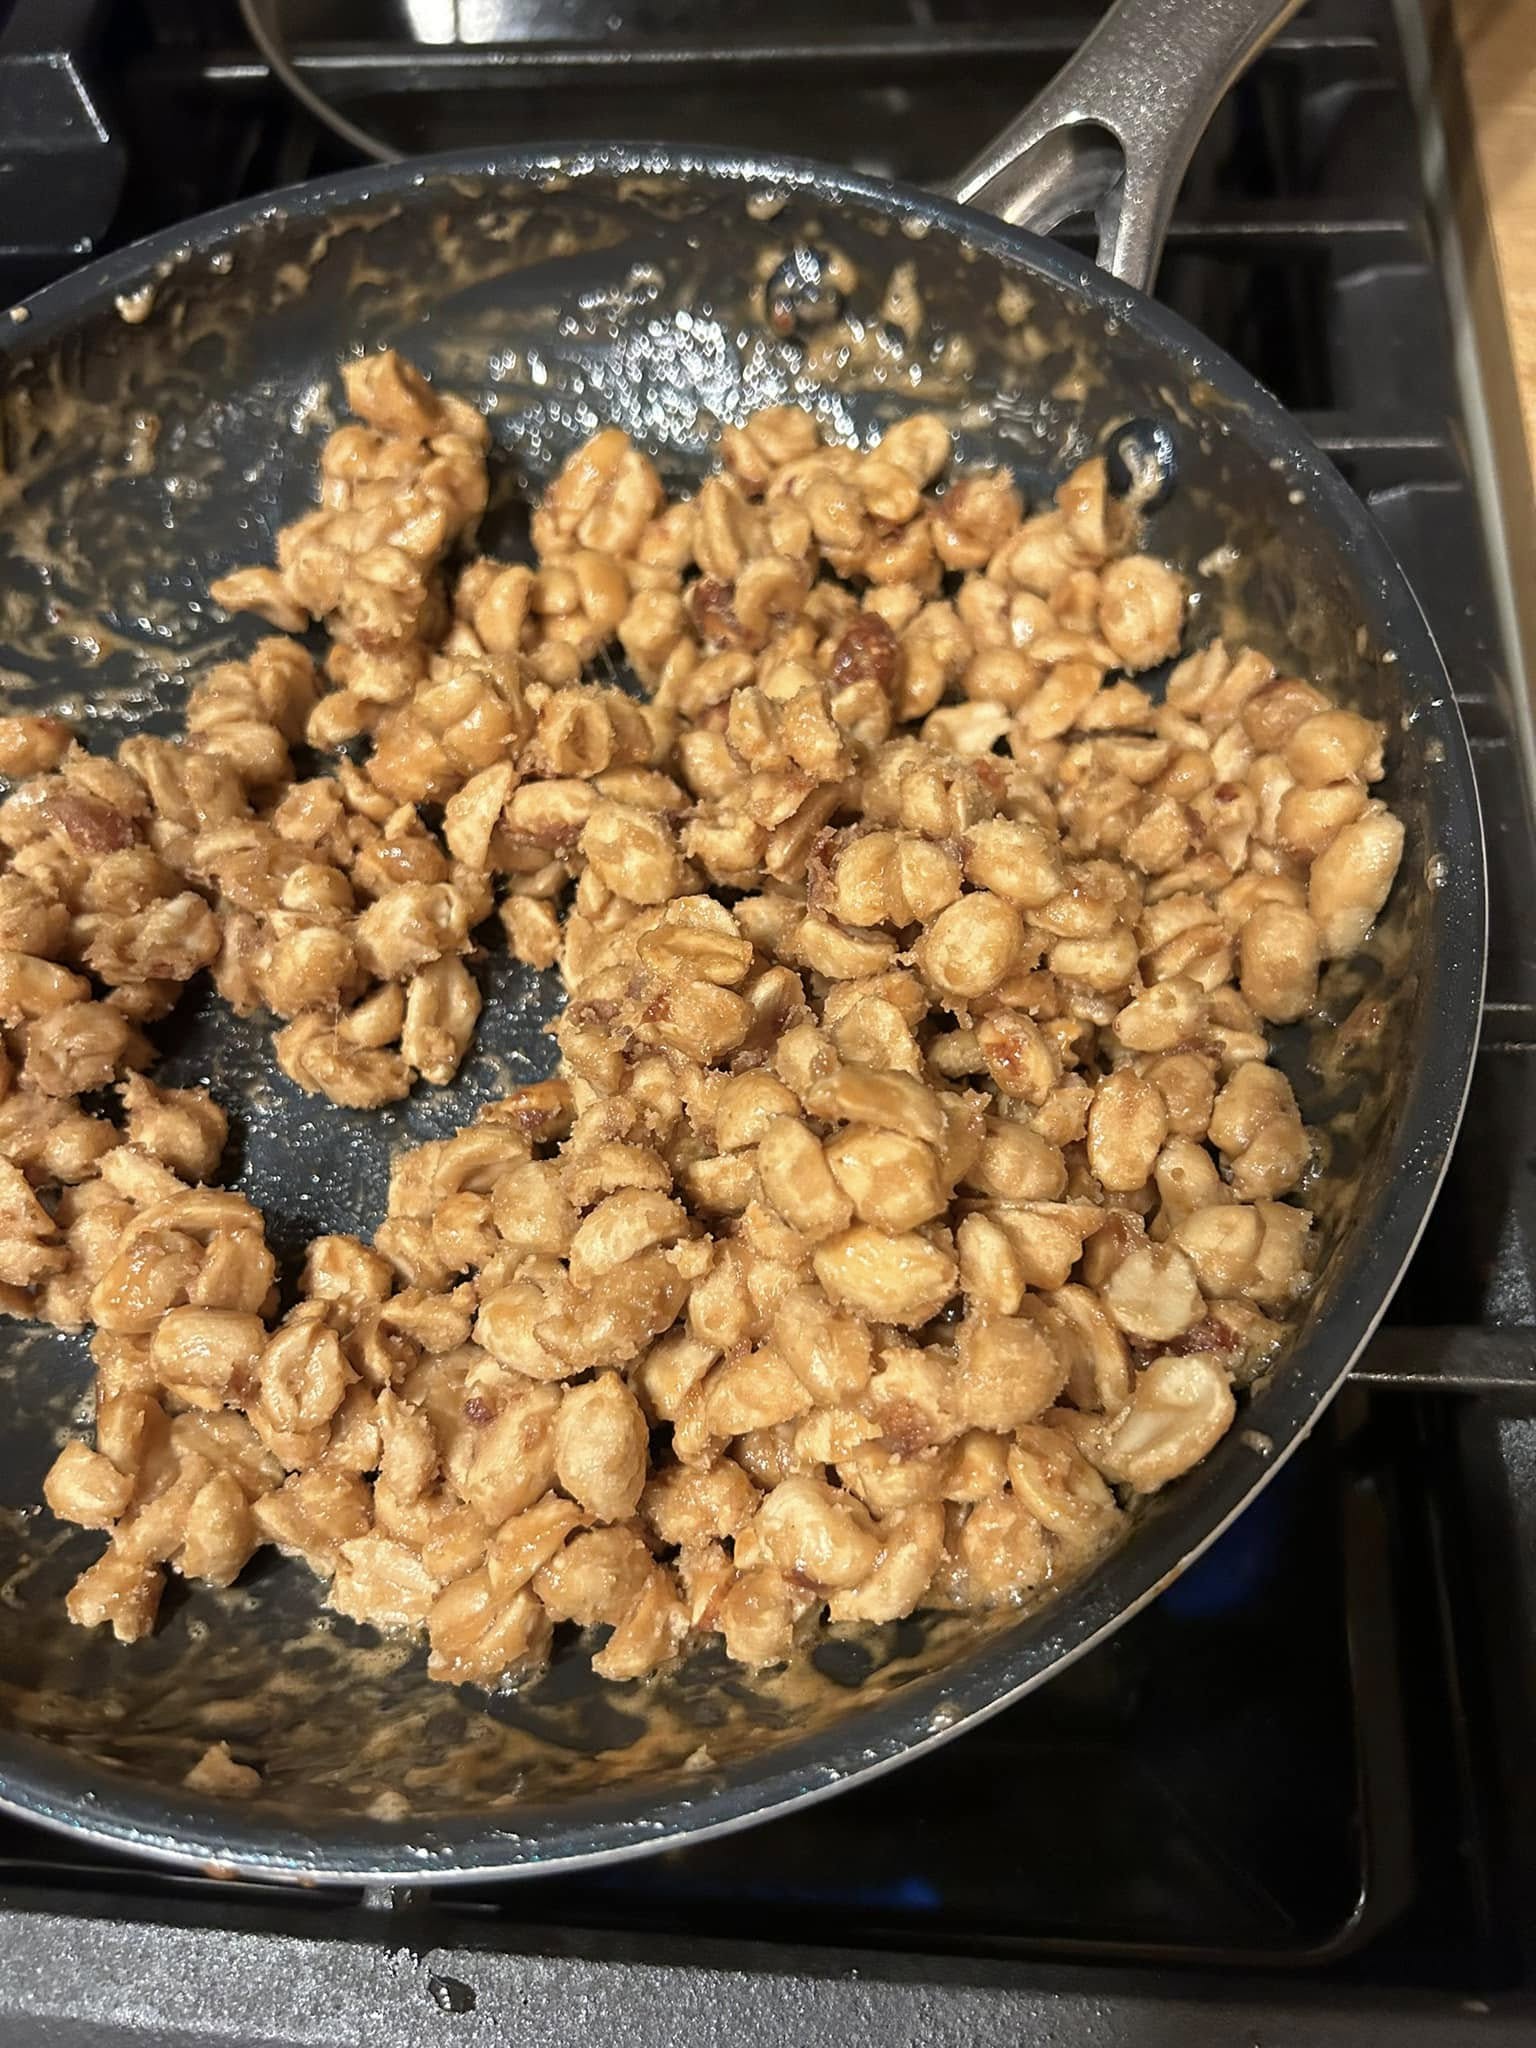
Keep stirring constantly as the thickened syrup reaches a sticky phase. Soon, you will start to see stringiness happening within the sugars as you pull your spoon or whisk through the nuts. Keep moving the peanuts around until you finally see the sugar lightly form and crystallize into a dry, frosty coating on the exterior of the nuts.
Step 4: Cool and Keep Stirring
The moment you see that crystallized sugar coating lightly form, immediately remove the pan from the heat. Do not stop stirring. You need to stir the peanuts constantly off the heat until they are completely cool. This crucial final step prevents the nuts from fusing together into one giant, solid block of brittle and ensures they remain individual, perfectly snackable pieces.
Expert Cooking Tips
-
A high-quality nonstick pan is absolutely essential for this recipe; it prevents the crystallizing sugars from fusing to the bottom of your cookware and making a difficult mess.
-
You must use 100% pure maple syrup. Artificial pancake syrups are made of corn syrup and water, and they will simply burn rather than crystallizing properly.
-
Do not step away from the stove at any point. The transition from watery to thick, to sticky and stringy happens very rapidly, and the nuts can burn if ignored.
-
Stirring constantly while the nuts cool off the heat is the secret to getting distinct, individual candied peanuts rather than a solid sheet of peanut brittle.
-
Have a silicone spatula or a heat-resistant whisk ready before you turn on the burner, as you will need to keep the mixture moving continuously.
Variations to Try
-
Spicy Maple Peanuts: Stir a quarter teaspoon of cayenne pepper and a dash of smoked paprika into the maple syrup before turning on the heat for an addictive sweet-and-spicy kick.
-
Maple Vanilla Pecans: Swap the peanuts out for pecan halves, and carefully stir in a teaspoon of vanilla extract right when the syrup reaches the thick and sticky stage.
-
Holiday Mixed Nuts: Use a 12-ounce blend of almonds, cashews, and walnuts instead of just peanuts, and add a heavy dash of pumpkin pie spice for a festive twist.
What to Serve With Candied Maple Peanuts
-
Scatter a handful of these sweet nuts across a savory charcuterie board to pair beautifully with sharp cheddar, creamy brie, and salty prosciutto.
-
Roughly chop the cooled peanuts and sprinkle them over a bowl of warm oatmeal or vanilla bean yogurt for a fantastic morning crunch.
-
Package them in decorative glass jars tied with a ribbon to give out as impressive, homemade edible holiday gifts.
Storage & Reheating
Refrigerator
Candied nuts generally do not need to be refrigerated. In fact, the humidity inside a refrigerator can sometimes cause the crystallized sugar coating to become sticky and weep. It is best to avoid the fridge entirely.
Room Temperature
Once the peanuts are completely cool and dry, transfer them to an airtight container or a heavy-duty zip-top bag. Store them in a cool, dry place in your pantry. They will remain wonderfully crisp and fresh for up to two weeks.
Freezer
If you want to make a massive batch for later, you can freeze candied peanuts. Place the completely cooled nuts into a freezer-safe bag, squeeze out all the air, and freeze for up to three months. Let them thaw at room temperature on the counter before eating.
Frequently Asked Questions
Why did my maple syrup burn instead of crystallizing?
Burning usually happens if the heat is turned up slightly too high or if you stop stirring. It is crucial to keep the heat at 3/4 high and stir constantly so the sugars cook evenly as the water evaporates.
Can I use a regular stainless steel skillet?
While it is technically possible, a nonstick pan is highly recommended. Stainless steel can cause the caramelizing sugars to stick aggressively to the pan, requiring a lot of elbow grease to clean later.
Should I use raw or roasted peanuts?
Roasted peanuts are best for this quick 10-minute method. Raw peanuts require a much longer cooking time to lose their raw, starchy flavor, and the maple syrup would burn before raw nuts had a chance to roast through properly.
What does “stringiness” in the sugar mean?
As the water evaporates from the syrup, the sugar concentration gets higher. When it reaches the sticky phase, pulling your spatula through the mixture will create thin, visible webs or “strings” of melted sugar stretching between the nuts.
Do I have to stir them while they cool?
Yes, stirring constantly off the heat until they are cool is what keeps the peanuts separated. If you just leave them to cool undisturbed in the pan, the sugar will harden them into a solid block.
Final Thoughts
Making candied nuts from scratch has never been more approachable. With just a bottle of pure maple syrup, a bag of peanuts, and ten minutes of stirring, you can produce a sweet, crunchy snack that tastes incredibly gourmet. The fascinating process of watching the syrup bubble down into a crystallized coating makes this recipe as fun to cook as it is to eat. Grab your favorite nonstick pan and treat yourself to a batch today!
10-Minute Candied Maple Peanuts
Ingredients
- 12 oz peanuts
- 2/3 cup pure maple syrup
Instructions
- Place a nonstick pan on the stove and add the 2/3 cup of maple syrup.
- Dump the 12 oz of peanuts into the pan and begin stirring to coat them.
- Increase the heat to 3/4 high (medium-high) and stir constantly as the mixture begins to boil.
- Continue stirring constantly as the consistency changes from watery, to thick, to sticky.
- Watch closely as you see stringiness happening in the sugars, finally culminating in the sugar lightly forming a crystallized coating on the nuts.
- Immediately remove the pan from the heat.
- Stir constantly off the heat until the peanuts are completely cool to prevent them from sticking together.
Notes