Giant Bakery Style Chocolate Chip Cookies
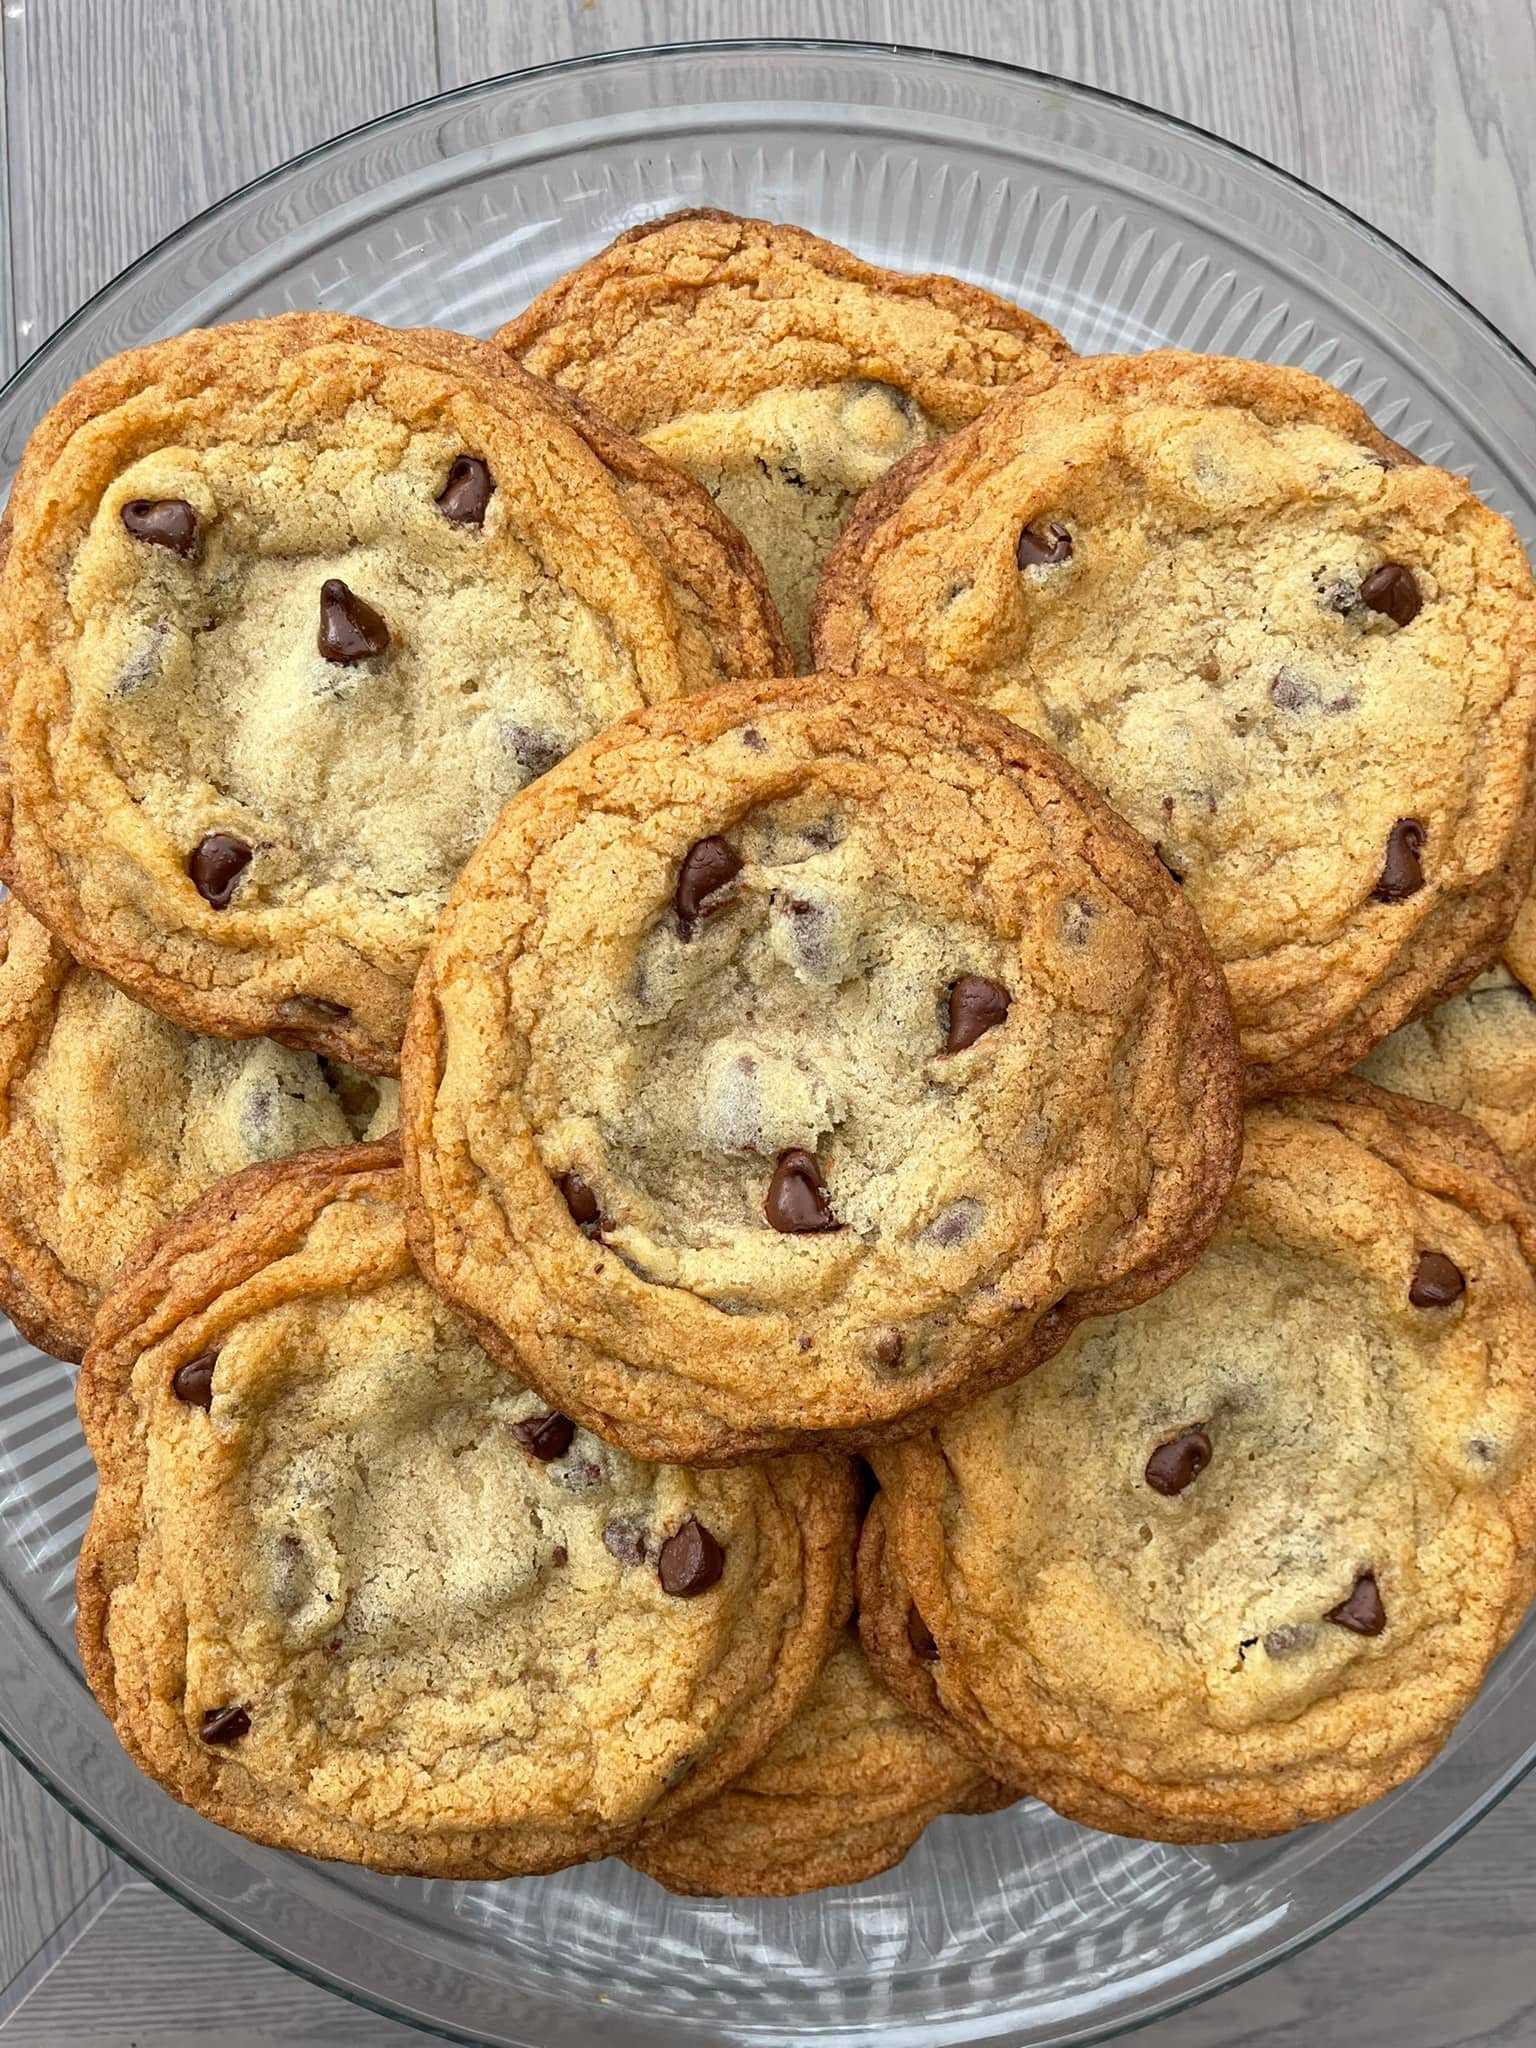
Creating the ultimate homemade treat is all about nailing the perfect texture and flavor. These bakery style chocolate chip cookies deliver exactly that, boasting perfectly crisp edges, a delightfully chewy middle ring, and an incredibly soft center. The secret to their rich flavor, which tastes remarkably like caramel butter dotted with chocolate, lies entirely in the precise ratio of butter and brown sugar to flour. It is a ratio that many home bakers struggle to get right, but this specific balance guarantees a flawless result every single time.
This formula is inspired by a legendary Martha Stewart recipe published over twenty years ago, originally known as Alexis’ Favorite Chocolate Chip Cookies. While the original instructions produced a massive quantity of enormous cookies, this updated version halves the ingredient list so you only need two sticks of butter. They make the absolute perfect after-school snack, filling the house with an irresistible aroma right before the kids walk through the door. With their giant size and deeply caramelized flavor profile, these cookies will have everyone wondering how a homemade treat can taste this spectacular.
Why You’ll Love This Recipe
-
The clever ratio of brown sugar and butter to flour creates a luxurious, caramel-forward flavor.
-
It produces huge, impressive portions by utilizing a full one-quarter cup ice cream scoop for each dough ball.
-
You do not need to dirty a separate bowl to whisk the dry ingredients together, saving you cleanup time.
-
The recipe is perfectly scaled down from a massive original batch to a manageable size utilizing just two sticks of butter.
-
It yields exactly 16 enormous cookies, providing plenty to share or save for later.
-
The strategic baking method—turning the pan halfway through—ensures an incredibly even, golden bake.
Ingredients
-
2 sticks salted butter, softened to room temperature
-
1 1/2 cups light brown sugar, packed
-
1/2 cup granulated sugar
-
2 large eggs
-
1 tsp vanilla extract
-
1 3/4 cups all-purpose flour
-
3/4 tsp salt
-
1 tsp baking soda (ensure it is free of lumps)
-
1 1/2 cups chocolate chips
Step-by-Step Instructions
Step 1: Cream the Butter and Sugars
Using either a standing mixer or an electric hand mixer, whip the softened salted butter together with the light brown sugar and granulated sugar. Continue to beat the mixture until it becomes exceptionally light and fluffy. Be sure to use a rubber spatula to scrape down the sides of the bowl frequently to ensure everything is evenly incorporated.
Step 2: Incorporate the Wet Ingredients
Once the butter and sugars are perfectly creamed, throw the eggs and the vanilla extract into the bowl. Blend the mixture on a medium speed just until the wet ingredients are fully combined into the sweet butter base.
Step 3: Mix in the Dry Ingredients
Throw the flour, salt, and baking soda directly into the mixing bowl. There is no need to stir these dry ingredients together in a separate bowl beforehand, provided your baking soda does not have any hard lumps in it. Mix the dough on a low speed until the dry ingredients are just combined, then gently stir in the chocolate chips.
Step 4: Scoop and Chill the Dough
Grab a real 1/4-cup ice cream scooper—avoid using tiny cookie scoops for this recipe—and portion out large balls of dough. Place the scooped dough portions into a baking dish that has been lightly sprayed with non-stick baking spray. Cover the dish tightly with plastic wrap, press down on the dough balls with your hand to flatten the tops slightly, and place them in the refrigerator to chill for at least one hour.
Step 5: Prep the Oven and Pans
When you are ready to bake, preheat your oven to 375 degrees Fahrenheit. Line a baking sheet with parchment paper, which is a fantastic investment that makes the baking and cleanup process incredibly easy.
Step 6: Bake to Perfection
Arrange the chilled dough portions on your parchment-lined baking sheet, making sure to leave about three inches of space between each cookie to allow for spreading. For a beautiful, professional appearance, press a couple of extra chocolate chips directly into the top of the raw dough. Bake the cookies for exactly 7 minutes, carefully turn the baking sheet around in the oven, and bake for another 7 minutes.
Step 7: Cool and Serve
Remove the baking sheet from the oven and allow the cookies to cool directly on the hot pan for 5 minutes. After they have set up slightly, transfer them to a wire cooling rack. Utilizing two different cookie sheets in rotation will help you bake the entire batch of 16 huge cookies efficiently.
Expert Cooking Tips
-
Never skip the chilling step for this dough. Resting the dough in the refrigerator is vital for achieving the perfect texture and preventing the cookies from spreading into thin puddles.
-
Mixing the dough in the morning and letting it hang out in the fridge allows you to simply pop them in the oven right before you need them.
-
Always ensure your baking soda is completely smooth before adding it; lumpy baking soda will create unpleasant, bitter pockets in the finished bake.
-
Pressing extra chocolate chips into the top of the chilled dough right before baking is the ultimate secret to achieving that picture-perfect bakery look.
-
Rotating the pan halfway through the 14-minute total baking time compensates for hot spots in your oven, ensuring an even, golden edge on every single cookie.
Variations to Try
-
Swap half of the semi-sweet chocolate chips for milk chocolate or dark chocolate chunks to create a more complex, layered flavor profile.
-
Add half a cup of toasted, chopped walnuts or pecans to the dough for a satisfying crunch that beautifully complements the caramel notes of the brown sugar.
-
Sprinkle a tiny pinch of flaky sea salt over the top of the warm cookies the moment they emerge from the oven to enhance the contrast between sweet and salty.
What to Serve With Bakery Style Chocolate Chip Cookies
-
A tall, ice-cold glass of whole milk for dipping, highlighting the nostalgic after-school snack experience.
-
A freshly brewed cup of black coffee or an iced vanilla latte to balance out the deep sweetness of the brown sugar dough.
-
A generous scoop of premium vanilla bean ice cream sandwiched between two warm cookies for an unforgettable homemade dessert.
Storage & Reheating
Refrigerator
You can store unbaked, pre-scooped cookie dough portions in an airtight container in the refrigerator for up to three days. This actually deepens the caramel flavor of the dough. Baked cookies can also be kept at room temperature in a sealed container for up to four days.
Freezer
Flash freeze unbaked dough balls on a baking sheet until solid, then transfer them to a heavy-duty freezer bag for up to three months. You can bake them directly from frozen, though you may need to add one or two extra minutes to the total baking time.
Reheating
To recapture that gooey, straight-from-the-oven texture, place a baked cookie on a microwave-safe plate and warm it for about 10 to 15 seconds. The chocolate chips will soften beautifully, and the buttery aroma will instantly return.
Frequently Asked Questions
Why do I have to use an ice cream scoop?
Using a standard 1/4-cup ice cream scoop is essential because it portions the dough into the massive sizes required to achieve the distinct bakery-style texture—crisp on the outside and soft on the inside.
Can I skip chilling the dough if I am in a hurry?
No, you should not skip the chilling step. Chilling the dough solidifies the butter and hydrates the flour, which is incredibly important for getting the perfect, thick cookie structure rather than a flat, greasy disc.
Do I really need to use two different cookie sheets?
Having two cookie sheets in rotation helps streamline the process significantly. It prevents you from placing cold dough onto a screaming-hot baking sheet, which can cause the butter to melt prematurely and ruin the cookies’ shape.
Why do I have to rotate the pan while baking?
Turning the baking sheet around at the 7-minute mark ensures that all the cookies bake evenly, regardless of where your oven’s specific hot and cold spots might be located.
Can I make the dough the night before?
Absolutely. You can whip up the dough, scoop it into portions, press them slightly flat, and cover the dish tightly with plastic wrap to chill overnight in the refrigerator. This long chill time will only improve the final flavor.
Final Thoughts
Baking a batch of incredibly thick, chewy, and caramel-scented cookies at home does not have to be complicated. By trusting this proven ingredient ratio and respecting the chilling process, you will easily produce spectacular treats that rival any upscale bakery window. Grab your mixing bowls and some butter, and enjoy the magical aroma of fresh cookies filling your kitchen today!

Giant Bakery Style Chocolate Chip Cookies
Ingredients
- 2 sticks salted butter softened
- 1 1/2 cups light brown sugar
- 1/2 cup sugar
- 2 eggs
- 1 tsp vanilla extract
- 1 3/4 cups flour
- 3/4 tsp salt
- 1 tsp baking soda
- 1 1/2 cups chocolate chips
Instructions
- Use an electric or standing mixer to whip up the butter and sugars until light and fluffy, scraping down the bowl with a rubber spatula frequently.
- Throw in the eggs and vanilla and blend until combined.
- Throw in the flour, salt, and baking soda (ensure baking soda is not lumpy) and mix until just combined.
- Stir in the chocolate chips.
- Use a 1/4-cup ice cream scoop to portion balls of dough, placing them in a baking dish sprayed with non-stick baking spray.
- Cover with plastic wrap and press down with your hand to flatten them just a bit on top. Allow to chill for at least 1 hour.
- Preheat the oven to 375 degrees and place parchment paper on a baking sheet.
- Place the chilled dough portions on the parchment leaving 3 inches of space between each. Press a couple of extra chocolate chips into the top of the dough.
- Bake for 7 minutes, turn the baking sheet around, and bake another 7 minutes.
- Allow cookies to cool on the baking sheet for 5 minutes before removing to a cooling rack. Notes:
- Do not skip the 1-hour chilling step; it is vital for the perfect texture.
- Having two cookie sheets in rotation helps speed up the baking process.
Notes