Upside-Down Cast Iron Mini Pizzas
The Brilliant Hack for a Perfect Pizza Crust
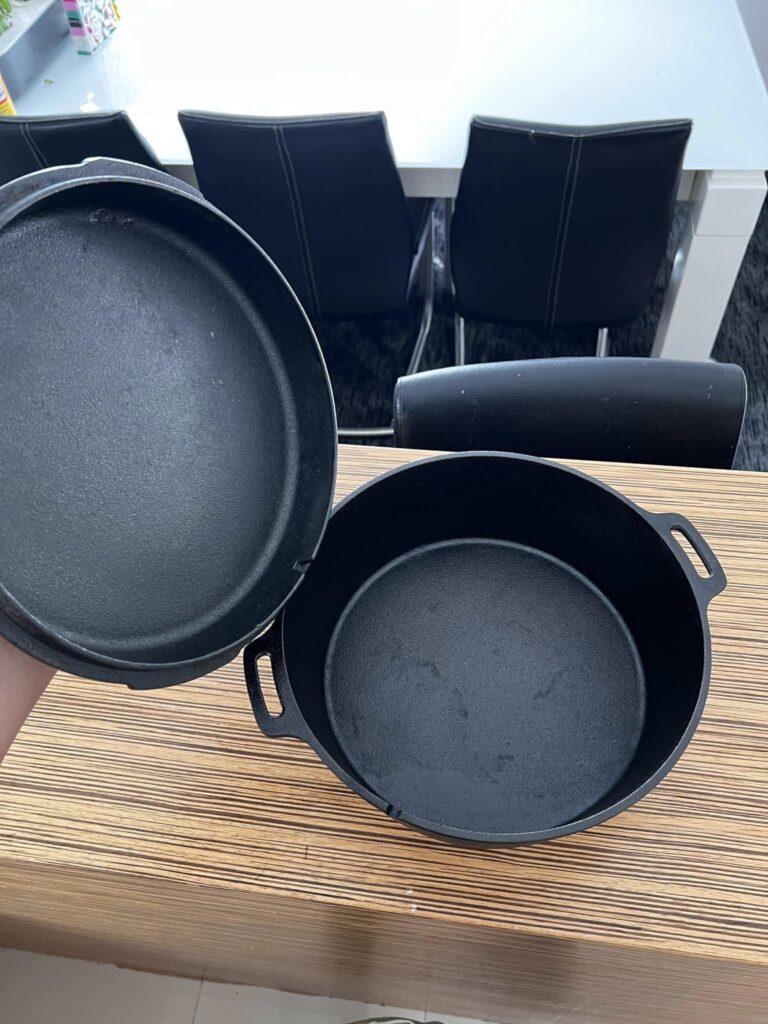
There is a very loud, very passionate community of cast iron enthusiasts who will tell you there is only one correct way to care for and use a vintage pan. They talk about sanding down the iron, building fifty layers of flaxseed oil seasoning, and exclusively cooking bacon in them to achieve a glass-like, non-stick finish. But here is the truth: sometimes the absolute best way to use a passed-down, slightly rusty, improperly seasoned cast iron skillet is to turn it completely upside down and use it as a makeshift pizza stone!
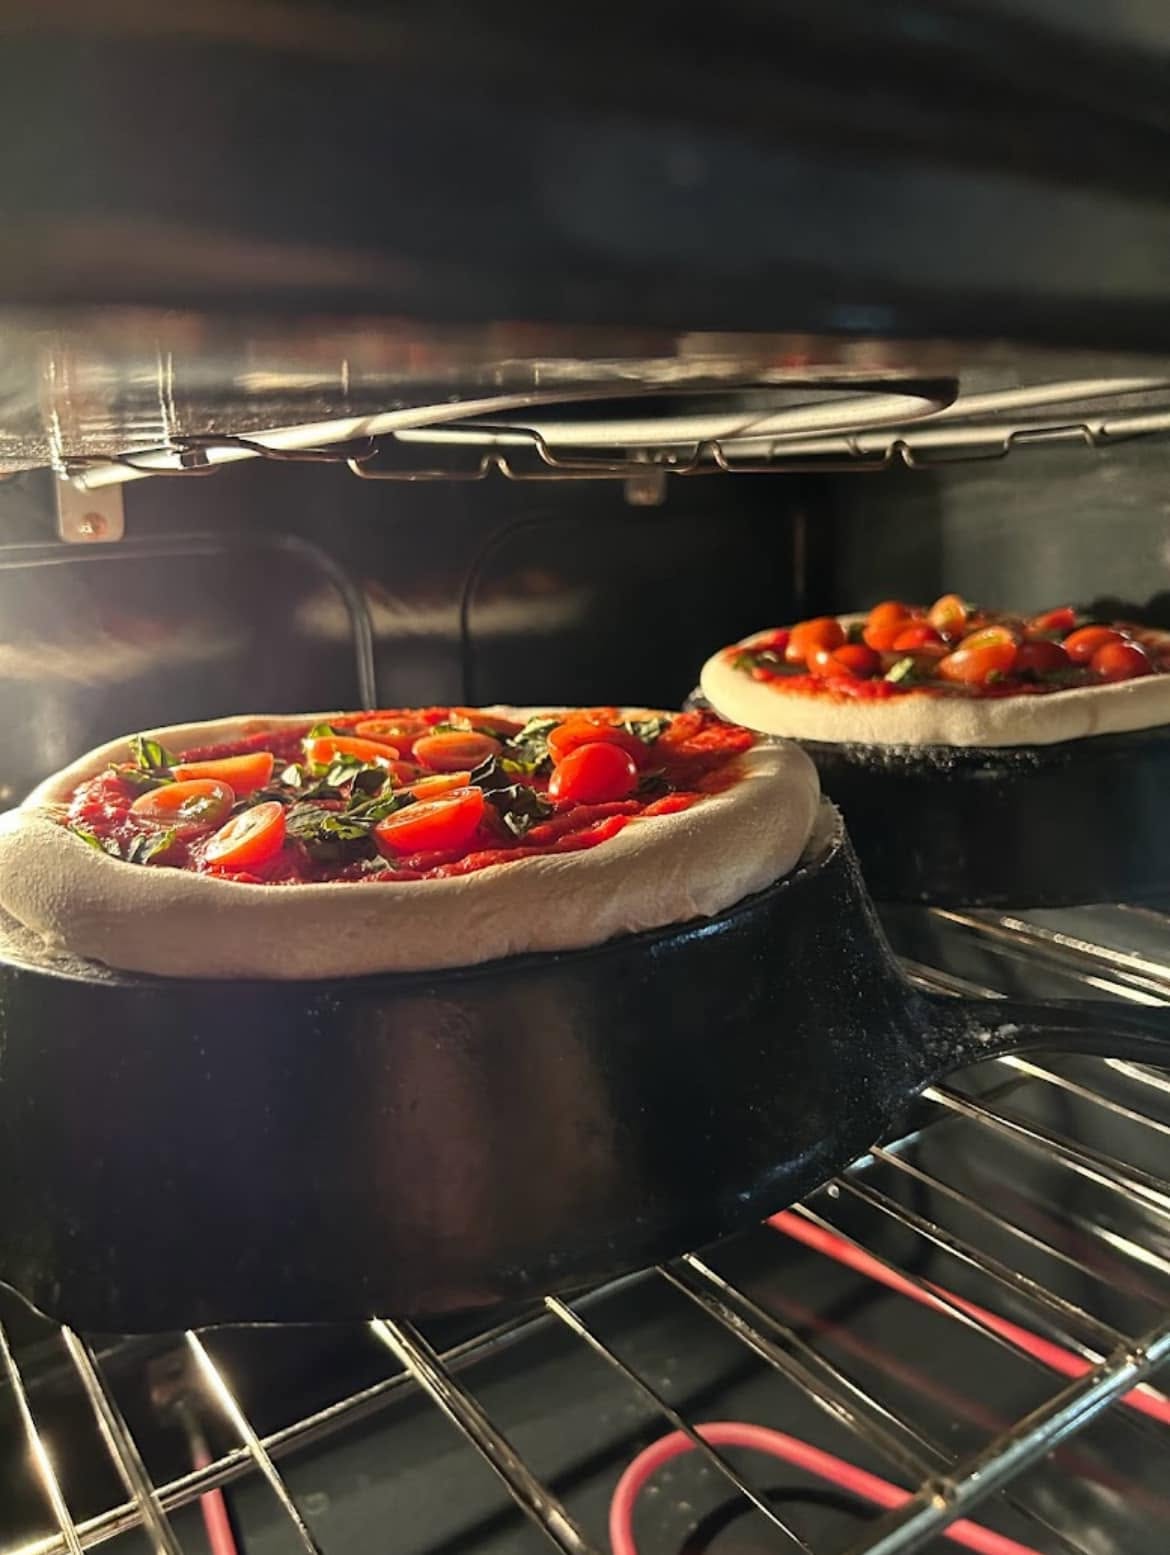
If you have a collection of vintage pans—perhaps a classic Wagner skillet or a heavy family heirloom—that has never been touched by a grinder and might honestly make your ancestors cringe, do not hide them away. Those thick, heavy pieces of iron absorb and retain massive amounts of heat. When you slide a raw pizza dough directly onto that screaming hot, flat metal surface, the bottom of the crust immediately begins to fry and crisp up. It perfectly mimics the blistering effects of a professional brick pizza oven right in your home kitchen.
This recipe makes perfect, personal-sized mini pizzas featuring a simple but incredibly flavorful Margherita topping. It is a fantastic, fuss-free dinner that proves you do not need expensive ceramic stones or a flawless seasoning layer to create incredible food. Let the cast iron purists scoff at your unconventional methods; you will be too busy enjoying a perfectly crispy, leopard-spotted pizza crust to care!
Why You’ll Love This Recipe
- Genius Equipment Hack: Turning your cast iron skillets upside down creates the perfect, flat, heavy baking surface, eliminating the need to ever buy a specialty pizza stone.
- Incredible Crust Texture: The massive heat retention of the iron guarantees a crispy, leopard-spotted bottom crust that standard aluminum baking sheets simply cannot achieve.
- Personal Sized Portions: Using the bottom of a standard 10-inch or 12-inch skillet naturally portions the pizzas into perfect individual sizes so everyone can customize their own.
- Simple, Fresh Flavors: Topping the pizzas Margherita-style with fresh cherry tomatoes and basil allows the exceptional quality of the crust to truly shine.
- Fast Baking Time: Because the iron is preheated so hot, these mini pizzas bake incredibly fast, making for a fun and surprisingly quick weeknight dinner.
- Forgiving on Cookware: You do not need a perfectly seasoned pan for this to work. Even a slightly neglected, bacon-greaseless pan works wonderfully as a baking steel!
Ingredients
- Pizza Dough: 1 pound of store-bought or homemade pizza dough, divided into two equal portions. Let it rest at room temperature so it stretches easily.
- Pizza Sauce: 1/2 cup of high-quality marinara or homemade pizza sauce.
- Mozzarella Cheese: 1 cup of freshly grated low-moisture mozzarella cheese, or torn pieces of fresh mozzarella.
- Cherry Tomatoes: 1/2 cup of fresh cherry tomatoes, sliced in half.
- Fresh Basil: A handful of fresh basil leaves, roughly torn or left whole for garnish.
- Olive Oil: 1 tablespoon of olive oil for brushing the outer crust and preventing the dough from sticking to the skillet.
- Cornmeal: A generous dusting of cornmeal for your pizza peel (or a flat cutting board) to help the raw pizza slide effortlessly onto the hot iron.
Step-by-Step Instructions
Step 1: Preheat the Cast Iron “Pizza Stones”
Place your oven racks in the middle or upper-middle position. Take two cast iron skillets and place them completely upside down on the oven racks. Preheat your oven to its absolute highest setting—usually 500°F or 550°F (260°C – 290°C). Let the skillets heat in the oven for at least 45 minutes to an hour so the thick iron absorbs a massive amount of heat.
Step 2: Prepare and Stretch the Dough
While the skillets are preheating, take your divided pizza dough and let it rest at room temperature for about 30 minutes so the gluten relaxes. On a lightly floured surface, gently stretch or roll each portion of dough out into a small circle. Aim for roughly 8 to 10 inches in diameter, making sure they are small enough to fit completely on the flat bottom of your upside-down skillets.
Step 3: Top the Mini Pizzas
Dust a pizza peel (or the back of a flat baking sheet or cutting board) generously with cornmeal. Place one stretched dough circle onto the peel. Brush the outer edge of the crust lightly with olive oil. Spread a thin layer of pizza sauce over the dough, followed by a scattering of the mozzarella cheese and the halved cherry tomatoes.
Step 4: The Tricky Transfer
This is the most exciting part of the process! Open the hot oven. Carefully and confidently slide the raw, topped pizza directly from the peel onto the flat bottom of the upside-down, screaming hot cast iron skillet. Give the peel a quick, decisive jerk to release the dough. Repeat this process with the second pizza on the second skillet.
Step 5: Bake Fast and Hot
Close the oven door quickly to trap the intense heat. Bake the mini pizzas for about 8 to 12 minutes. Because ovens vary and the iron is so incredibly hot, you need to watch them closely. You are looking for the cheese to be melted and bubbling, and the outer crust to be puffed up and beautifully browned with some dark, crispy spots.
Step 6: Garnish and Serve
Use a metal spatula or your pizza peel to carefully slide the baked pizzas off the hot skillets and onto a cutting board. Scatter the fresh basil leaves over the top of the hot pizzas immediately so the residual heat releases their sweet, aromatic oils. Slice into small wedges and serve immediately!
Expert Cooking Tips
- Use Cornmeal Generously: Do not skimp on the cornmeal when building your pizza on the peel. If the raw dough sticks to the peel when you try to slide it onto the hot skillet, your toppings will slide off and create a massive, smoky mess in the oven.
- Do Not Overload the Toppings: Mini pizzas have a delicate structure. If you pile on too much heavy sauce or wet toppings, the center of the dough will become soggy and it will be very difficult to slide onto the skillet.
- Let the Dough Rest: If your pizza dough keeps shrinking back into a small, tight ball when you try to stretch it, the gluten is overworked. Cover it with a damp towel and let it rest for 15 more minutes before trying again.
- Clean the Bottoms First: Before you try this hack, make sure the actual bottoms of your cast iron skillets are relatively clean and free of heavy soot or flaking rust, since your food will be touching that surface directly! A quick scrub before preheating is always a good idea.
- Give the Peel a Shimmy: Right before you open the oven door to transfer the pizza, give your peel a gentle shimmy back and forth. If the dough moves freely, you are ready to slide. If it sticks, gently lift the edge and toss a little more cornmeal underneath.
Variations to Try
- Garlic White Pizza: Skip the tomato sauce and use a base of whole milk ricotta cheese mixed with a little minced garlic and olive oil. Top with mozzarella and dollops of vibrant green pesto.
- Spicy Hot Honey Pepperoni: Load the mini pizzas up with small, cup-and-char pepperoni slices. Give the pizzas a heavy drizzle of spicy hot honey right after they come out of the oven for a sweet and savory kick.
- The Brunch Pizza: Top the raw dough with a light brush of olive oil, shredded cheddar cheese, cooked bacon crumbles, and crack a raw egg directly into the center right before sliding it into the oven.
What to Serve With Mini Pizzas
Because these upside-down skillet pizzas are personal-sized and bake so quickly, they are perfect for a casual family pizza night. Serve them alongside a massive, crunchy Italian chopped salad loaded with pepperoncini, red onions, and a sharp, acidic vinaigrette. The bright, tangy salad is the perfect contrast to cut through the heavy, rich cheese and thick bread.
Storage & Reheating
Refrigerator
Allow any leftover pizza slices to cool completely to room temperature. Store them in an airtight container or wrapped tightly in heavy-duty aluminum foil in the refrigerator. They will stay fresh for up to 4 days.
Freezer
You can easily freeze baked pizza slices for quick future meals! Wrap individual slices very tightly in plastic wrap and place them in a zip-top freezer bag for up to 2 months. You can also freeze tight balls of raw pizza dough to have on hand for future impromptu pizza nights.
Reheating
Never microwave leftover pizza if you want to keep that beautiful crust crispy! To reheat, place the slices directly on the center oven rack or on a baking sheet in a 350°F (175°C) oven for about 10 minutes, just until the cheese is melted and the crust is re-crisped. You can also quickly reheat slices in an air fryer at 350°F for 3 to 4 minutes.
Frequently Asked Questions
Will this ruin the seasoning on my cast iron skillet?
No, baking pizza on the bottom of the skillet will not ruin your seasoning, especially if you are using it in a very hot oven. The intense dry heat might make the iron look a little dull or ashy afterward, but a quick rub with a tiny drop of cooking oil will immediately restore it.
Why do I need to turn the skillet upside down?
If you put the pizza inside the skillet in the traditional way, the high side walls of the pan make it incredibly difficult to slide a raw, topped pizza in from a peel without ruining the shape. Turning it upside down gives you a completely flat, elevated surface that is easy to slide dough onto and scoop it off of.
Can I do this with a regular aluminum baking sheet?
While you can technically bake pizza on an upside-down baking sheet, it will not yield the same blistered results. Cast iron is incredibly thick and dense, meaning it holds onto heat much better than thin aluminum. That massive heat retention is what creates the instant “fry” on the bottom of the pizza crust.
Do I have to preheat the skillet for that long?
Yes! This is the most crucial step of the entire recipe. If you put raw dough onto a cold cast iron skillet and put it in the oven, the dough will heat up slowly, resulting in a pale, soft, and potentially soggy bottom crust. The iron must be screaming hot before the dough touches it.
Can I use store-bought pizza dough?
Absolutely. Store-bought pizza dough from the bakery section of your local grocery store works wonderfully for this hack. Just remember to let it sit on the counter for at least 30 minutes before trying to stretch it out.
Final Thoughts
Who says you need fancy, expensive culinary equipment to make incredible food at home? Utilizing the bottom of an upside-down cast iron skillet as a makeshift pizza stone is a stroke of rebellious, practical genius. It delivers a phenomenally crispy, blistered crust that easily rivals your favorite local wood-fired pizzeria. So grab those passed-down, less-than-perfect vintage pans, crank up the oven, and enjoy the best homemade mini pizzas you have ever made!

Upside-Down Cast Iron Mini Pizzas
A genius kitchen hack! Use the bottom of an upside-down, preheated cast iron skillet as a makeshift pizza stone for perfectly crispy, personal-sized Margherita pizzas.
Equipment
- 2 Cast Iron Skillets (10-inch or 12-inch)
- Pizza peel or flat cutting board
- Metal spatula
Ingredients
- 1 lb pizza dough store-bought or homemade, divided in half
- 1/2 cup pizza sauce or marinara
- 1 cup shredded mozzarella cheese
- 1/2 cup cherry tomatoes halved
- 1 handful fresh basil leaves roughly torn
- 1 tbsp olive oil
- Cornmeal for dusting the peel
Instructions
- Place two cast iron skillets completely upside down on the middle racks of your oven. Preheat the oven to its highest setting (500°F - 550°F). Let the skillets preheat for 45 to 60 minutes.
- Let the divided pizza dough rest at room temperature for 30 minutes to relax the gluten.
- On a lightly floured surface, gently stretch or roll each dough portion into an 8 to 10-inch circle.
- Dust a pizza peel generously with cornmeal. Place one stretched dough circle onto the peel.
- Brush the crust edges with a little olive oil. Spread half the pizza sauce over the dough, and top with half the mozzarella and half the cherry tomatoes.
- Open the oven and carefully slide the topped pizza directly onto the flat, hot bottom of the upside-down skillet. Repeat with the second pizza on the other skillet.
- Bake for 8 to 12 minutes, or until the cheese is bubbling and the crust is golden and puffed.
- Remove the pizzas carefully using a spatula or peel. Immediately top with the fresh basil leaves. Slice and serve hot!
Notes
Pan Prep: Ensure the bottoms of your skillets are clean and free of loose debris before preheating, as your food will touch them directly. Sliding Tip: Give the pizza peel a gentle horizontal shake before transferring to the oven to ensure the dough isn't sticking. If it is, lift the edge and toss a little more cornmeal underneath.