Chewy Holiday M&M Christmas Cookie Bars
The Easiest, Most Decadent Holiday Dessert
The holiday season is incredibly busy, and sometimes you simply do not have the time or energy to chill dough, roll it out, and use cookie cutters. When you are craving that classic, comforting bakery flavor but need a shortcut, these festive Christmas cookie bars are the absolute perfect solution. They deliver everything you love about a premium chocolate chip cookie—crispy edges, a soft and chewy center, and a rich buttery flavor—but baked effortlessly in a single pan.
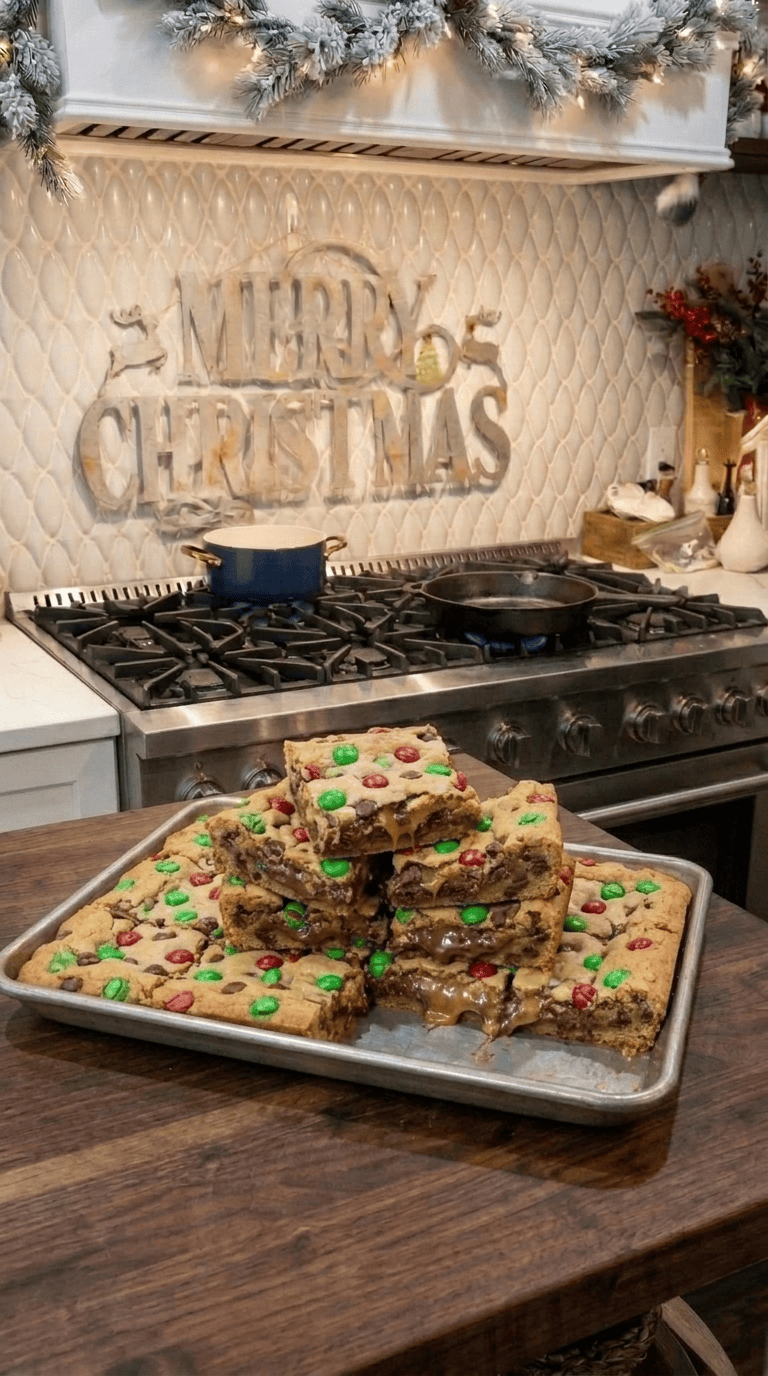
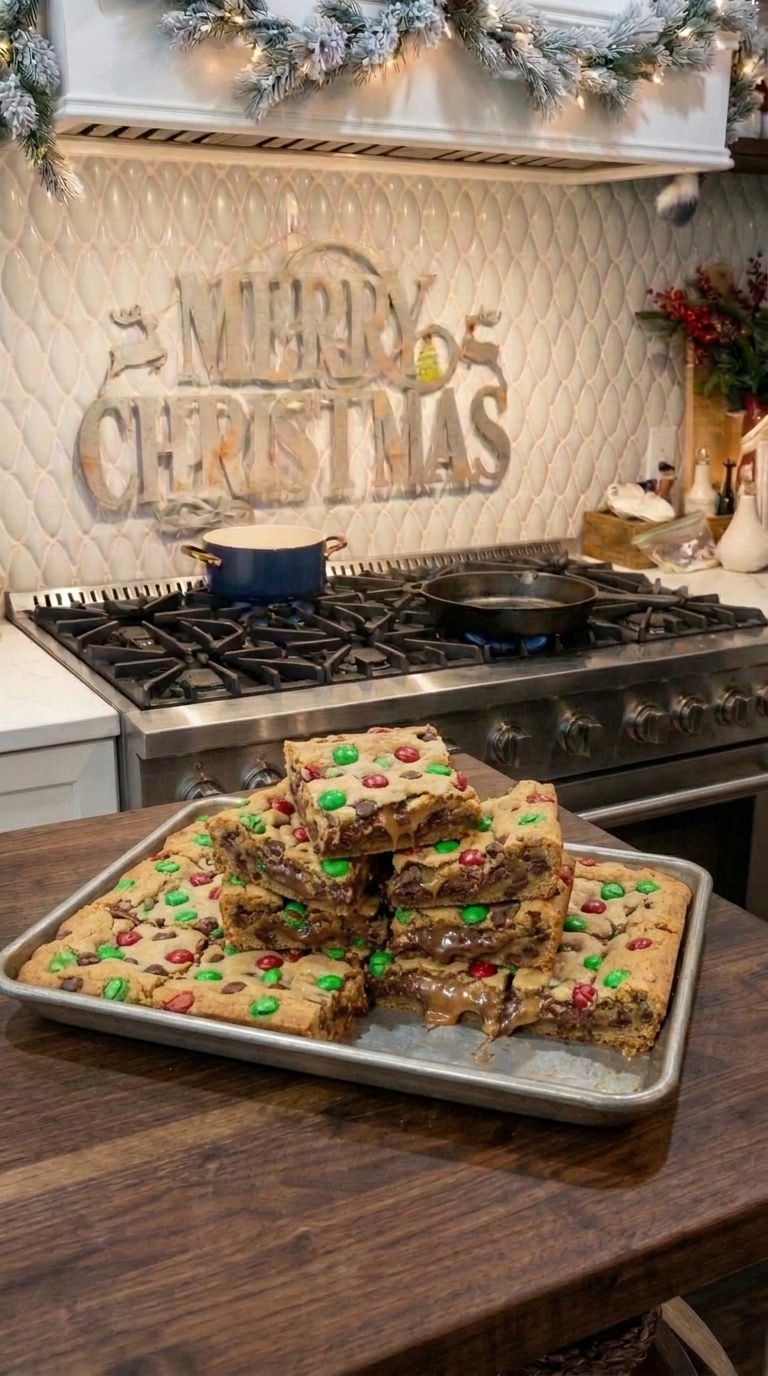
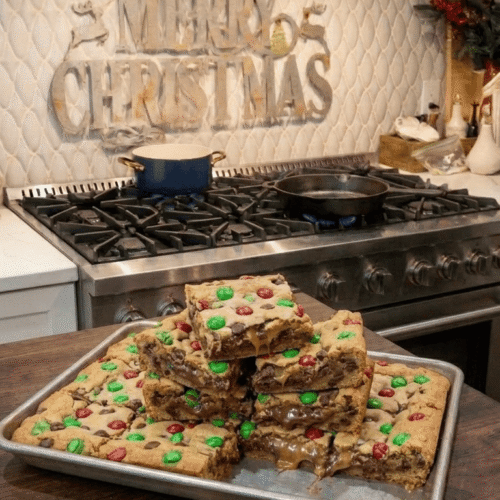
What makes these bars truly spectacular is their incredibly gooey, dense texture. By using melted butter and an extra egg yolk in the dough, you bypass the cakey texture that plagues many bar recipes and achieve a deeply fudgy, brownie-like chewiness. Loaded with vibrant red and green holiday M&Ms and sweet chocolate chips, they immediately bring festive cheer to any dessert table.
Because they bake up in a standard 9×13 pan, you can easily slice them into thick squares to feed a crowd. They are sturdy enough to stack high on a platter or package into cellophane bags for neighborhood gifts. Whether you need a last-minute contribution to a holiday potluck or just want a cozy weekend baking project with the kids, these incredibly easy blondie-style bars will be a massive hit.
Why You’ll Love This Recipe
-
No chilling required: You can mix the dough and pop it straight into the oven, saving you hours of waiting around.
-
Incredibly chewy texture: The combination of melted butter and an extra egg yolk guarantees a dense, gooey center that stays soft for days.
-
Festive and fun: Bright holiday M&Ms make these bars look visually stunning with zero decorating effort required.
-
Feeds a crowd: One pan easily yields 16 generous, thick squares, making it perfect for holiday parties.
-
Kid-friendly baking: There is no need for a stand mixer, and children will love helping press the extra candies into the top of the dough.
-
Easy cleanup: Mixing the dough requires just one large bowl and a whisk, keeping your kitchen sink free of clutter.
Ingredients
-
Unsalted butter: You will melt the butter and let it cool slightly. This provides a rich flavor and ensures the bars are dense and chewy rather than light and cakey.
-
Brown sugar: Make sure it is packed tightly into your measuring cup. The molasses in the brown sugar creates a soft texture and a deep, caramelized flavor.
-
Granulated white sugar: Balances the brown sugar and helps create those coveted, slightly crisp outer edges.
-
Large egg + egg yolk: One whole egg binds the dough, while the extra yolk adds essential fat for a richer, fudgier center. Ensure they are at room temperature.
-
Vanilla extract: A generous tablespoon enhances the buttery dough and highlights the chocolate mix-ins.
-
All-purpose flour: The structural foundation of the bars. Spoon and level your flour to avoid a dry dough.
-
Baking soda: Gives the bars just enough lift so they bake evenly without becoming too puffy.
-
Salt: A crucial pinch to cut through the sweetness of the candies and sugar.
-
Red and green holiday M&Ms: The star of the show, bringing that essential holiday color and a wonderful candy crunch.
-
Semi-sweet chocolate chips: Offers a slightly bitter, rich contrast to the sweet milk chocolate M&Ms.
Step-by-Step Instructions
Step 1: Prep the Oven and Pan
Begin by preheating your oven to 350°F (175°C). Take a standard 9×13-inch rectangular baking pan and line it with parchment paper. Make sure to leave a few inches of parchment hanging over the long sides of the pan. This creates a sling that will allow you to lift the entire block of cookie bars out of the pan later, ensuring perfectly clean slices.
Step 2: Mix the Wet Ingredients
In a large mixing bowl, pour in your melted (and slightly cooled) unsalted butter, the packed brown sugar, and the granulated white sugar. Use a wire whisk to beat them together vigorously until the mixture looks completely smooth, glossy, and well combined. There should be no hard lumps of brown sugar remaining.
Step 3: Incorporate the Eggs and Vanilla
To your butter and sugar mixture, add the room-temperature whole egg, the extra egg yolk, and the tablespoon of vanilla extract. Whisk everything together for about one minute. The batter will lighten slightly in color and become beautifully smooth and emulsified.
Step 4: Fold in the Dry Ingredients
Put your whisk aside and grab a sturdy rubber spatula. Add the all-purpose flour, baking soda, and salt directly into the wet ingredients. Gently fold the mixture together. Stop mixing the exact moment the white streaks of flour disappear. If you overmix the dough, you will develop the gluten, resulting in tough bars instead of tender ones.
Step 5: Add the Festive Mix-Ins
Pour ½ cup of the holiday M&Ms and ¾ cup of the semi-sweet chocolate chips into the bowl. Use your spatula to gently fold the candies into the soft dough until they are evenly distributed.
Step 6: Press into the Pan
Transfer the thick cookie dough into your prepared baking pan. Use your spatula or slightly damp hands to press the dough out into an even layer, ensuring it reaches all four corners. Take your remaining holiday M&Ms and chocolate chips and sprinkle them evenly across the top of the dough. Gently press them down just a bit so they adhere nicely as the bars bake.
Step 7: Bake and Cool
Place the pan in the preheated oven and bake for 22 to 25 minutes. You want to pull them out when the edges are a deep golden brown and pulling away slightly from the pan, but the center still looks a bit soft and set. Let the bars cool completely to room temperature inside the pan. Once entirely cooled, use the parchment overhang to lift the block out, place it on a cutting board, and slice into 16 squares.
Expert Cooking Tips
-
Cool the melted butter: If your melted butter is piping hot when you add the sugars and eggs, it can scramble the eggs or melt your chocolate chips prematurely. Let it sit for 10 minutes after melting.
-
Do not skip the extra yolk: That single extra egg yolk is the scientific secret to achieving a gooey, chewy, bakery-style texture.
-
Underbake slightly: To guarantee a soft center, pull the pan from the oven right at the 22-25 minute mark. The residual heat from the pan will finish baking the center as it cools on the counter.
-
Use the parchment sling: Never try to cut these bars directly in the pan. Lifting the entire cooled block onto a cutting board ensures you get sharp, bakery-worthy edges.
-
Wait to slice: If you cut into these bars while they are still warm, they will fall apart into a gooey mess. Be patient and wait for them to cool completely so they hold their shape.
Variations to Try
-
White Chocolate Macadamia: Swap the semi-sweet chips and M&Ms for white chocolate chips and roughly chopped, toasted macadamia nuts.
-
Peppermint Crunch: Use standard chocolate chips in the dough, but press crushed candy canes or peppermint crunch baking bits into the top before baking.
-
Brown Butter Base: Brown the butter in a saucepan first, let it cool back to room temperature, and proceed with the recipe for an incredibly deep, nutty, caramelized flavor.
-
Pretzel and Caramel: Fold half a cup of crushed pretzels into the dough and drizzle the baked, cooled bars with thick salted caramel sauce.
What to Serve With Christmas Cookie Bars
These thick, decadent squares are incredibly rich and demand a refreshing beverage. Pair them with:
-
A tall, ice-cold glass of whole milk.
-
A steaming mug of peppermint hot chocolate.
-
A fresh cup of dark roast coffee to balance the sweetness.
-
A scoop of vanilla bean ice cream served right over a slightly warmed bar.
Storage & Reheating
Refrigerator
You can store these cookie bars in an airtight container at room temperature for up to 5 days. They will stay incredibly soft and chewy thanks to the melted butter and brown sugar. If you prefer a firmer, dense texture, you can store them in the refrigerator for up to a week.
Freezer
These bars freeze beautifully! Slice the fully cooled block into squares, place them in a freezer-safe zip-top bag, and use wax paper to separate any layers. They will keep in the freezer for up to 3 months. Let them thaw on the kitchen counter for an hour before serving.
Reheating
To recreate that fresh-from-the-oven, gooey chocolate experience, place a single cookie bar on a microwave-safe plate and heat it for exactly 8 to 10 seconds.
Frequently Asked Questions
Can I make this in an 8×8 or 9×9 square pan?
This recipe is specifically scaled for a 9×13-inch pan to yield the perfect thickness. If you try to squeeze this amount of dough into a smaller square pan, the bars will be incredibly thick and the center will remain raw while the edges burn.
Why did my bars sink in the middle?
A slight dip in the center is normal for a chewy blondie-style bar, but if it sank dramatically, you likely underbaked them too much, or your baking soda is expired. Make sure your oven is fully preheated and you check that the center is set before pulling them out.
Can I use softened butter instead of melted butter?
You can, but it will completely change the texture of the bars. Creaming softened butter with sugar incorporates air, which will result in a puffier, lighter, more cake-like bar. Melted butter is crucial for that dense, chewy, brownie-like consistency.
Do I have to use holiday M&Ms?
Not at all! You can use standard M&Ms, peanut butter candies, butterscotch chips, or simply double the amount of chocolate chips if you prefer a classic chocolate chip cookie bar.
Can I make the dough ahead of time?
Yes. You can mix the dough, press it into your parchment-lined pan, cover it tightly with plastic wrap, and keep it in the refrigerator for up to 48 hours. You may need to add 2-3 extra minutes to the baking time if you are baking the pan straight from the fridge.
Final Thoughts
When the holiday rush is in full swing, having a reliable, incredibly easy dessert recipe in your back pocket is essential. These festive Christmas cookie bars deliver all the nostalgic, buttery flavor of your favorite cookies without any of the tedious rolling or chilling. With their undeniably chewy centers, crisp golden edges, and cheerful pops of red and green, they are guaranteed to disappear quickly from your holiday dessert spread. Grab your whisk and enjoy the easiest baking project of the season!
Christmas Cookie Bars
The easiest holiday dessert! These thick, chewy, brownie-like cookie bars are loaded with red and green M&Ms and chocolate chips. No chilling or rolling required!
Ingredients
- 3/4 cup Unsalted butter melted and slightly cooled
- 1 cup Brown sugar packed
- 1/2 cup Granulated white sugar
- 1 large Egg room temperature
- 1 large Egg yolk room temperature
- 1 tbsp Vanilla extract
- 2 1/4 cups All-purpose flour
- 1 tsp Baking soda
- 1/2 tsp Salt
- 1 cup Red and green holiday M&Ms divided
- 1 cup Semi-sweet chocolate chips divided
Instructions
- Preheat your oven to 350°F (175°C). Line a 9x13-inch baking pan with parchment paper, leaving an overhang on the sides for easy removal later.
- In a large mixing bowl, whisk together the melted (and slightly cooled) butter, packed brown sugar, and granulated white sugar until completely smooth.
- Whisk in the whole egg, the extra egg yolk, and the vanilla extract until well combined and the mixture lightens slightly.
- Use a rubber spatula to gently fold in the all-purpose flour, baking soda, and salt. Mix just until a soft dough forms and no dry streaks remain. Do not overmix.
- Fold in 1/2 cup of the holiday M&Ms and 3/4 cup of the semi-sweet chocolate chips.
- Transfer the dough into the prepared baking pan, pressing it out evenly to reach the corners.
- Sprinkle the remaining 1/2 cup of M&Ms and 1/4 cup of chocolate chips across the top of the dough, pressing them in slightly so they stick.
- Bake for 22-25 minutes, or until the edges are golden brown and the center is set.
- Let the bars cool completely to room temperature in the pan before using the parchment overhang to lift the block out. Cut into 16 squares and serve.
Notes
The Secret to Chewiness: Do not skip the extra egg yolk or substitute softened butter for the melted butter! These two elements guarantee a fudgy, dense center.
Cooling is Mandatory: Do not attempt to slice these bars while they are warm, or they will fall apart. Let them cool completely for clean, sharp edges.
Parchment Sling: Lining the pan with overhanging parchment paper is the best way to remove the bars smoothly without destroying the first piece.
Storage: Store in an airtight container at room temperature for up to 5 days, or freeze the sliced bars for up to 3 months.