Easy Mini Apple Pies (Baked in a Muffin Tin!)
The Ultimate Bite-Sized Comfort Dessert
There is absolutely nothing quite like the aroma of cinnamon-spiced apples and buttery pastry baking in the oven. A classic apple pie is a staple of traditional comfort food, but baking a massive pie from scratch, waiting hours for it to cool, and attempting to slice it neatly can sometimes feel like a daunting task. That is exactly why these brilliant mini apple pies are an absolute game-changer for your dessert rotation. By utilizing a standard muffin tin, you get perfectly portioned, individual pies that look incredibly impressive with a fraction of the effort.
The secret to this simple recipe is pre-cooking the apple filling on the stove. Sautéing the diced apples in butter, brown sugar, and warm cinnamon ensures the filling is perfectly tender and bursting with concentrated flavor before it ever hits the oven. By combining this rich, gooey filling with the brilliant shortcut of refrigerated pie dough, you eliminate the hassle of rolling out homemade pastry from scratch.
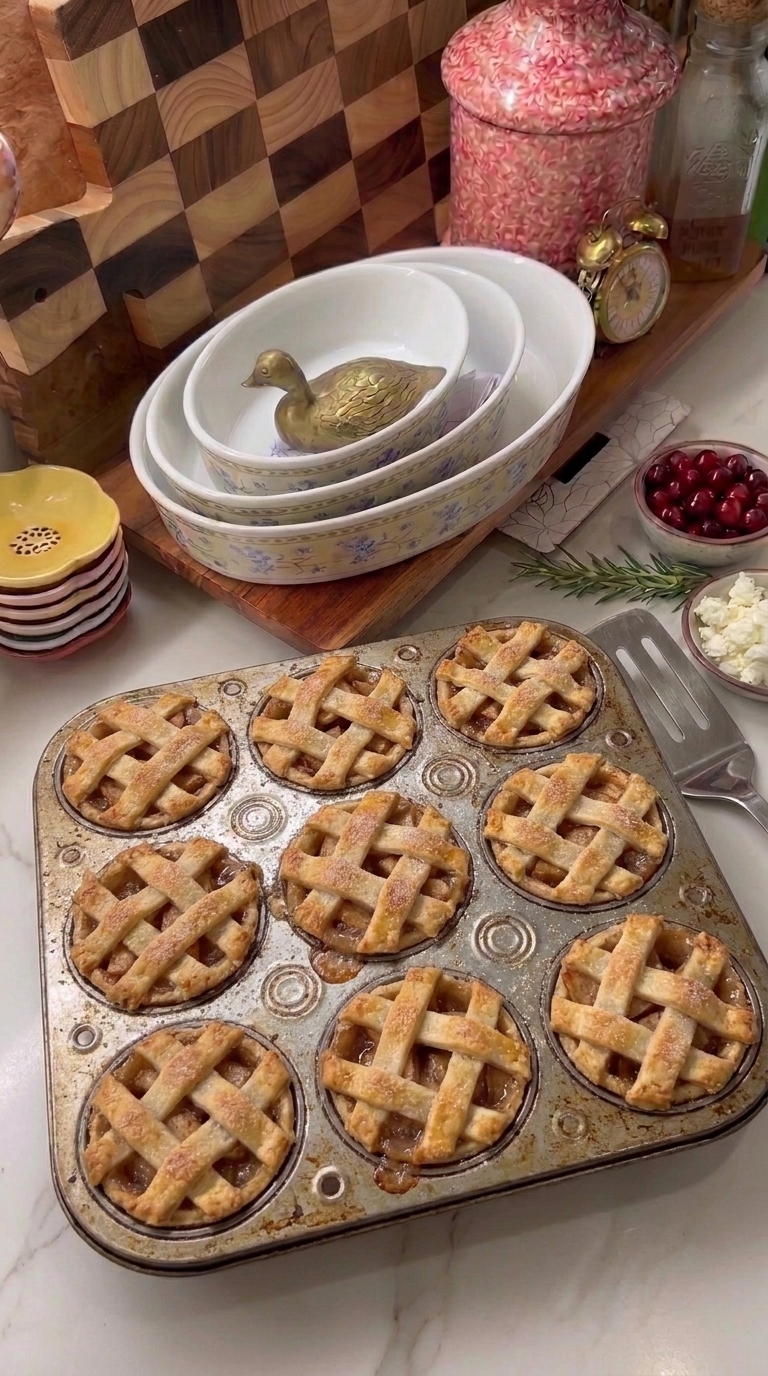
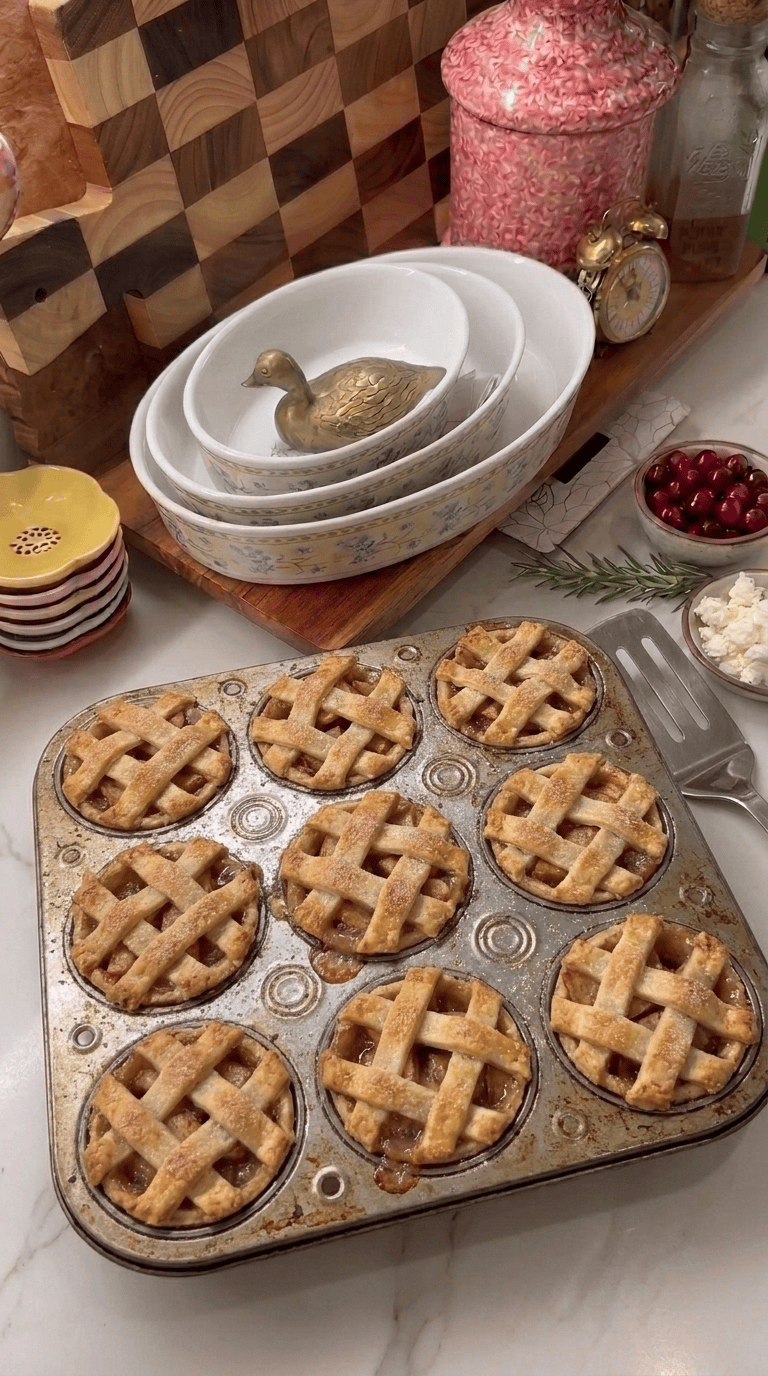
Whenever I pull a warm muffin tin full of these golden, bubbly mini pies out of the oven, my husband and daughter absolutely devour them. They are the perfect grab-and-go treat for autumn gatherings, holiday dessert tables, or a cozy Sunday afternoon. Plus, the beautiful little lattice tops make them look like they came straight out of a professional bakery!
Why You’ll Love This Recipe
-
Perfectly Portioned: Baking them in a muffin tin means everyone gets their own individual pie. No messy slicing or crumbling crusts to worry about!
-
Incredible Crust-to-Filling Ratio: If you love the flaky, buttery crust of a pie, these mini versions provide the ultimate balance in every single bite.
-
Brilliant Shortcuts: Using pre-made refrigerated pie dough saves you a tremendous amount of time and cleanup, making this an easy weeknight possibility.
-
No Soggy Bottoms: Pre-cooking the apple filling reduces excess moisture, ensuring your bottom crust bakes up perfectly crisp and golden.
-
Absolutely Adorable: The woven lattice tops give these bite-sized treats a stunning, rustic, bakery-style presentation.
Ingredients
-
Refrigerated Pie Crusts: You will need two standard boxes, which should give you 4 individual pie crusts in total. You need enough dough to cut out 12 solid bottom crusts and 12 lattice tops.
-
Fresh Apples: Three large apples, peeled and finely diced. Granny Smith and Honeycrisp are the best choices because they hold their shape beautifully when cooked and balance the sweet sugar with a slight tartness.
-
Brown Sugar: A third of a cup of packed brown sugar adds a deep, rich molasses flavor that pairs perfectly with the fruit.
-
Ground Cinnamon: One teaspoon of ground cinnamon provides that signature, warming, aromatic spice.
-
Unsalted Butter: One tablespoon of unsalted butter to sauté the apples, creating a rich, glossy sauce in the skillet.
-
Egg: One large egg, beaten well. This acts as an egg wash for the lattice tops, giving the pastry a stunning, glossy, golden-brown finish in the oven.
Step-by-Step Instructions
Step 1: Prepare the Oven and Pan
Start by preheating your oven to 375°F (190°C). Grab a standard 12-cup metal muffin tin and lightly coat the inside of each cup with non-stick baking spray. This guarantees your delicate little pies will pop right out after baking without sticking to the pan.
Step 2: Sauté the Apple Filling
Place a medium skillet over medium heat and drop in your tablespoon of unsalted butter. Once the butter has melted and begins to bubble slightly, add in your finely diced apples, brown sugar, and ground cinnamon. Use a stainless steel spatula to gently toss and stir the apples, cooking them for about 5 to 7 minutes. They should become tender, and the sugar will melt into a beautiful, bubbling syrup. Remove the skillet from the heat and let the mixture cool down completely.
Step 3: Cut the Pie Crust Bases
Unroll two of your refrigerated pie crusts onto a clean, flat surface. Using a 3.5-inch round cookie cutter—or the wide rim of a drinking glass if you don’t have a cutter—stamp out 12 circles of dough. Carefully lift each circle and gently press it into a cup of your prepared muffin tin, molding the dough up the sides to create a little pastry cup.
Step 4: Fill the Cups
Once your spiced apple filling has cooled, spoon a generous, heaping tablespoon of the mixture into each of the pie crust cups. Make sure you distribute the buttery, cinnamon syrup evenly among all the pies.
Step 5: Weave the Lattice Tops
Unroll the remaining two pie crusts and use a sharp knife or a pizza cutter to slice them into long, thin strips. Take these strips and weave them over the top of each filled mini pie to create a beautiful, classic lattice pattern. Use your fingers to gently press the edges of the strips into the bottom crust to seal the pies shut.
Step 6: Apply the Egg Wash
In a small bowl, beat your egg until the yolk and white are completely blended. Dip a pastry brush into the beaten egg and lightly brush it over the top of every lattice crust. This simple step is the secret to achieving that deep, glossy, bakery-worthy golden color.
Step 7: Bake to Golden Perfection
Transfer the muffin tin to the center rack of your preheated oven. Bake the pies for 18 to 20 minutes. Keep a close eye on them during the final few minutes; you want the lattice crusts to be a rich golden brown and the apple filling to be hot and bubbly.
Step 8: Cool and Remove
Remove the tin from the oven and set it on a wire cooling rack. It is crucial that you let the pies cool in the pan for at least 10 to 15 minutes. The filling needs to set and the crust needs to firm up. Once they are warm but sturdy, carefully run a butter knife around the edges and pop them out of the tin.
Expert Cooking Tips
-
Dice the apples small: Because these are mini pies, large chunks of apple will not fit properly in the muffin tin and will make it difficult to weave a flat lattice on top. Aim for a fine, uniform dice.
-
Let the filling cool: Do not spoon boiling hot apple filling into raw pastry dough. The heat will melt the fat in the pie crust before it even hits the oven, resulting in a tough, greasy bottom crust.
-
Keep the dough cold: Refrigerated pie crust is easiest to handle when it is chilled. If your kitchen is very warm and the dough starts getting sticky while you are cutting the strips, pop it back into the fridge for 10 minutes.
-
Mix your apples: For the most complex flavor profile, use a mix of apples! Combine two tart Granny Smith apples with one sweet Honeycrisp or Pink Lady apple.
-
Add a sugary crunch: After brushing the lattice tops with the egg wash, sprinkle a heavy pinch of coarse sparkling sugar or turbinado sugar over the top of each pie for a beautiful, crunchy texture.
Variations to Try
-
Caramel Apple Mini Pies: Stir two tablespoons of thick, rich caramel sauce into the cooled apple mixture before filling the pie crusts for an incredibly decadent twist.
-
Dutch Apple Crumb Topping: Skip the tedious lattice weaving entirely! Top the filled pie cups with a heavy sprinkle of homemade streusel (made from butter, brown sugar, flour, and cinnamon) before baking.
-
Pear and Apple: Substitute one of the apples with a firm Bosc pear for an elegant, deeply autumnal flavor profile.
What to Serve With Mini Apple Pies
These warm, spiced treats are wonderful completely on their own, but serving them with a creamy accompaniment elevates them to a restaurant-quality dessert. Plate a warm mini pie alongside a large scoop of high-quality vanilla bean ice cream, allowing it to slowly melt over the warm lattice crust. They are also fantastic with a dollop of freshly whipped heavy cream and a drizzle of salted caramel sauce.
Storage & Reheating
Refrigerator
Allow any leftover mini pies to cool completely to room temperature. Place them into an airtight container in a single layer and store them in the refrigerator for up to 4 days.
Freezer
These freeze wonderfully! Once entirely cooled, place the pies in an airtight, freezer-safe container. If you need to stack them, place a layer of parchment paper between the pies. They will keep beautifully in the freezer for up to 2 months.
Reheating
To recapture that freshly baked, crispy crust, reheat the mini pies in a 350°F (175°C) oven for about 8 to 10 minutes. You can also pop them into an air fryer at 320°F for 3 to 4 minutes. Microwaving is not recommended, as it will make the pastry soft and soggy.
Frequently Asked Questions
Do I really have to cook the apples first?
Yes! Because these mini pies only bake for about 20 minutes, raw apples will not have enough time to soften completely in the oven. Pre-cooking them on the stove ensures the filling is perfectly tender and prevents the apples from shrinking and leaving an empty gap under your top crust.
Can I make the pie dough from scratch?
Absolutely. While the refrigerated crusts are a brilliant time-saving shortcut, you can certainly use your favorite homemade all-butter pie dough. Just make sure you make a double batch so you have enough dough for both the bases and the lattice tops.
Why did my pie crusts shrink in the tin?
Pie dough shrinks when it is stretched too tightly or when the dough becomes too warm before baking. When pressing the circles into the muffin tin, lift and gently ease the dough down into the corners rather than stretching it.
Can I prepare these ahead of time?
You can easily prep the components ahead of time! You can cook the apple filling and store it in the fridge up to 3 days in advance. You can also assemble the entire unbaked pies in the muffin tin, wrap the tin tightly in plastic wrap, and refrigerate them for up to 24 hours before you are ready to apply the egg wash and bake.
What do I do with the leftover pie dough scraps?
Do not throw them away! Toss the extra pie dough scraps in a little melted butter, cinnamon, and sugar, and bake them on a flat baking sheet for about 10 minutes for a delicious, crispy baker’s snack.
Final Thoughts
Baking from scratch does not have to be a stressful, all-day endeavor. These mini apple pies deliver all the nostalgic, comforting flavors of a classic holiday dessert without any of the headache. The combination of the buttery, flaky crust and the sweet, cinnamon-spiced apple filling is guaranteed to be a massive hit with your family and friends. Grab your muffin tin, unroll that dough, and get ready to enjoy the easiest, most adorable pies you will ever bake!
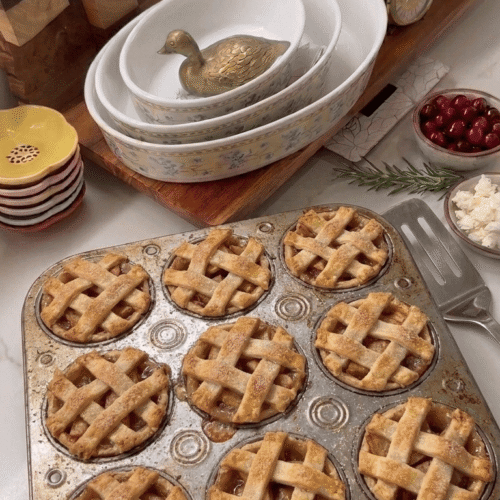
Easy Mini Apple Pies (Baked in a Muffin Tin)
The ultimate bite-sized comfort dessert! These adorable mini apple pies are baked in a muffin tin using a brilliant pie crust shortcut and a gooey, pre-cooked cinnamon apple filling.
Equipment
- Standard 12-cup metal muffin tin
- Medium skillet
- Stainless steel spatula
- 3.5-inch round cookie cutter (or wide glass)
- Pastry brush
Ingredients
- 2 boxes Refrigerated pie crusts 4 crusts total
- 3 large Apples Granny Smith or Honeycrisp, peeled and finely diced
- 1/3 cup Brown sugar packed
- 1 tsp Ground cinnamon
- 1 tbsp Unsalted butter
- 1 large Egg beaten (for egg wash)
Instructions
- Preheat your oven to 375°F (190°C). Lightly spray a standard 12-cup muffin tin with non-stick baking spray.
- In a medium skillet over medium heat, melt the 1 tablespoon of unsalted butter. Add the finely diced apples, brown sugar, and cinnamon.
- Sauté the mixture for 5-7 minutes, stirring gently until the apples are tender and a syrup forms. Remove from heat and let the filling cool completely.
- Unroll two of the pie crusts. Using a 3.5-inch round cookie cutter, stamp out 12 circles of dough. Gently press one circle into each cup of the muffin tin, molding it up the sides.
- Spoon a generous tablespoon of the cooled, spiced apple filling into each pie crust cup.
- Unroll the remaining two pie crusts and slice them into thin strips. Weave the strips over the top of each mini pie to create a classic lattice pattern. Press the edges down to seal.
- Using a pastry brush, lightly brush the beaten egg over the tops of the lattice crusts.
- Bake on the center rack for 18-20 minutes until the crusts are a deep golden brown and the filling is bubbling.
- Let the pies cool in the tin for at least 10-15 minutes before carefully popping them out to serve.
Notes
Do not skip pre-cooking the apples! They need the head start so they are perfectly tender after a short bake time.
If your pie dough gets too warm and sticky while making the lattice, place it in the refrigerator for 10 minutes to firm back up.