Poison Apple Cake Pops (Easy Halloween Chocolate Cake Pops)
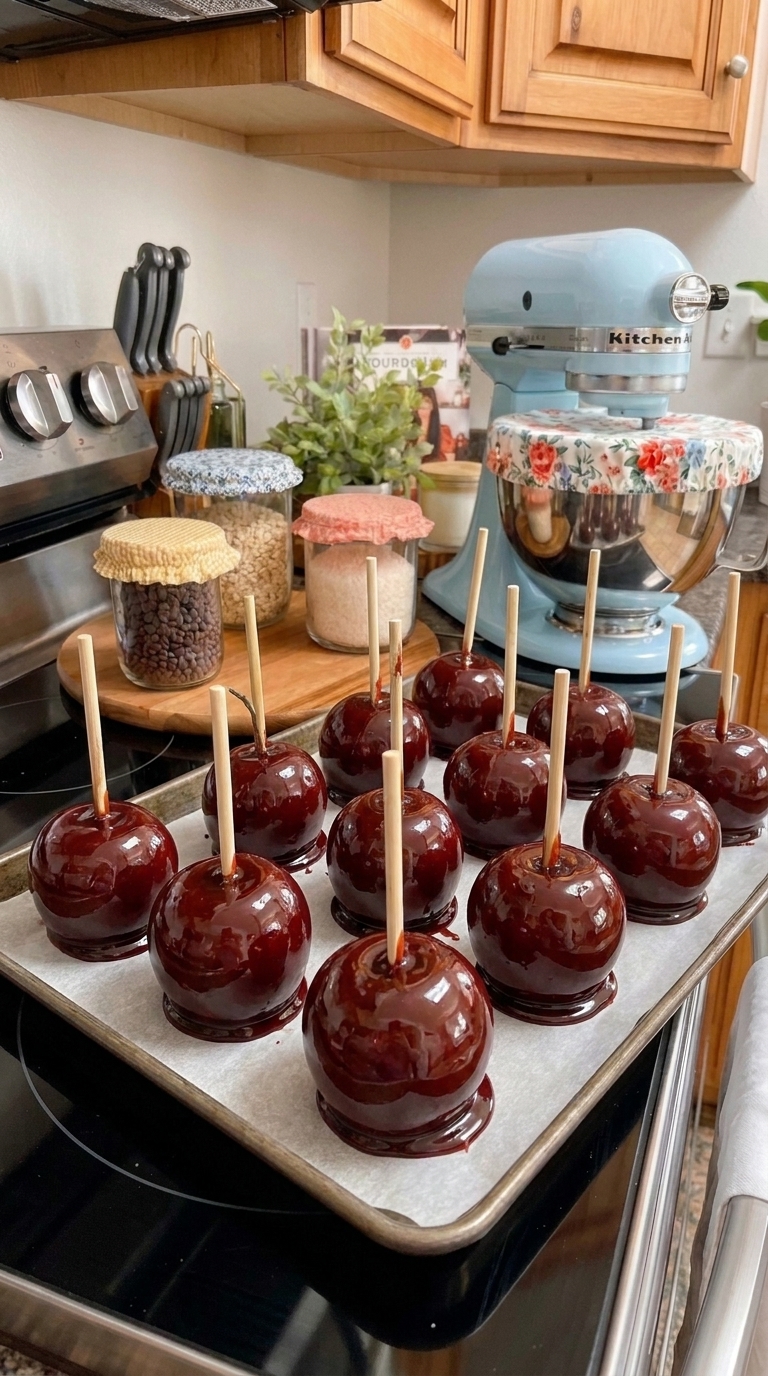
These Poison Apple Cake Pops are a spooky, sweet Halloween treat made with rich chocolate cake, creamy frosting, bright red candy coating, and dramatic black drips. Inspired by the poisoned apple from Snow White, they’re perfect for Halloween parties, spooky dessert tables, and Disney villain-themed celebrations.
The best part? You don’t need to bake a complicated cake from scratch. Start with a prepared chocolate cake, mix it with frosting, shape it into little apples, and decorate with colorful candy melts.
Underneath the candy shell is a soft, chocolatey cake center that tastes just like a delicious chocolate truffle.
Whether you’re planning a Halloween party for kids or making something special for a movie night, these homemade poison apple cake pops are sure to stand out.
Recipe at a Glance
- Prep Time: 30 minutes
- Chill Time: 30 minutes
- Decorating Time: Approximately 20 minutes
- Total Time: Approximately 1 hour 20 minutes, plus coating set time
- Yield: Approximately 15 large cake pops
- Course: Dessert
- Cuisine: American
- Difficulty: Easy to Intermediate
Why You’ll Love These Halloween Cake Pops
Spooky Halloween appearance. The glossy red coating and black drips create a dramatic poisoned-apple look.
Rich chocolate centers. Chocolate cake mixed with frosting creates a soft, fudgy filling.
Great for parties. Individual cake pops are easy to display and serve.
Fun to decorate. Each pop can have slightly different drips for a unique appearance.
Easy shortcut recipe. Using prepared cake saves time without sacrificing flavor.
Ingredients for Poison Apple Cake Pops
- 1 prepared 9×13-inch chocolate cake, completely cooled
- 1/2 cup chocolate frosting
- 12 oz red candy melts
- Black candy melts, approximately 3–4 oz, or oil-based black candy coloring suitable for candy melts
- 15 cake pop sticks
- Small pretzel sticks, broken into 1-inch pieces
Ingredient Notes
Chocolate Cake: Use your favorite boxed chocolate cake mix or homemade chocolate cake. It must be completely cool before mixing.
Chocolate Frosting: Helps bind the crumbs into a dough that holds its shape. Add gradually because some cakes need less frosting.
Red Candy Melts: Create the smooth red apple coating. Use candy melts designed for dipping.
Black Candy Melts: The easiest option for creating dark, dramatic drips. Regular water-based food coloring can cause melted candy coating to seize.
Pretzel Sticks: Make simple edible apple stems.
How to Make Poison Apple Cake Pops
Step 1: Crumble the Chocolate Cake
Place the completely cooled chocolate cake in a large mixing bowl.
Break it into fine crumbs using clean hands or a fork.
Make sure there are no large pieces remaining.
Add the chocolate frosting a little at a time and mix until the crumbs hold together when pressed.
Step 2: Shape the Cake Pops
Scoop portions of the cake mixture and roll them into compact balls approximately 1½ inches wide.
For a more realistic apple appearance, gently flatten the tops and make a shallow indentation in the center.
Place the shaped cake balls on a parchment-lined baking sheet.
Freeze for approximately 15 minutes, until firm but not frozen solid.

Step 3: Insert the Cake Pop Sticks
Melt a small portion of the red candy melts according to the package directions.
Dip the tip of each cake pop stick into the melted coating.
Insert each stick approximately halfway into the bottom of a chilled cake ball.
Place the cake pops back in the freezer for another 15 minutes to help secure the sticks.
Step 4: Dip in Red Candy Coating
Melt the remaining red candy melts in a deep, microwave-safe bowl.
Heat in short intervals, stirring frequently until smooth.
Dip each chilled cake pop straight into the melted red coating.
Lift it out carefully and gently tap away the excess.
Place the pops upright in a cake pop stand or sturdy foam block until the coating hardens.
Step 5: Add the Black Poison Drips
Melt the black candy melts in a small microwave-safe bowl.
Allow the coating to cool slightly so it is fluid but not overly hot.
Using a small spoon, add a little black coating around the top of each red cake pop.
Let it drip naturally down the sides.
Vary the length of the drips to create a spooky poisoned-apple effect.
Step 6: Add the Pretzel Stems
Before the black coating sets, carefully insert a short pretzel piece into the top center of each cake pop.
Hold it briefly if necessary until the coating begins to firm.
Allow the finished cake pops to set completely before serving.
Tips for Perfect Poison Apple Cake Pops
Don’t Add Too Much Frosting
Start with less frosting and add more only if needed. Too much can make the cake balls heavy and overly soft.
Keep the Cake Balls Firm
Chilling helps the pops hold their shape during dipping. Avoid dipping rock-hard frozen cake balls, which can cause the coating to crack.
Use the Right Candy Coloring
Only use coloring specifically labeled for chocolate or candy melts. Water-based food coloring can ruin the coating.
Don’t Overheat the Candy Melts
Overheated candy melts become thick and difficult to dip. Melt slowly and stir frequently.
Let the Red Coating Set First
The red layer should be firm before adding black drips. Otherwise, the colors may blend together.
Common Problems and Easy Fixes
Why Are My Cake Pops Falling Off the Sticks?
The cake mixture may be too soft, the pops may be too large, or the sticks may not be secured properly.
Why Is My Candy Coating Cracking?
A large temperature difference between frozen cake balls and warm coating can cause cracks.
Why Are My Black Drips Too Thick?
The coating may have cooled too much. Warm it gently until it flows smoothly again.
Fun Halloween Cake Pop Variations
Green Poison Apples: Use green candy melts with black drips for a witch-inspired version.
Purple Poison Apples: Try purple candy coating for a magical Halloween appearance.
White Chocolate Centers: Substitute vanilla cake and vanilla frosting for a lighter filling.
Mini Poison Apples: Make smaller cake pops for bite-sized Halloween treats.
How to Store Poison Apple Cake Pops
Refrigerator: Store in an airtight container for up to 4 days.
Freezer: Freeze undecorated cake balls for up to 2 months for best quality.
Make Ahead: Prepare the cake balls a day before decorating and refrigerate until ready to dip.
Allow chilled cake pops to warm slightly before serving for the best texture.
Frequently Asked Questions
Can I Use Boxed Cake Mix?
Yes! A boxed chocolate cake mix works perfectly. Bake it according to the package directions and cool completely.
Can I Make These Without Cake Pop Sticks?
Absolutely. Make poison apple cake truffles and place them in small cupcake liners.
Can I Use White Chocolate Instead of Candy Melts?
Yes, but you’ll need oil-based candy coloring and proper tempering or a suitable coating method.
Can I Make Poison Apple Cake Pops Ahead of Time?
Yes. They’re convenient to prepare one or two days before a Halloween party.
How Do I Keep Cake Pops Upright?
Use a dedicated cake pop stand or a sturdy foam block with evenly spaced holes.
Final Thoughts
These Poison Apple Cake Pops combine rich chocolate cake with colorful Halloween decorations for a fun, festive dessert.
The bright red candy shell, spooky black drips, and edible pretzel stems make them perfect for Halloween parties, movie nights, and themed dessert tables.
They’re a creative way to transform an ordinary chocolate cake into something memorable!

Poison Apple Cake Pops
Ingredients
- 1 prepared 9×13-inch chocolate cake cooled
- Up to 1/2 cup chocolate frosting
- 12 oz red candy melts
- 3 –4 oz black candy melts
- 15 cake pop sticks
- 15 small pretzel pieces approximately 1 inch each
Instructions
- Crumble the cooled chocolate cake into a large bowl.
- Add frosting gradually until the mixture holds together.
- Shape into 15 large cake balls, gently flattening the tops to resemble apples.
- Freeze for 15 minutes.
- Melt a little red candy coating, dip the ends of the sticks, and insert them halfway into the cake balls.
- Freeze for another 15 minutes.
- Melt the remaining red candy melts and dip each cake pop until fully coated.
- Stand upright and allow the red coating to set.
- Melt black candy melts and spoon small drips around the tops.
- Insert pretzel stems before the black coating hardens.
- Allow the decorations to set completely before serving.
Notes
Use candy melts designed for dipping.
Avoid water-based coloring.
Chill the cake balls before dipping.
Store in an airtight container in the refrigerator for up to 4 days.