Old Fashioned Lemon Meringue Pie — Jeff’s Heritage Recipe
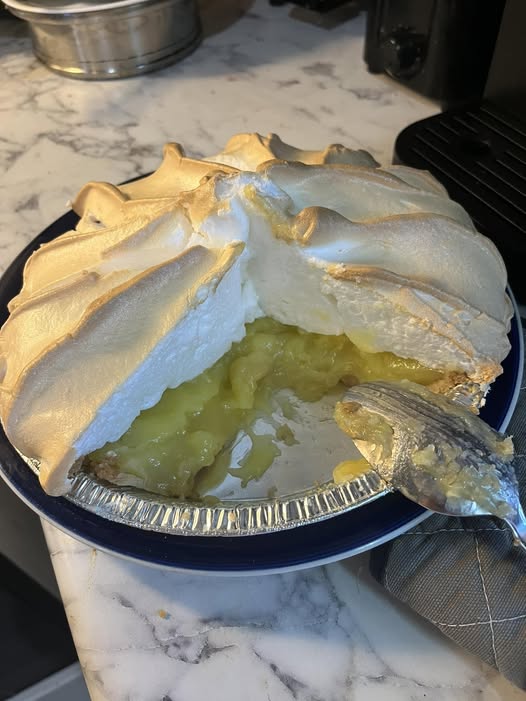
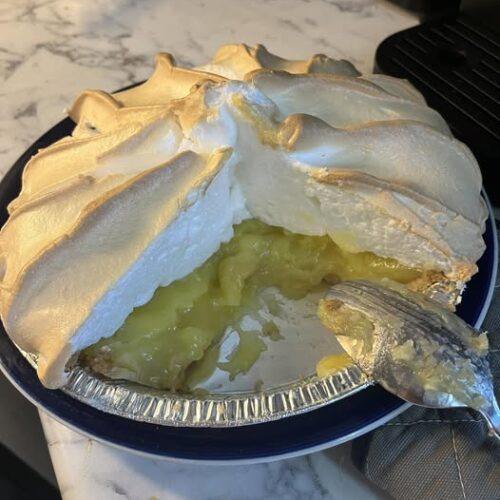
The hum of a kitchen mixer competing with the distant chatter of a lazy Sunday afternoon is a sound that instantly brings a smile to my face. Growing up, the dessert table was the undisputed crown jewel of any family gathering, and nothing commanded a room quite like a towering, golden-crested pie sitting proudly on a glass pedestal stand. There is a magnificent, theatrical beauty to a proper meringue—billowing like white summer clouds, accented with deep amber ridges that crackle ever so slightly when the serving knife glides through them. Whenever I see that contrast of snowy white peaks sitting atop a vibrant, sun-yellow citrus custard, I am transported straight back to the potlucks and church socials of my youth.
In our home, baking is a shared language of affection, but I must confess that when it comes to this specific sweet masterpiece, my husband Jeff wears the apron. He makes an absolutely spectacular version that hits every nostalgic note perfectly. A few days ago, when I shared a snapshot of Jeff’s latest creation with our beautiful Old Fashioned Family Recipes Facebook community, so many of you sweet ladies requested his exact breakdown. You were reminiscing about the traditional pies your mothers made, swap-testing secrets for preventing that dreaded weeping or shrinking that can sometimes break a cook’s heart.
Jeff’s approach balances traditional scratch-made flavor with a brilliant, time-saving technique for cooking the lemon base to a perfect, glossy thickness without constant stovetop scorching. It yields a slice that holds its shape beautifully while remaining remarkably silky on the tongue. Let us step into the kitchen together, pull out your favorite mixing bowl, and look at how to construct a majestic dessert that will have your loved ones crowded around the counter waiting for the first slice.
Why this recipe works
-
The Burst-Interval Starch Gelatinization: Utilizing measured bursts of high heat breaks down the cornstarch molecules rapidly, causing them to absorb the whole milk and fresh citrus juice evenly. This creates a highly stable, volcanic thickening action that guarantees the lemon filling will slice cleanly without oozing out onto the plate.
-
The Whisk-Agitation Emulsification: Agitating the hot egg yolk and citrus mixture with a sturdy wire whisk between cooking intervals ensures the proteins stretch smoothly rather than scrambling. This results in a luxurious, uniform custard base with a beautiful glossy sheen.
-
The Room-Temperature Protein Expansion: Whipping egg whites that have sat out to reach true room temperature allows the protein bonds to stretch to their absolute maximum volume. This traps tiny pockets of air efficiently, producing a stable, mile-high meringue that resists collapsing.
-
The Direct Hot-Custard Anchoring: Spreading the fresh meringue directly over a hot, steaming lemon filling seals the two layers together instantly. The residual heat cooks the bottom of the egg whites upon contact, which prevents the meringue from sliding or weeping liquid later on.
What you’ll need
This impressive heritage dessert relies entirely on standard larder staples and fresh citrus from the counter basket.
-
Freshly Squeezed Lemon Juice and Zest: Avoid the bottled varieties entirely; the intense punch of fresh juice and the aromatic oils from the grated rind provide the bright, authentic flavor profile required for the base.
-
Granulated Sugar: Sweetens the tart citrus and provides the essential structural crystalline matrix that holds the whipped egg whites steady.
-
Cornstarch: The crucial thickening agent that sets the filling into a sliceable, velvety custard.
-
Whole Milk: Adds a rich, creamy dairy depth that rounds out the sharp, biting edges of the lemon juice.
-
Farm Eggs Separated: Fresh eggs provide the double magic of this dish—the rich yolks build the golden custard base, while the whites transform into a towering meringue.
-
Pre-Baked Pie Crust: A traditional, flaky lard or butter pastry shell baked until light golden and crisp, ready to house the heavy filling.
Substitutions & Variations
While a classic lemon profile is timeless, you can adapt this vintage method to showcase other beautiful fruits from the orchard. For a lovely historical variation, you can replace the lemon juice and zest with fresh Key lime juice and lime rind to create a spectacular heritage lime meringue pie. If you prefer a completely dairy-free custard, the whole milk can be swapped for a high-quality canned coconut milk, which lends a subtle, tropical richness to the citrus base. For those who enjoy a bit of extra texture in their meringue, a half-cup of sweetened flaked coconut can be gently folded into the stiff egg whites or scattered across the top peaks right before the pie enters the oven to toast beautifully under the heat.
How to make Old Fashioned Lemon Meringue Pie
Step 1: Whisk the Custard Foundation
In a large, microwave-safe Pyrex bowl, combine your freshly squeezed lemon juice, grated lemon zest, granulated sugar, cornstarch, whole milk, and the five separated egg yolks. Save the egg whites in a clean stainless-steel bowl for later. Use a sturdy wire whisk to beat the mixture vigorously for a full minute, ensuring the cornstarch is completely dissolved into the liquids and no yellow clumps of yolk remain visible.
Step 2: Cook the Lemon Filling in Intervals
Place the bowl into the microwave and cook on high for four minutes. Carefully remove the hot bowl using oven mitts; the mixture will be warm and starting to thicken slightly around the edges. Take your whisk and beat the liquid thoroughly to redistribute the heat. Return the bowl to the microwave and cook on high for an additional two minutes, then remove and whisk again. Continue cooking in short, one-minute bursts, whisking well after each interval, until the mixture transforms into a thick, bubbling, and glossy yellow custard that heavily coats the back of a spoon.
Step 3: Whip the Meringue to Soft Peaks
While the filling is finishing its final thicken, attach the stainless-steel bowl containing your room-temperature egg whites to a stand mixer fitted with the whisk attachment. Turn the machine to medium-high speed and let it run for several minutes until the whites transform from a clear liquid into a thick, opaque white foam that forms gentle, soft peaks that curl over when the beater is lifted.
Step 4: Stabilize to Stiff Peaks
With the mixer running continuously on high speed, add your five tablespoons of granulated sugar one single tablespoon at a time. Allowing a few seconds between additions gives the sugar time to dissolve completely into the foam. Continue beating on high until the mixture becomes incredibly glossy, bright white, and holds rigid, stiff peaks that stand straight up without wobbling.
Step 5: Assemble and Anchor the Layers
Pour your piping-hot lemon custard directly into the bottom of your pre-baked, flaky pie shell, smoothing the surface with a spatula. Immediately spoon the glossy meringue over the top of the hot filling. Use the back of your spoon to spread the meringue all the way to the very edges of the pie, ensuring it touches and sticks to the baked pastry crust; this crucial anchoring prevents the egg whites from shrinking during baking.
Step 6: Bake to a Golden Tan
Slide the assembled pie onto the center rack of your oven preheated to 350°F. Bake for fifteen to eighteen minutes, keeping a watchful eye through the oven window during the final few minutes. You are looking for the peaks of the billowing meringue to turn a beautiful, warm amber-brown color. Carefully remove the pie from the oven and place it on a wire cooling rack, allowing it to cool completely to room temperature for at least two hours so the layers can set fully before slicing.
Destiny’s tips
-
I always use a completely clean stainless-steel bowl for whites: Even a microscopic speck of oil or leftover grease on the bowl walls can prevent the egg whites from trapping air, leaving you with a flat, liquid mess instead of a fluffy meringue.
-
In my kitchen, we never skimp on anchoring the edges: If you leave even a tiny gap between the meringue and the baked pie crust, the egg whites will pull inward as they heat, causing the top layer to shrink away from the sides.
-
I always let the eggs sit on the counter before separating: Cold eggs are easier to separate cleanly into yolks and whites, but room-temperature whites always whip up to a much grander, more impressive volume.
-
In my kitchen, we use a wet knife for clean slices: To prevent the delicate meringue from tearing or sticking to the blade when serving, dip your sharp knife into a glass of warm water before making each cut.
What to serve with Old Fashioned Lemon Meringue Pie
-
Hot Chicory Coffee: A steaming cup of dark, slightly bitter chicory coffee offers a spectacular contrast that balance the intense sweetness of the toasted meringue.
-
Salty Roasted Pecans: A small dish of warm, salted pecans served alongside the pie provides a lovely, crunchy texture that complements the soft custard beautifully.
-
Fresh Red Raspberries: A scattered handful of tart, raw red berries on the side of the plate adds a gorgeous pop of color and a bright fruit contrast to the rich lemon base.
Frequently Asked Questions
Why does my meringue separate or weep liquid onto the filling?
Weeping usually happens when the meringue is spread over a cold filling, which prevents the bottom of the egg whites from cooking properly. To stop this from happening, always ensure your lemon custard is piping hot when you pile the whipped whites on top so the residual steam can cook the barrier layer instantly.
Can I cook the lemon filling on the stovetop instead?
You can certainly cook the mixture in a heavy saucepan over medium heat if you prefer traditional methods. You will need to stir the liquid constantly with a wooden spoon for roughly ten to twelve minutes to prevent the starch from clumping or burning against the bottom of the pan until it reaches a thick boil.
How do I prevent beads of sugar moisture from forming on top?
Those little golden droplets on top of a baked pie are caused by overbaking the meringue, which forces the sugar matrix to liquefy. To prevent this, pull the pie from the oven the exact moment the tips turn a gentle amber color, rather than letting it bake a minute longer.
Should I store my leftover pie in the refrigerator?
Any leftover pie should be stored in the refrigerator after it has cooled completely. Do not cover it tightly with plastic wrap, as that traps condensation which can destroy the delicate texture of the meringue; instead, use a loose tent of aluminum foil or an inverted glass bowl to protect it.
Old Fashioned Lemon Meringue Pie
Ingredients
- 1/2 cup freshly squeezed lemon juice
- 1 tbsp lemon zest
- 2 cups granulated sugar for the filling
- 1/2 cup cornstarch
- 2 cups whole milk
- 5 large farm eggs separated
- 5 tbsp granulated sugar for the meringue
- 1 pre-baked 9-inch pie crust
Instructions
- In a large microwave-safe Pyrex bowl, whisk the lemon juice, zest, 2 cups sugar, cornstarch, whole milk, and 5 egg yolks until completely smooth.
- Microwave on high for 4 minutes, remove carefully, and beat thoroughly with a wire whisk.
- Return to the microwave for 2 minutes, remove, and whisk again; repeat in 1-minute bursts until the custard is thick and glossy.
- Pour the piping-hot lemon filling directly into your pre-baked pie shell.
- In a clean stainless bowl, beat the 5 egg whites at room temperature on medium-high until soft peaks form.
- Gradually add the 5 tablespoons of sugar one at a time while beating on high until stiff, glossy peaks stand rigid.
- Spread meringue immediately over the hot filling, anchoring it tightly to the pastry edges, and bake at 350°F for 15-18 minutes until golden.
Notes