Old-Fashioned Mama’s Coconut Cake
The Ultimate Nostalgic Dessert for Any Gathering
There is a special place in our hearts and recipe boxes for those handed-down, old-fashioned desserts that taste just like home. This beautiful, rustic coconut cake is exactly that kind of recipe. If you have ever attended a Wednesday night church supper, a family reunion, or a classic Southern holiday dinner, you have likely seen a glorious, snow-white coconut cake sitting proudly on the dessert table.
What makes this specific version so incredibly special is the unique “soak and chill” method. While the cake itself starts with a convenient box mix shortcut, the magic happens in the refrigerator. A rich, sweet blend of sour cream, sugar, and shredded coconut is spread between the layers, and the entire cake is left to chill for four full days before slicing. During this time, the cake absorbs all that incredible moisture and flavor, transforming into the most tender, melt-in-your-mouth dessert you will ever eat.
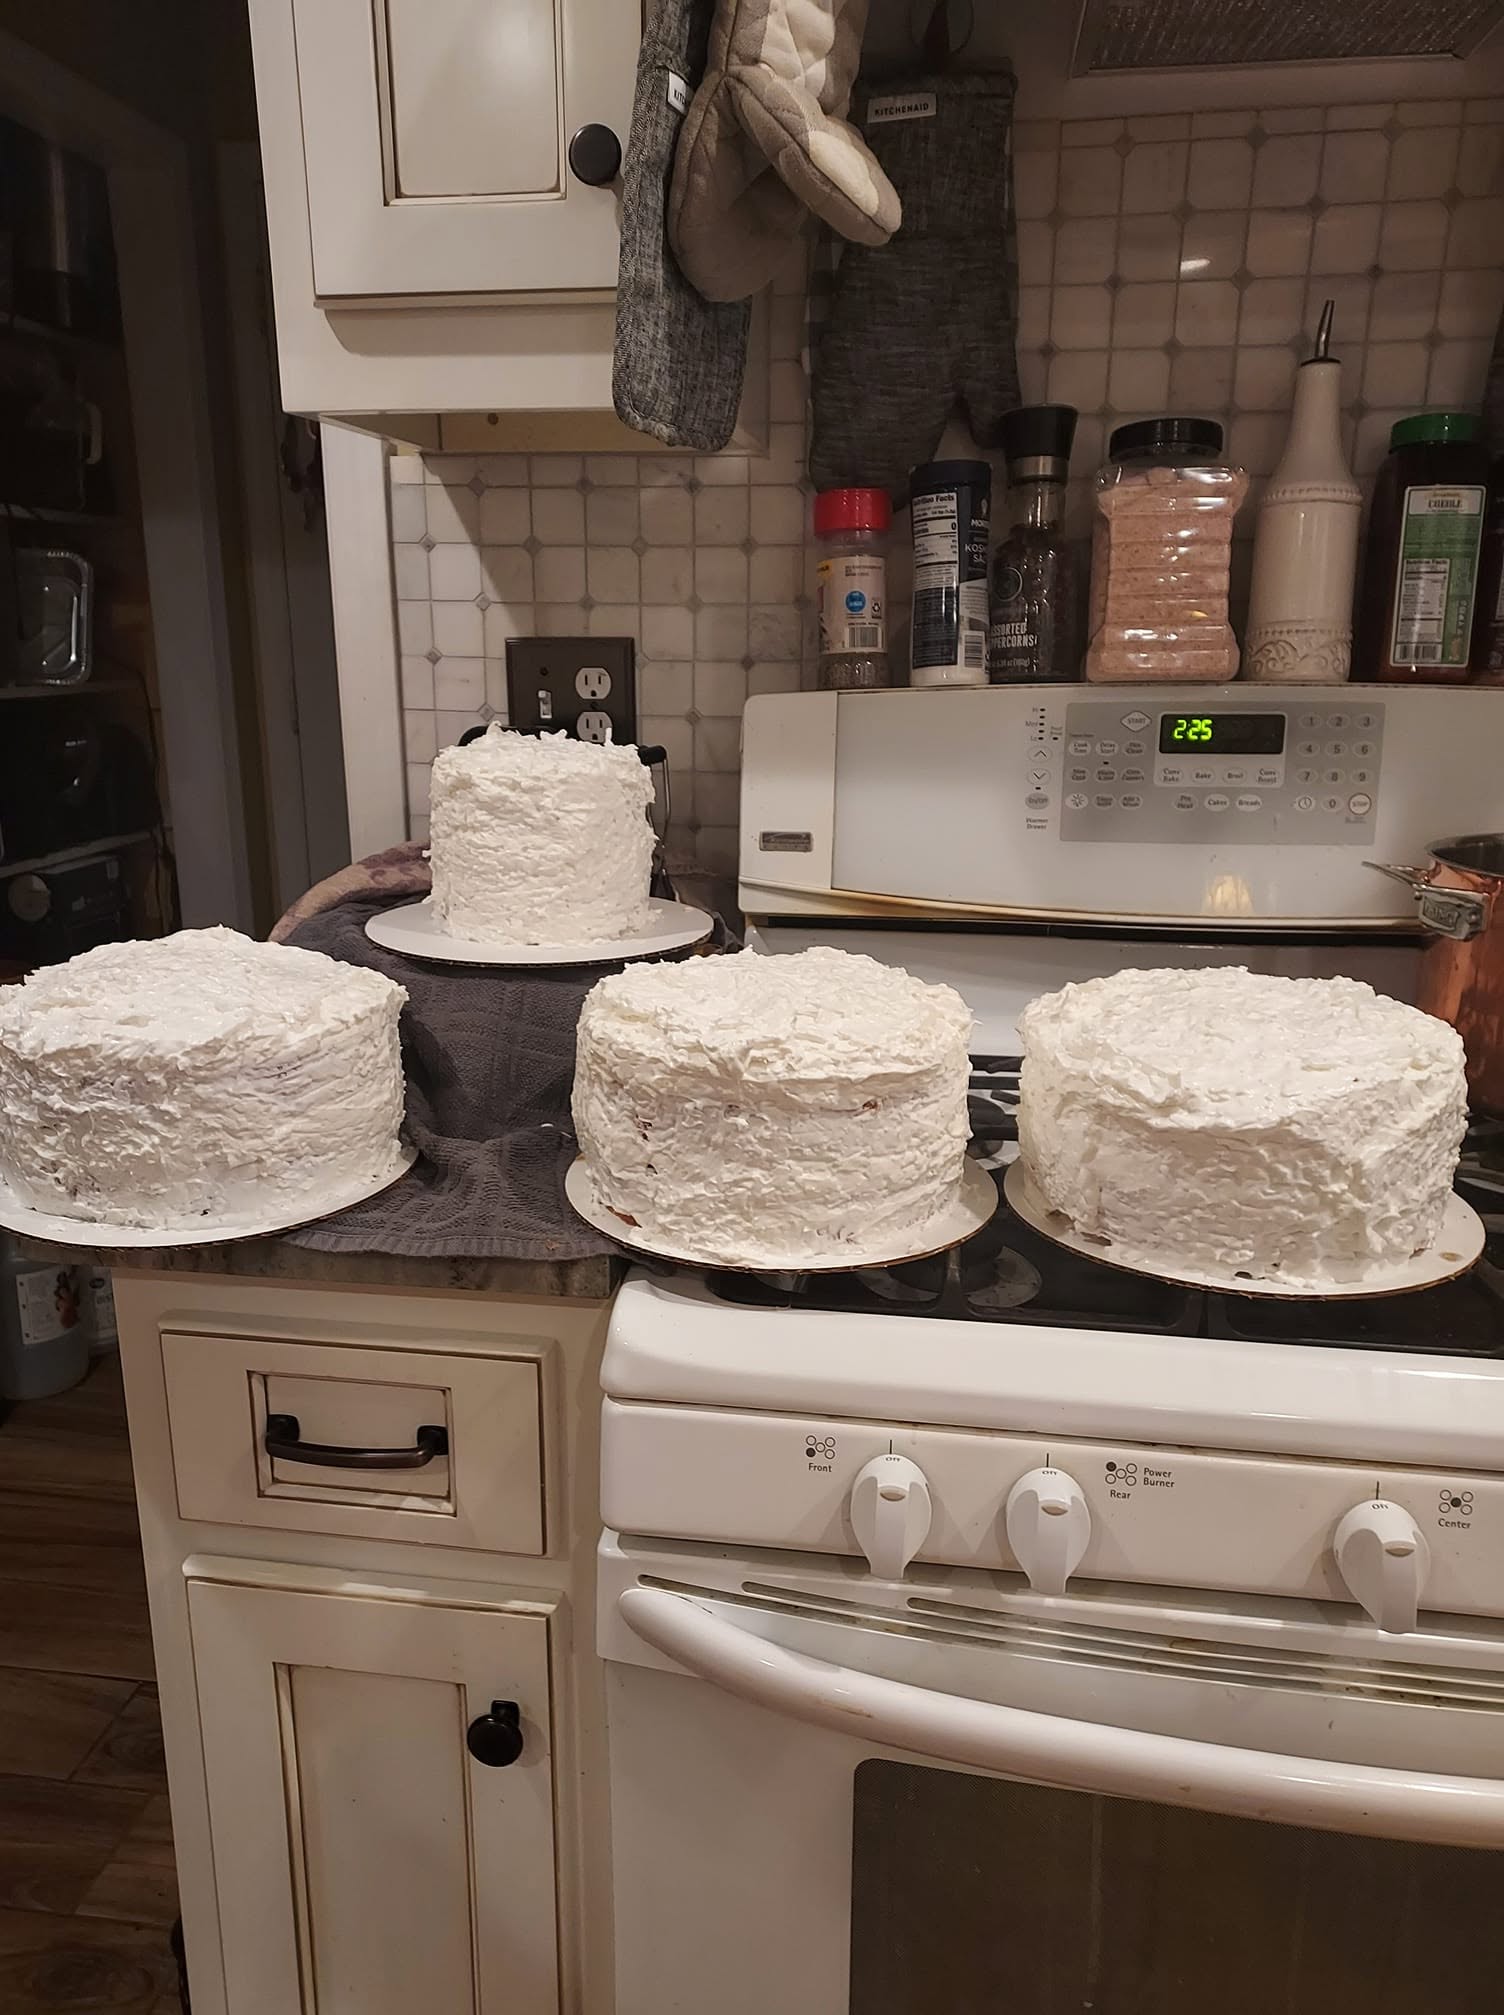
You also do not need to be a professional pastry chef to make this look stunning. In fact, it is meant to look delightfully rustic. You can skip the piping bags and offset spatulas entirely. Just use the back of a large spoon to swoop and swirl the whipped topping frosting all over the outside. It is simple, stress-free, and absolutely guaranteed to have everyone asking you for the recipe.
Why You’ll Love This Recipe
- Incredible Moisture: The four-day resting period in the refrigerator ensures every single crumb is unbelievably moist and infused with sweet coconut flavor.
- Time-Saving Shortcut: Using white cake mixes as the base saves you time in the kitchen without sacrificing the taste or texture of the final dessert.
- No Decorating Skills Needed: The frosting is meant to be applied casually with the back of a spoon. The more rustic and swoopy it looks, the better!
- Perfect for Making Ahead: Because this cake requires days to rest, it is the ultimate make-ahead dessert for busy holidays or weekend gatherings.
- Crowd-Pleasing Size: Using two boxes of cake mix yields wonderfully thick, bakery-style layers that easily feed a hungry crowd.
Ingredients
- White Cake Mix: 2 boxes (16.5 ounces each) of your favorite white cake mix.
- Water: 2 cups to hydrate the cake batter.
- Eggs: 6 large eggs, preferably at room temperature, to bind the cake and add richness.
- Vegetable Oil: 2/3 cup of neutral cooking oil to keep the crumb soft.
- Granulated Sugar: 3 cups to sweeten the rich sour cream filling.
- Sour Cream: 2 cups (16 ounces) of full-fat sour cream. This balances the sweetness and adds incredible moisture.
- Shredded Coconut: 5 cups of sweetened shredded coconut, divided for the filling and the topping.
- Whipped Topping: 16 ounces (one large tub) of frozen whipped topping, completely thawed.
- Additional Coconut (Optional): Extra shredded coconut for sprinkling over the finished frosting.
Step-by-Step Instructions
Step 1: Prep the Oven and Pans
Preheat your oven to 350°F (175°C). Prepare two deep 9×3-inch round cake pans by coating the bottom and sides thoroughly with a baking spray that contains flour. This ensures your thick cake layers will release effortlessly later.
Step 2: Mix the Cake Batter
In a very large mixing bowl or the bowl of a stand mixer, add both boxes of white cake mix. Add the water, eggs, and vegetable oil. Blend on medium speed until the ingredients are completely combined and the batter is smooth.
Step 3: Bake the Cake Layers
Divide the thick batter evenly between your two prepared 9-inch cake pans. Use a spatula to gently spread the batter all the way to the edges, smoothing the tops. Place the pans on the middle rack of your preheated oven.
Step 4: Monitor the Baking Process
Bake for 20 minutes, then check the cakes. You are looking for the edges of the cake to turn a light golden brown and just begin to pull away from the sides of the pan. Because these are very thick layers, you may need to add an additional 3 to 5 minutes depending on your specific oven and the color of your pans. A toothpick inserted in the center should come out clean.
Step 5: Cool the Cakes
Once baked, remove the pans from the oven. Carefully run a butter knife along the edge of the pans to loosen the cakes. Turn them out onto wire cooling racks and allow them to cool completely to room temperature.
Step 6: Prepare the Coconut Filling
While the cake is in the oven or cooling, prepare the filling. In a large bowl, combine the granulated sugar, sour cream, and shredded coconut. Stir well until the sugar begins to dissolve into the sour cream.
Step 7: Fill the First Layer
Place your bottom layer of cooled cake onto a serving plate or cake stand. Scoop out about 1/4 to 1/2 of the sour cream and coconut mixture and spread it evenly over the top of the bottom layer, right up to the edges.
Step 8: Prepare the Frosting
Take your thawed whipped topping and gently fold it into the remaining sour cream and coconut mixture. Stir gently until it is fully incorporated into a light, fluffy frosting.
Step 9: Assemble and Frost
Place the second cake layer on top of the filling. Scoop large dollops of the whipped topping mixture onto the cake. Use the back of a large spoon to spread the frosting over the top and down the sides of the cake. Use swirling motions to give it a beautiful, rustic appearance. Sprinkle the entire cake with additional shredded coconut if desired.
Step 10: The Four-Day Chill
This is the most important step! Lightly cover the frosted cake with plastic wrap or place it inside a tall cake dome. Place the cake in the refrigerator and let it sit undisturbed for exactly 4 days before slicing and serving.
Expert Cooking Tips
- Do Not Rush the Chill: The 4-day resting period is non-negotiable for the best results. The sugar in the sour cream mixture breaks down and seeps into the crumb of the cake, transforming the texture completely.
- Thaw the Topping Completely: Ensure your whipped topping is fully thawed in the refrigerator before folding it into the sour cream. If it is still frozen, your frosting will turn out lumpy.
- Use Deep Pans: Because this recipe uses two full boxes of cake mix to make one towering cake, you must use deep 9×3-inch pans. Standard 2-inch deep pans may overflow in the oven.
- Embrace the Spoon Technique: Do not stress about getting smooth edges on your frosting. The charm of this traditional dessert lies in the fluffy, textured peaks created by simply swirling the back of a spoon.
- Room Temperature Eggs: Using room temperature eggs helps the cake batter emulsify properly, resulting in a lighter, fluffier crumb.
Variations to Try
- Toasted Coconut: For a deeper, nuttier flavor profile, spread your shredded coconut on a baking sheet and toast it in a 325°F oven for 5-10 minutes until golden before using it in the recipe.
- Pineapple Coconut: Spread a thin layer of drained crushed pineapple over the bottom cake layer before adding the sour cream filling for a tropical, piña colada-inspired twist.
- Pecan Crunch: Fold a half cup of finely chopped, toasted pecans into the frosting mixture for an added layer of texture and southern charm.
What to Serve With Old-Fashioned Coconut Cake
This rich, sweet cake is a star all on its own, making it the perfect grand finale for heavy, savory meals. Serve generous slices after a comforting dinner of baked ham, mashed potatoes, and green beans. It pairs beautifully with a hot cup of black coffee or a tall glass of unsweetened iced tea to balance the sweetness of the frosting.
Storage & Reheating
Refrigerator
This cake must be stored in the refrigerator at all times due to the sour cream and whipped topping in the frosting. Keep it lightly covered with plastic wrap or stored in a cake carrier. It will keep well in the fridge for up to 7 days (including the 4 days of resting time).
Freezer
You can easily freeze leftover slices of this cake. Place individual slices on a baking sheet in the freezer until the frosting is firm (about 2 hours). Then, wrap each slice tightly in plastic wrap and a layer of aluminum foil. Freeze for up to 2 months. Thaw overnight in the refrigerator before eating.
Reheating
Cake should not be reheated. Serve this dessert chilled directly from the refrigerator for the best taste and texture.
Frequently Asked Questions
Why do I have to wait 4 days to eat it?
The resting period is a traditional technique used in many old-fashioned Southern cakes. As the cake sits in the fridge, the granulated sugar breaks down into the sour cream, creating a sweet syrup that slowly seeps into the baked cake layers. This results in an incredibly dense, moist, and flavorful dessert that you simply cannot get on day one.
Can I use homemade cake instead of a box mix?
Yes, you absolutely can! If you have a favorite from-scratch white cake recipe that yields two sturdy 9-inch layers, you can swap it in. However, the box mix provides a very dependable, fluffy structure that holds up perfectly to the heavy, wet filling during the long chilling process.
Do I really need two boxes of cake mix for one cake?
Yes. This recipe is designed to make one very large, impressive cake meant to feed a crowd at church suppers or family reunions. Using two boxes ensures the layers are thick enough to support the generous amount of sour cream filling.
Can I use cream cheese instead of sour cream?
It is not recommended for this specific recipe. Sour cream provides a very specific tanginess that cuts through the 3 cups of sugar and the sweet coconut. Cream cheese would make the filling far too dense and heavy, and it will not seep into the cake layers in the same way.
What if I only have standard 2-inch deep cake pans?
If you do not have 3-inch deep pans, do not pour all the batter into two standard pans, or they will overflow. Instead, divide the batter between three standard 9-inch pans, and reduce the baking time slightly. You will end up with a beautiful three-layer cake instead!
Final Thoughts
Making this classic coconut cake feels like keeping a delicious piece of history alive. The magic truly is in the waiting—leaving it in the fridge for those four days takes a bit of patience, but the first bite makes it all completely worth it. Whether you are bringing it to a Wednesday night supper or serving it at your own family table, this rustic, comforting dessert is sure to become a highly requested favorite. Grab your mixing bowl and a big spoon, and enjoy the process!
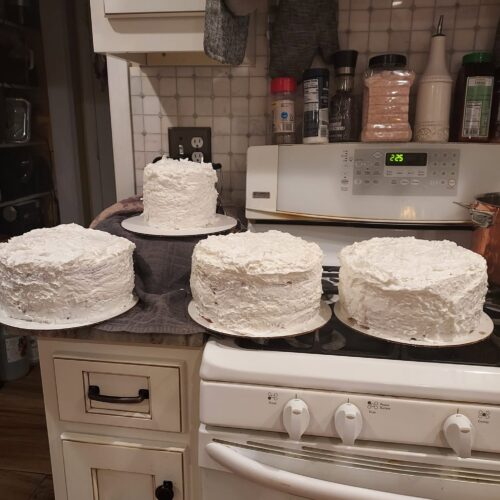
Old-Fashioned Mama's Coconut Cake
A classic, rustic Southern dessert featuring thick white cake layers and a rich sour cream and coconut filling. This make-ahead cake rests in the fridge for 4 days to achieve unbelievable moisture!
Equipment
- Two 9x3-inch round cake pans
- Large mixing bowl
- Electric hand mixer or stand mixer
- Large spoon for frosting
- Wire cooling racks
Ingredients
- 2 16.5 oz white cake mixes
- 2 cups water
- 6 large eggs
- 2/3 cup vegetable oil
- 3 cups granulated sugar
- 2 cups 16 oz sour cream
- 5 cups shredded coconut plus extra for garnish
- 16 oz whipped topping thawed
Instructions
- Preheat oven to 350°F. Grease the bottom and sides of two deep 9x3-inch cake pans with baking spray containing flour.
- In a large bowl, combine the cake mixes, water, eggs, and oil. Blend until smooth and fully combined.
- Divide the batter evenly between the two prepared pans. Gently spread the batter to the edges.
- Place pans on the middle rack of the oven and bake for 20 minutes. Check the cakes; the edges should be browned and pulling away from the sides. Bake an additional 3-5 minutes if necessary until a toothpick comes out clean.
- Run a knife along the edge of the pans to loosen. Remove cakes and cool completely on wire racks.
- While the cake cools, prepare the filling. In a bowl, combine the sour cream, 5 cups of shredded coconut, and granulated sugar. Mix well.
- Place the bottom cake layer on a serving plate. Spread 1/4 to 1/2 of the sour cream mixture evenly over the top of this layer.
- Gently stir the thawed whipped topping into the remaining sour cream mixture until combined to create the frosting.
- Place the second cake layer on top. Frost the top and sides of the entire cake using the back of a large spoon to create rustic swirls. Sprinkle with additional shredded coconut if desired.
- Lightly cover the cake with plastic wrap and place in the refrigerator. Let it rest for 4 days before slicing and serving.
Notes
Pan Size: You must use 3-inch deep pans for this recipe. If you only have standard 2-inch pans, divide the batter into three pans instead to avoid overflowing. Waiting Period: Do not skip the 4-day chill in the refrigerator! This is essential for the sugar to melt and soak into the cake crumb. Storage: Keep covered in the refrigerator for up to 7 days.