Vintage No-Bake Cornflake Wreaths
The Easiest, Most Nostalgic Holiday Treat
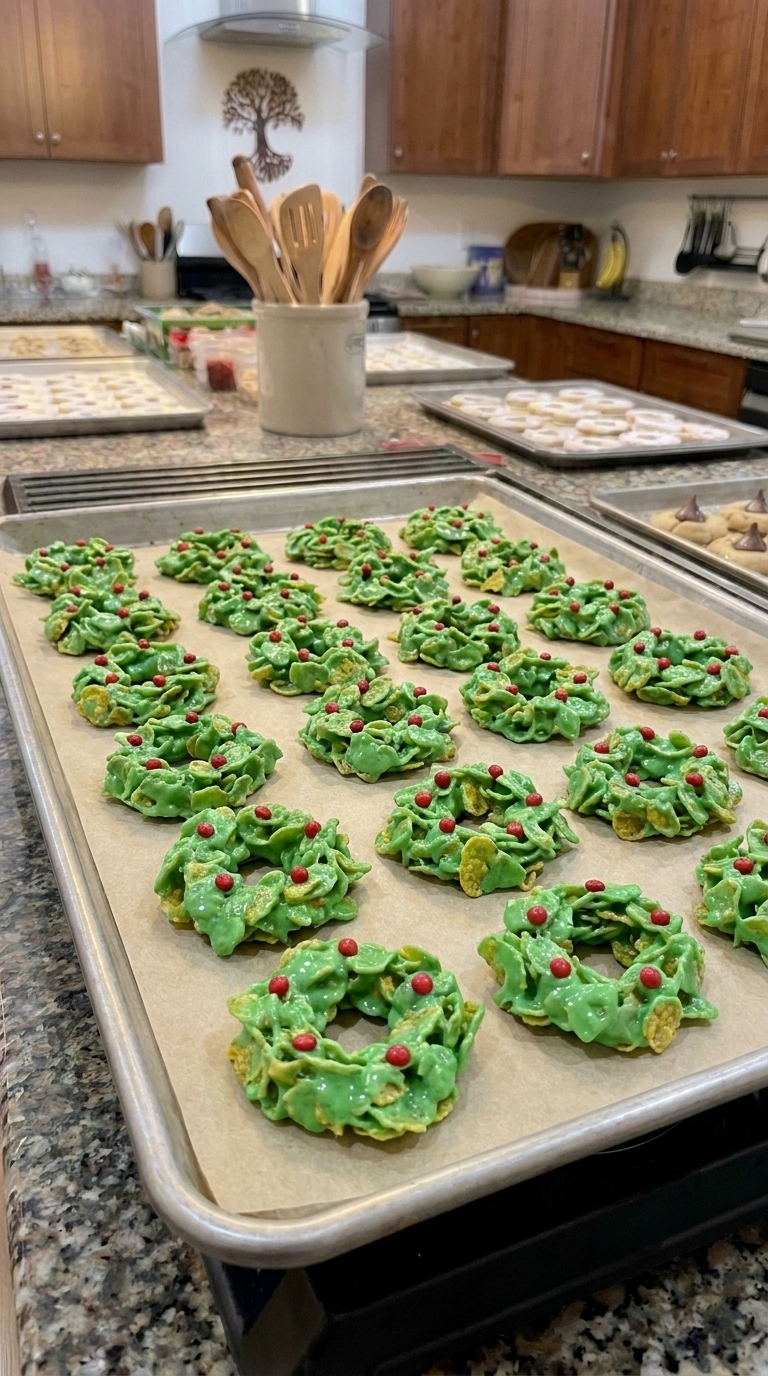
When your oven is already working overtime baking batches of gingerbread, shortbread, and crinkle cookies, finding a dessert that requires zero oven space is an absolute lifesaver. These vintage no-bake cornflake wreaths are a beloved holiday classic that have been gracing family dessert tables for generations. They take just fifteen minutes to whip up, require no baking whatsoever, and are an absolute blast to make with kids.
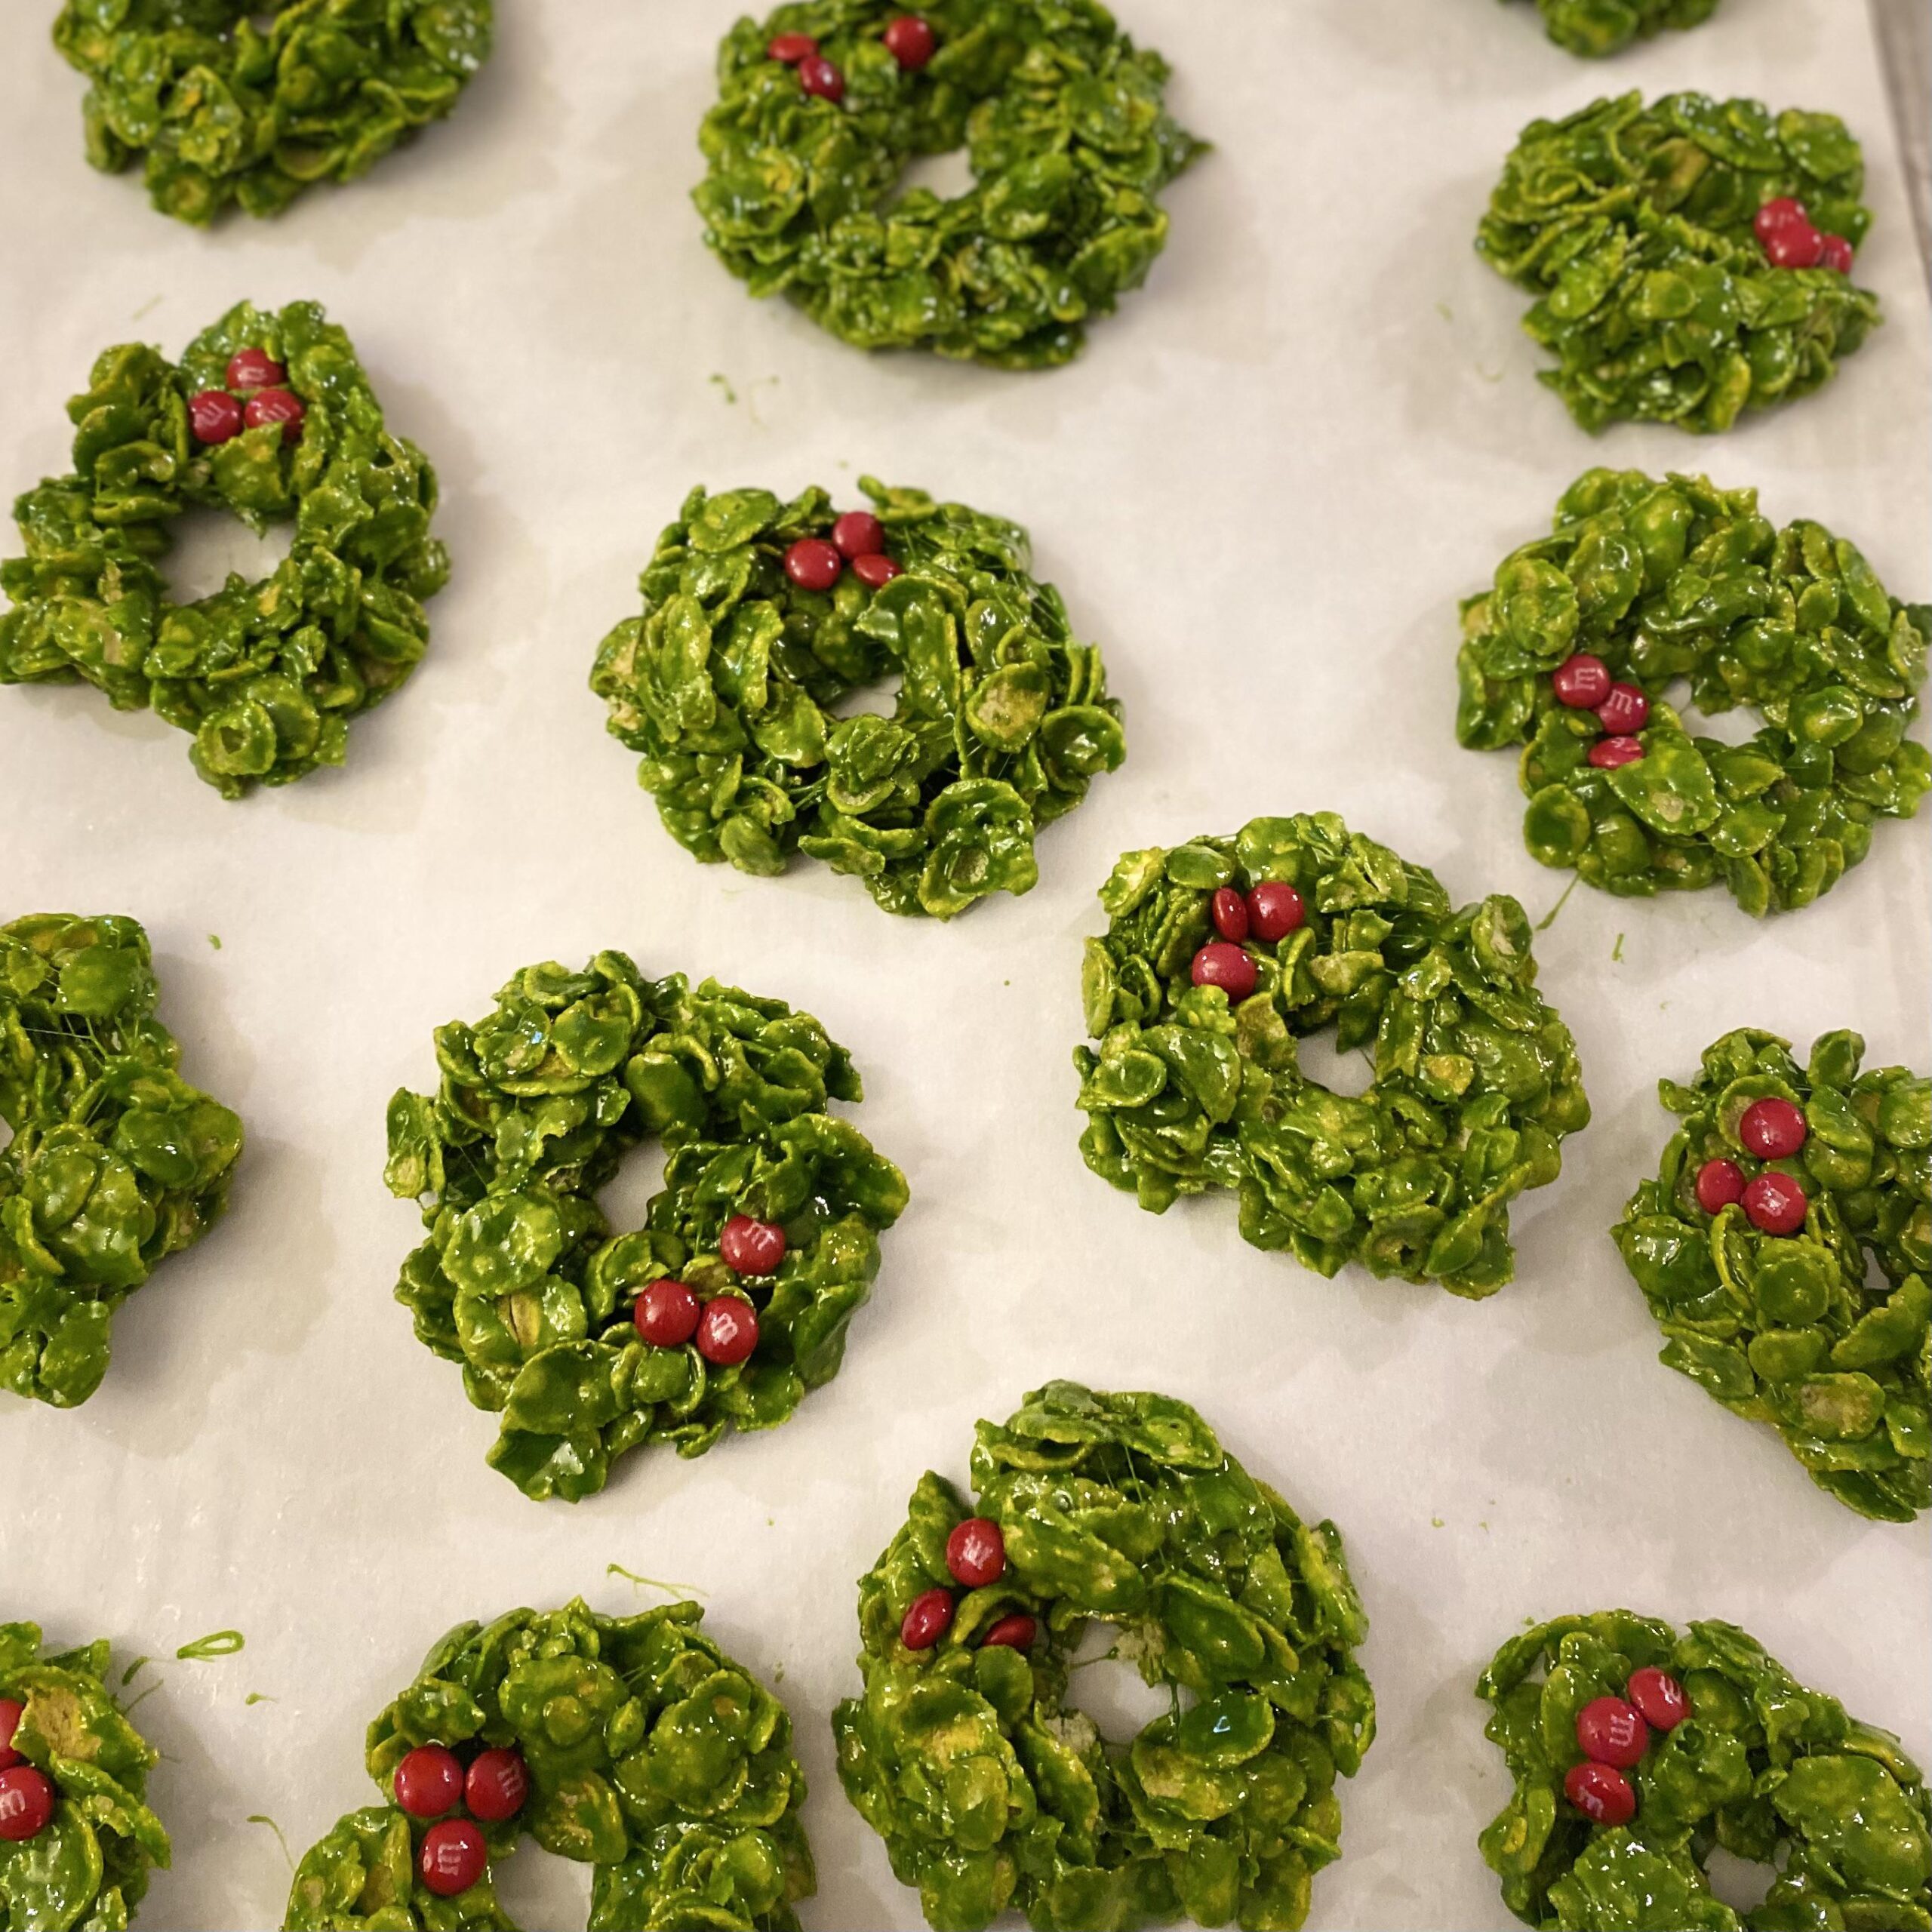
If you love the classic, gooey texture of homemade rice crispy treats, you will instantly fall in love with these festive green wreaths. By combining melted butter and marshmallows with crispy cornflakes, you get a treat that is delightfully crunchy, sweet, and chewy all at once. A few drops of green food coloring transform the mixture into vibrant holiday wreaths, while bright red cinnamon candies (like Red Hots) or mini red M&Ms serve as the charming holly berries on top.
Because they are so quick and budget-friendly, they are the ultimate project when you need a festive dessert in a hurry. They hold their shape wonderfully on a cookie tray, offering a fun, colorful contrast to traditional brown and white baked goods. Get the little ones involved, grease up your fingers, and let’s make a batch of these retro holiday favorites!
Why You’ll Love This Recipe
-
Zero oven space required: Perfect for when your kitchen is packed and every single baking sheet is already in use.
-
Incredibly fast: You can go from ingredients on the counter to a finished tray of treats in just 15 minutes.
-
Kid-friendly project: Children love helping shape the sticky wreaths and pressing the red “holly berries” into place.
-
Retro charm: These vintage treats bring back wonderful holiday memories and look exceptionally cute on any dessert platter.
-
Budget-friendly: Made using inexpensive, everyday pantry staples that you can find at any grocery store.
Ingredients
-
Unsalted butter: Forms the rich, buttery base for melting your marshmallows smoothly.
-
Mini marshmallows: Mini marshmallows melt much faster and more evenly than large marshmallows. You will need a standard 10-ounce bag.
-
Vanilla extract: Adds a warm, sweet background flavor to the marshmallow mixture.
-
Green liquid food coloring: Gives the wreaths their classic, vibrant holiday hue. You can adjust the amount depending on how bright you want the green to be.
-
Cornflakes cereal: The crunchy structural base of the wreaths. They provide a light, airy crunch that mimics pine needles.
-
Red cinnamon candies (Red Hots) or mini M&Ms: Used as the decorative “holly berries” pressed onto each finished wreath.
Step-by-Step Instructions
Step 1: Prep the Pans
Before you start melting anything, line two large baking sheets with parchment paper or wax paper. Because marshmallow mixture is wonderfully sticky, having your pans lined and ready to go is crucial so you don’t get caught scrambling while the mixture cools.
Step 2: Melt the Butter and Marshmallows
In a large pot or Dutch oven, melt your stick of unsalted butter over low heat. Once melted, add the entire 10-ounce bag of mini marshmallows. Stir the marshmallows continuously with a rubber spatula over low heat until they are completely melted, smooth, and free of lumps.
Step 3: Add Color and Vanilla
Remove the pot from the heat source entirely. Immediately stir in the vanilla extract and your green liquid food coloring. Mix vigorously until the marshmallow cream is a rich, uniform holiday green. If it isn’t quite vibrant enough, add another drop or two until you reach your desired shade.
Step 4: Fold in the Cornflakes
Gently pour the 4 cups of cornflakes cereal right into the green marshmallow mixture. Using your rubber spatula, carefully fold the cereal over itself until every single flake is evenly coated in the sticky green marshmallow.
Step 5: Shape the Wreaths
Working quickly while the mixture is still warm and pliable, drop generous spoonfuls of the coated cereal onto your prepared baking sheets. Lightly butter your fingers (this prevents the sticky marshmallow from adhering to your skin!), then shape each mound into a 2-inch circle, pressing a hole right through the center to form a wreath.
Step 6: Add the Holly Berries
Immediately press 3 to 4 red cinnamon candies (or mini red M&Ms) into the top of each warm wreath to resemble clusters of holly berries. Leave the wreaths undisturbed at room temperature for about 1 hour so they can cool and set completely before serving.
Expert Cooking Tips
-
Keep the heat low: When melting your marshmallows, always keep the burner on low. High heat can scorch the sugar, turning your marshmallow cream yellow or brown, which will ruin the vibrant green color.
-
Butter your fingers: Marshmallow mixture is notoriously sticky. Rubbing a tiny bit of softened butter or non-stick spray onto your hands before shaping the wreaths makes the job effortless.
-
Work quickly: The marshmallow mixture begins to firm up as it cools. Have your baking sheets right next to the stove so you can scoop and shape the wreaths without delay.
-
Choose your berries: Traditional recipes use red cinnamon candies (Red Hots) for a spicy kick, but if you are serving these to young children who don’t like spice, mini red M&Ms make a fantastic, sweet alternative.
-
Use fresh cereal: Stale cornflakes will lack that crisp, satisfying crunch. Make sure your box of cereal is fresh for the best texture.
Variations to Try
-
Peppermint Wreaths: Swap the vanilla extract for 1/2 teaspoon of peppermint extract for a refreshing, minty holiday twist.
-
Fruity Wreaths: For a colorful, kid-friendly variation, use Fruity Pebbles cereal instead of cornflakes and skip the green food coloring for a vibrant rainbow effect.
-
Chocolate Drizzle: Once the wreaths have set, drizzle a little bit of melted dark or white chocolate over them for an extra layer of decadence.
-
Mini Wreath Bites: Instead of shaping large wreaths, drop small bite-sized clusters onto the pan and top each one with a single red M&M for easy, poppable treats.
What to Serve With No-Bake Cornflake Wreaths
These sweet, crunchy treats look wonderful on a diverse holiday dessert table. Serve them alongside:
-
A warm, frothy mug of homemade hot chocolate.
-
A tall glass of ice-cold milk.
-
A spread of classic baked cookies like gingerbread men and peanut butter blossoms.
-
A cozy cup of spiced apple cider on movie night.
Storage & Reheating
Room Temperature
Store your finished cornflake wreaths in an airtight container at room temperature. To prevent them from sticking together, place sheets of parchment paper or wax paper between the layers. They will stay fresh and crispy for up to 5 days.
Freezer
Freezing is not recommended for cornflake wreaths. The moisture from the freezing and thawing process can cause the cornflakes to lose their signature crunch, resulting in a soggy, unappealing texture.
Reheating
Never microwave or heat these treats! Applying heat will instantly melt the marshmallow binding, turning your neat little wreaths back into an unshaped sticky puddle. Enjoy them at room temperature.
Frequently Asked Questions
Why did my cornflake wreaths turn out soggy?
Soggy wreaths usually happen if you use stale cereal, or if the marshmallow mixture was too hot when you mixed the flakes in, causing them to break down. Always use fresh cereal and let the melted marshmallows cool for just a minute off the heat before folding.
Can I make this ahead of time for a party?
Yes! You can easily make these up to 3 to 4 days before your event. Just store them in a tightly sealed airtight container with parchment paper between the layers to keep them from sticking together.
What if I don’t have green food coloring?
If you don’t have green food coloring on hand, you can still make these delicious treats! They will just look like golden-brown marshmallow cereal clusters, which are still incredibly tasty. You can also mix blue and yellow food coloring if you have those available.
Why are my wreaths falling apart and not holding their shape?
If the mixture is too crumbly and won’t hold together, you may not have used enough marshmallows, or you waited too long to shape them after removing the pot from the heat. The warm marshmallow acts as the glue; if it cools too much, it loses its adhesiveness.
Can I use gluten-free cereal for this recipe?
Yes! Traditional cornflakes often contain malt flavoring (which has gluten), but you can easily substitute certified gluten-free cornflakes to make this entire holiday treat completely safe for gluten-sensitive guests.
Final Thoughts
When you need a quick, stress-free dessert that still delivers maximum holiday cheer, these vintage no-bake cornflake wreaths are the ultimate solution. Requiring zero oven space and just a handful of basic ingredients, they are a wonderful throwback recipe that brings families together in the kitchen. With their bright green color, sweet marshmallow crunch, and festive red candy berries, they are guaranteed to bring smiles to faces of all ages. Grab your pot and whip up a batch today!
Vintage No-Bake Cornflake Wreaths
The easiest holiday throwback! No-bake cornflake wreaths made with melted marshmallows, green food coloring, and topped with red cinnamon candy holly berries.
Ingredients
- 1/2 cup Unsalted butter 1 stick
- 1 10 oz bag Mini marshmallows
- 1 tsp Vanilla extract
- 1 tsp Green liquid food coloring plus extra if a brighter shade is desired
- 4 cups Cornflakes cereal
- 1/4 cup Red cinnamon candies Red Hots or mini red M&Ms
Instructions
- Line two large baking sheets with parchment paper or wax paper.
- In a large pot or Dutch oven, melt the stick of unsalted butter over low heat.
- Add the entire bag of mini marshmallows. Stir continuously over low heat until the marshmallows are completely melted, smooth, and free of lumps.
- Remove the pot from the heat source. Stir in the vanilla extract and green food coloring until the marshmallow mixture is a uniform holiday green.
- Gently fold in the cornflakes cereal using a rubber spatula until all the flakes are evenly coated in the green marshmallow mixture.
- Drop generous spoonfuls of the coated cereal onto the prepared baking sheets.
- Lightly butter your fingers, then shape each warm mound into a 2-inch circle with a hole in the center to form a wreath.
- Immediately press 3 to 4 red candies into the top of each wreath to resemble holly berries.
- Let the wreaths set completely at room temperature for about 1 hour before serving.
Notes
Low Heat is Key: Always melt marshmallows over low heat so the sugar doesn't scorch or discolor.
Butter Your Fingers: Marshmallow is very sticky! A tiny bit of butter or non-stick spray on your hands makes shaping the wreaths effortless.
Gluten-Free Option: Use certified gluten-free cornflakes if you need these treats to be gluten-free.
Storage: Store in an airtight container at room temperature with parchment paper between layers for up to 5 days. Do not refrigerate or freeze.