Christmas Cake Pops (Easy No-Bake Holiday Treats)
These Christmas Cake Pops are the cutest little holiday treats! Made with soft cake crumbs, creamy vanilla frosting, colorful candy melts, and festive sprinkles, they’re a fun and easy addition to Christmas parties, holiday dessert tables, and homemade gift boxes.
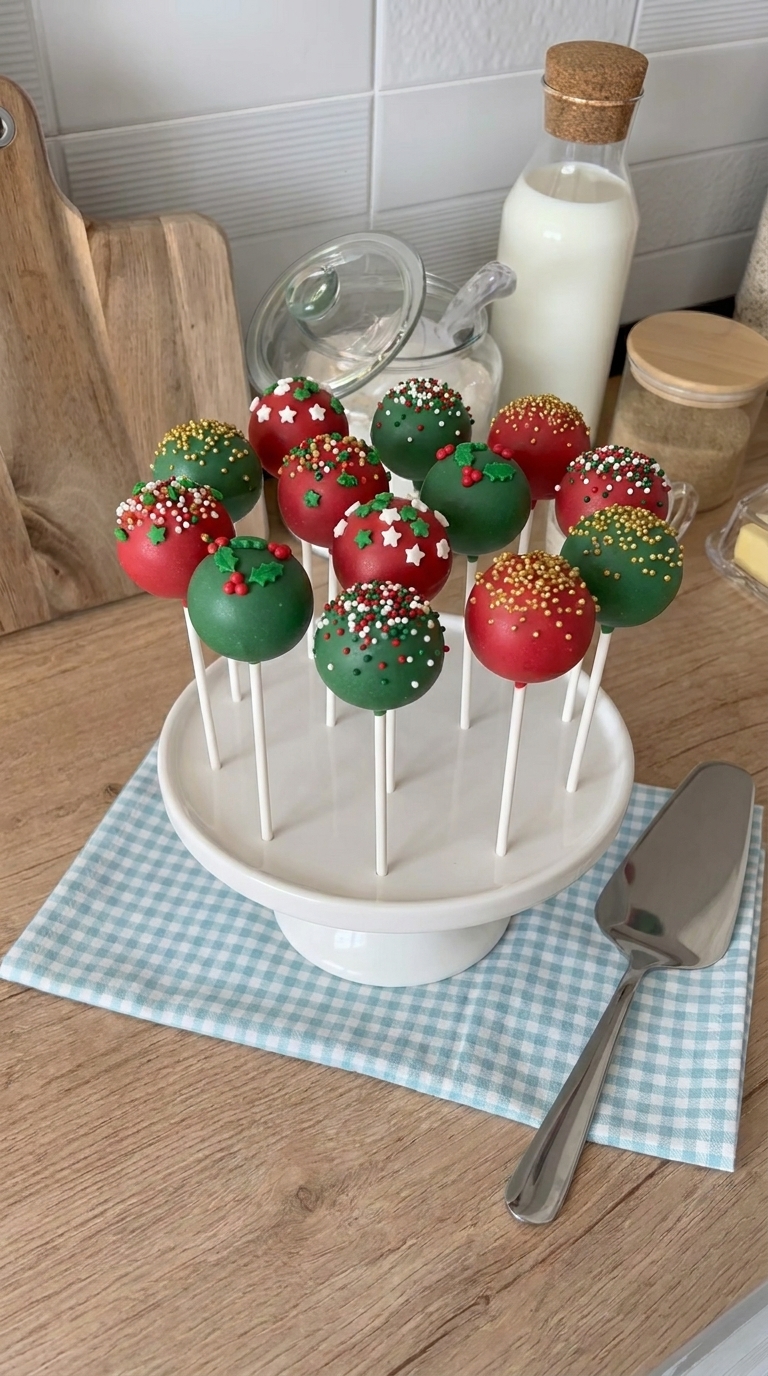
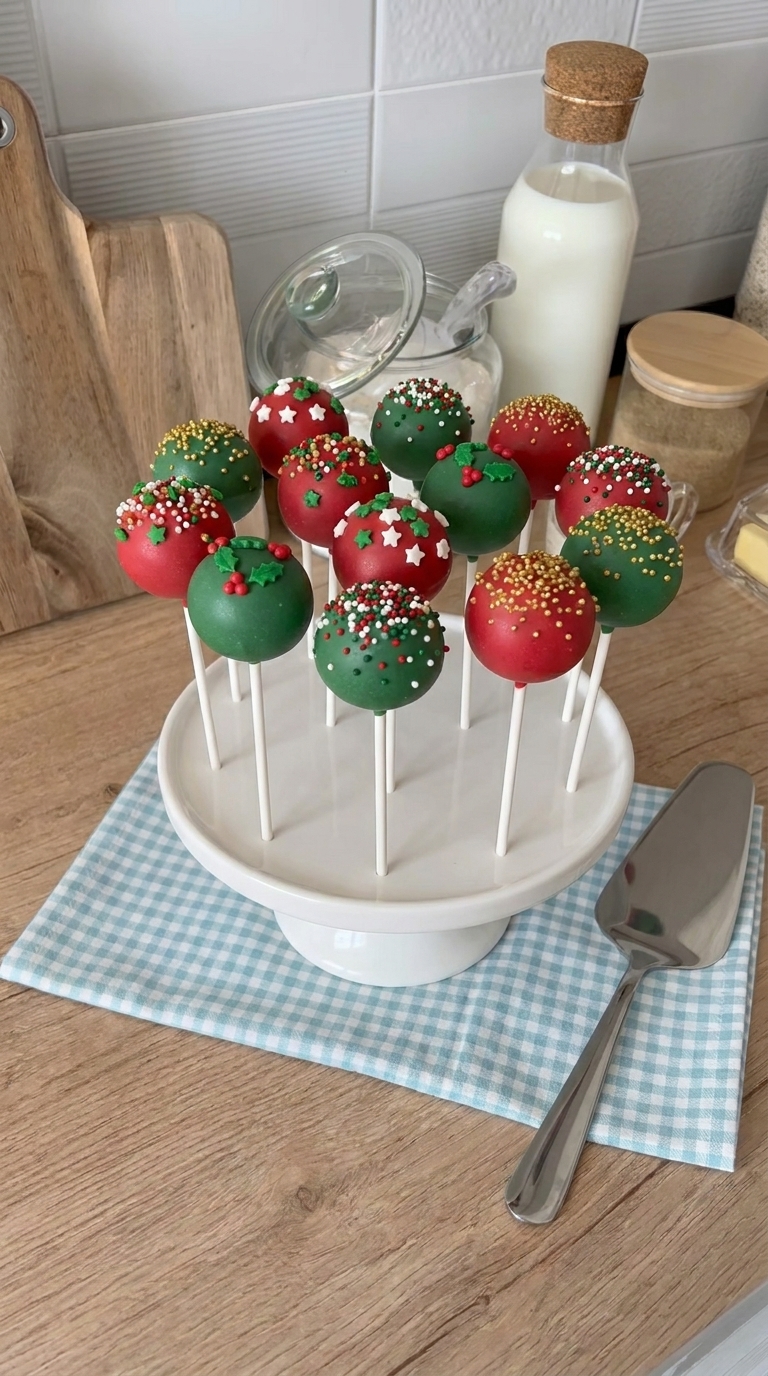
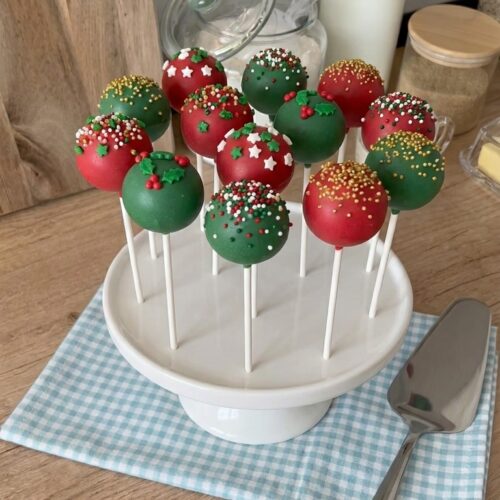
Each cake pop has a soft, moist cake center wrapped in a smooth candy coating. Decorate them with red and green sprinkles, tiny candy stars, or edible holly decorations for an adorable Christmas finish.
The best part? You can use your favorite boxed cake mix and store-bought frosting, so there’s no need to make everything from scratch.
Whether you’re planning a Christmas party, baking with the kids, or making homemade treats for neighbors, these festive cake pops are a wonderful way to celebrate the season.
Recipe at a Glance
- Prep Time: 30 minutes
- Cook Time: 0 minutes, using a previously baked cake
- Chill Time: 1 hour
- Total Time: Approximately 1 hour 30 minutes, plus coating and setting time as needed
- Yield: Approximately 24 cake pops
- Course: Dessert
- Occasion: Christmas, Holiday Parties, Homemade Gifts
Why You’ll Love These Christmas Cake Pops
There’s something about little decorated treats that makes a holiday dessert table feel extra special.
These homemade Christmas cake pops are easy to customize, and you don’t need professional cake decorating skills to make them.
Here’s why they’re worth making:
- Perfect for Christmas parties: They’re easy to serve individually and look beautiful on a dessert table.
- Made with boxed cake mix: A convenient way to turn a simple cake into festive treats.
- Fun to decorate: Use red, green, white, and gold sprinkles to create different Christmas designs.
- Great for gifting: Wrap individual cake pops in clear treat bags and tie them with festive ribbons.
- Kid-friendly activity: Children can help roll the cake balls and add decorations.
- Easy to make ahead: Prepare the cake balls in advance and decorate them when you’re ready.
What Are Christmas Cake Pops?
Christmas cake pops are bite-sized cake balls mixed with frosting, shaped into rounds, attached to lollipop sticks, and dipped in a candy coating.
Unlike traditional cookies or cupcakes, cake pops have a dense, soft center that resembles a rich cake truffle.
The coating hardens around the filling, making them easy to hold and decorate.
For Christmas, cake pops are often dipped in red, green, or white candy melts and finished with holiday sprinkles.
They’re especially popular for Christmas dessert tables, school holiday parties, cookie exchanges, and edible Christmas gifts.
Ingredients for Christmas Cake Pops
You only need a handful of simple ingredients to make these festive holiday treats.
For the Cake Pop Centers
- 1 baked 9×13-inch cake, completely cooled (any flavor)
- Up to 1/2 cup vanilla frosting, store-bought or homemade
For the Candy Coating
To match the red and green cake pops in the photo:
- 8 oz green candy melts
- 8 oz red candy melts
Original single-color option: Use 16 oz green candy melts.
For Decorating
- 24 lollipop sticks
- Assorted Christmas sprinkles
- Red, green, and white nonpareils
- Gold sugar pearls
- Edible holly decorations
- Small candy stars
Ingredient Notes
Cake: Vanilla, chocolate, red velvet, or yellow cake all work. Make sure the cake has cooled completely before crumbling it.
Frosting: Vanilla frosting helps bind the cake crumbs together. Start with less than the full amount and add only enough to make the mixture hold its shape.
Candy melts: Candy melts are convenient because they melt smoothly and set into a firm coating without traditional chocolate tempering.
Food coloring: If using white chocolate instead, choose oil-based food coloring specifically designed for chocolate. Water-based coloring can cause melted chocolate to seize.
Sprinkles: Use Christmas-themed sprinkles in red, green, white, and gold.
Lollipop sticks: Standard cake pop sticks work well. Choose sticks sturdy enough to support the cake balls.
Equipment You’ll Need
- Large mixing bowl
- Baking sheet
- Parchment paper
- Cookie scoop
- Microwave-safe bowls
- Tall, narrow dipping glasses
- Lollipop sticks
- Cake pop stand or food-safe foam block
A cake pop stand is especially helpful because it allows the coating to dry without creating a flat spot on the bottom.
How to Make Christmas Cake Pops
These Christmas cake pops come together in a few easy steps.
The most important things are getting the right cake-to-frosting consistency, securing the sticks properly, and dipping the cake balls without overheating the coating.
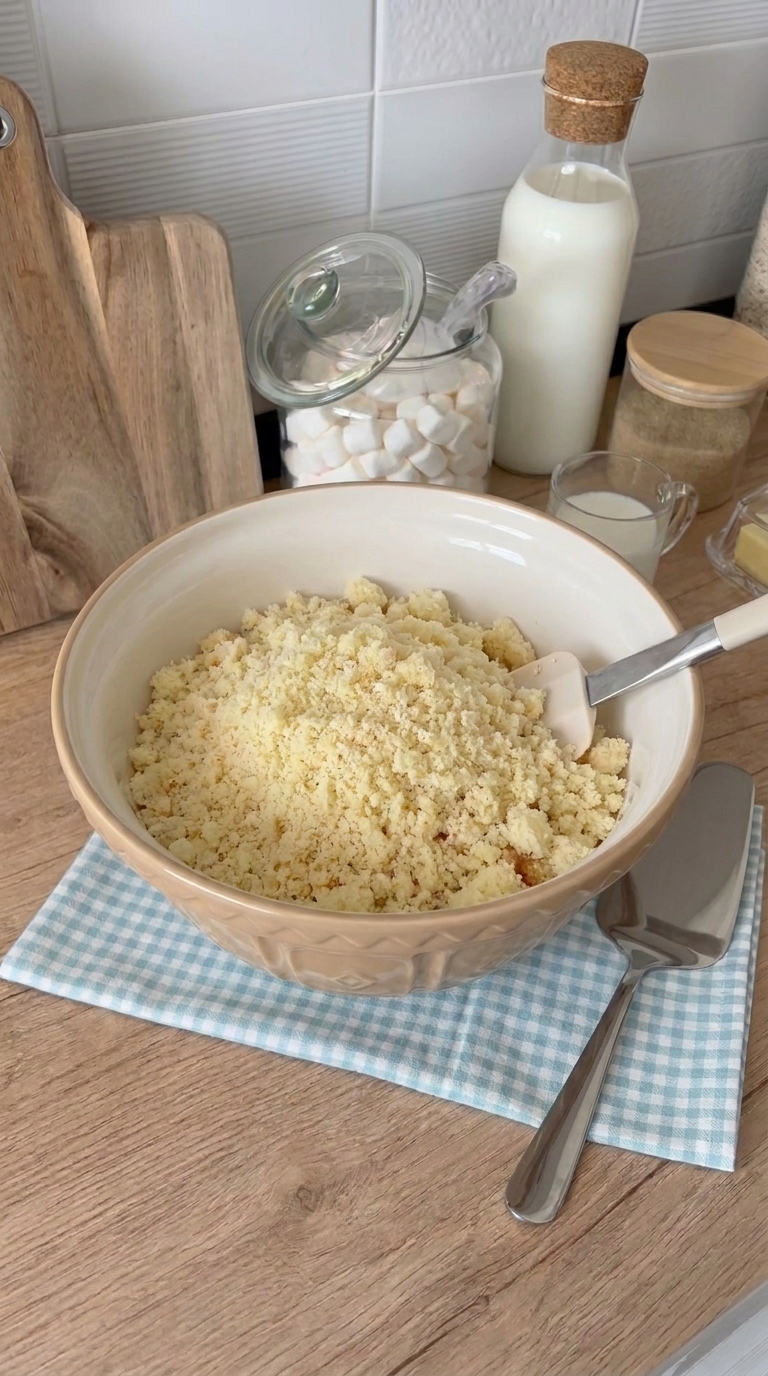
Step 1: Crumble the Cake
Place your completely cooled 9×13-inch cake into a large mixing bowl.
Use your hands or a fork to break the cake into fine crumbs.
Continue until there are no large chunks remaining.
The finer the crumbs, the smoother your cake pops will be.
Step 2: Add the Frosting
Add the vanilla frosting gradually to the cake crumbs.
Start with a few tablespoons and mix thoroughly.
Continue adding frosting only until the mixture becomes moist enough to hold together when pressed.
You may not need the entire 1/2 cup, depending on the moisture level of your cake.
The mixture should feel soft and moldable, not wet or greasy.
Helpful tip: If you squeeze a small amount of cake mixture in your hand and it holds together without crumbling, it’s ready.
Step 3: Roll the Cake Balls
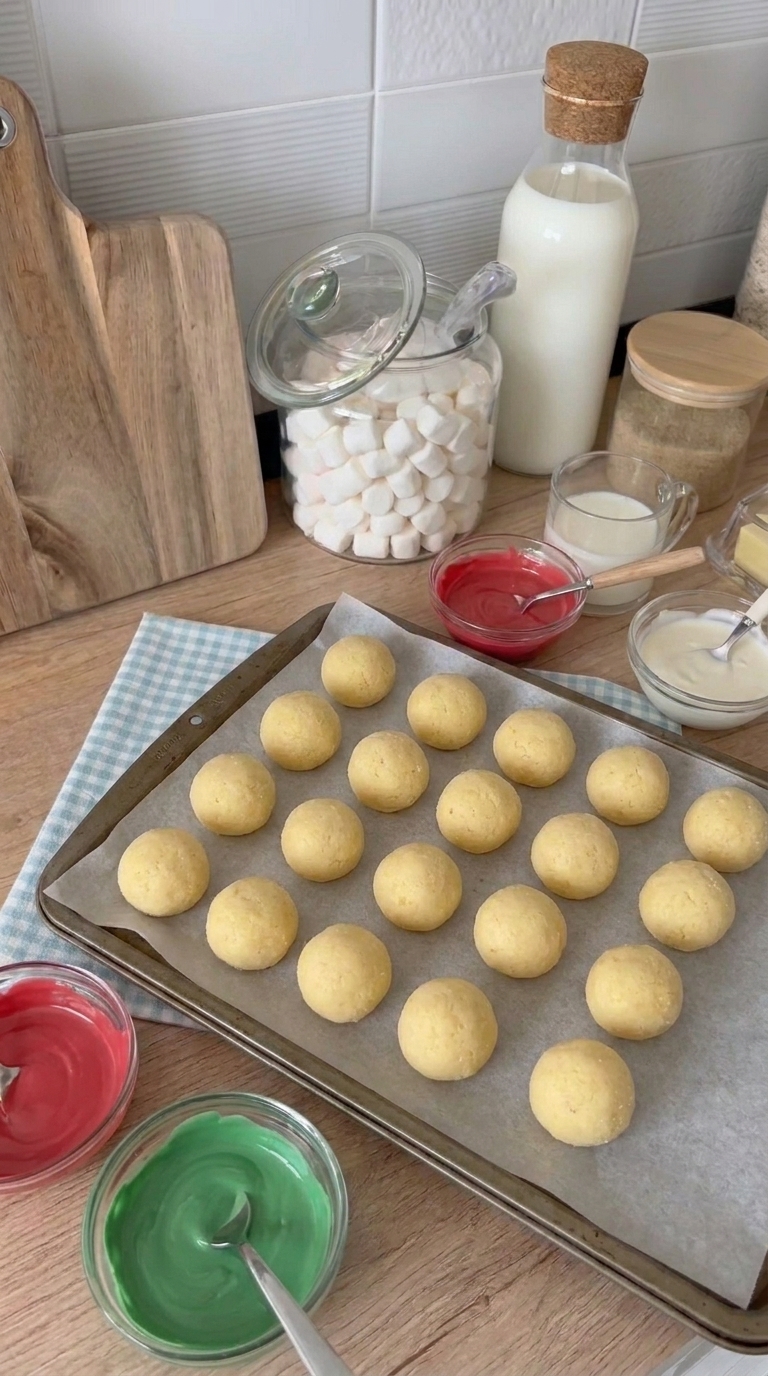
Line a baking sheet with parchment paper.
Scoop portions of the cake mixture and roll them into smooth balls approximately 1.5 inches wide.
Try to make each ball the same size so the finished cake pops look uniform.
Arrange them on the prepared baking sheet.
Refrigerate for approximately 30 minutes to help them firm up.
Melt a small amount of candy melts in a microwave-safe bowl.
Dip about 1/2 inch of one end of a lollipop stick into the melted coating.
Gently insert the coated end halfway into a chilled cake ball.
Repeat with the remaining cake balls.
The melted candy acts like glue, helping secure each cake ball to its stick.
Place the cake pops back on the baking sheet and chill until the coating around the sticks is firm.
You can freeze them for approximately 30 minutes as in the original recipe, but avoid dipping them while deeply frozen because the temperature difference may cause the outer coating to crack.
Step 5: Melt the Red and Green Candy Coatings
Place the red candy melts and green candy melts into separate microwave-safe bowls.
Heat each color in short intervals, stirring between each interval.
Once the coating is smooth, transfer it to a tall, narrow glass for easier dipping.
If the candy melts seem too thick, follow the manufacturer’s instructions for thinning them with an appropriate candy-coating thinner.
Avoid adding water.
Step 6: Dip the Cake Pops
Hold one cake pop by its stick and lower it straight down into the melted candy coating.
Make sure the entire cake ball is covered.
Lift it out gently and allow the excess coating to drip back into the glass.
Tap the stick lightly to help remove extra coating.
Avoid stirring or twisting the cake pop aggressively while dipping, as this can loosen the cake ball from the stick.
Repeat with the remaining cake pops, alternating between red and green coatings.
Step 7: Decorate With Christmas Sprinkles
While the candy coating is still wet, add your favorite holiday decorations.
Try different combinations to create a beautiful assortment.
Red Christmas cake pops: Decorate with white snowflakes, green stars, or gold sugar pearls.
Green Christmas cake pops: Add red and white nonpareils, tiny candy holly leaves, or gold sprinkles.
Classic Christmas colors: Use red, green, and white sprinkles together for a traditional holiday look.
Work quickly because candy melts begin setting as they cool.
Step 8: Let the Cake Pops Set
Carefully insert each decorated cake pop into a cake pop stand or food-safe foam block.
Allow the coating to harden completely.
Once set, the cake pops are ready to serve, display, or package as Christmas gifts.
Tips for Making Perfect Christmas Cake Pops
1. Don’t Add Too Much Frosting
Too much frosting can make cake pops overly soft and heavy.
Start with a small amount and gradually add more until the mixture holds together.
2. Make Sure the Cake Is Completely Cool
Warm cake can melt the frosting and create a sticky mixture that’s difficult to shape.
Allow the cake to cool fully before crumbling.
3. Keep the Cake Balls Evenly Sized
Uniform cake balls are easier to dip and look more professional.
A small cookie scoop can help with portioning.
4. Secure the Sticks With Melted Coating
Always dip the end of each stick in melted candy coating before inserting it into the cake ball.
This helps prevent the cake pops from sliding off during dipping.
5. Avoid Dipping Frozen-Solid Cake Balls
Very cold cake balls can cause warm candy coating to crack as the temperatures equalize.
The centers should be chilled and firm, but not excessively frozen.
6. Use a Tall Glass for Dipping
A tall, narrow glass allows you to cover the cake pop in one smooth motion.
This is usually easier than rolling the cake ball around in a shallow bowl.
7. Add Sprinkles Immediately
Candy melts can set quickly, especially in a cool kitchen.
Decorate each cake pop right after dipping while the coating is still wet.
Common Cake Pop Problems and How to Fix Them
Why Are My Cake Pops Falling Off the Sticks?
This usually happens when the cake balls are too heavy, the filling is too soft, or the sticks aren’t properly secured.
Try making slightly smaller cake balls and chilling them until firm.
Also, dip the sticks in melted coating before inserting them into the cake balls.
Why Is My Candy Coating Cracking?
Cracks can occur when very cold cake balls are dipped into warm candy coating.
Allow frozen cake balls to warm slightly in the refrigerator before dipping.
Avoid overheating the candy melts.
Why Are My Cake Pops Lumpy?
Lumpy cake pops can result from large cake crumbs, uneven rolling, or thick candy coating.
Crumble the cake finely, roll the balls smoothly, and make sure the coating has the correct consistency.
Why Is My Candy Coating Too Thick?
Candy melts can become thick if overheated or not melted correctly.
Heat gently and stir frequently.
Use a candy-coating thinner if needed, following the product instructions.
Why Are My Cake Pops Sweating?
Condensation can form when cold cake pops are moved into a warm, humid room.
Allow them to come to temperature gradually in a covered container to help reduce moisture on the surface.
Christmas Cake Pop Decorating Ideas
One of the most enjoyable parts of making Christmas cake pops is decorating them.
Here are a few fun designs to try.
Classic Red and Green Cake Pops
Dip half the cake pops in red candy melts and the other half in green.
Decorate with contrasting Christmas sprinkles.
Christmas Holly Cake Pops
Use green candy coating and decorate with small edible holly leaves and red candy berries.
Snowflake Cake Pops
Dip the cake pops in red or white coating and decorate with white snowflake sprinkles.
Gold Christmas Cake Pops
Use red or green candy melts and sprinkle the tops with edible gold sugar pearls.
Christmas Sprinkle Cake Pops
Coat the cake pops in red, green, and white nonpareils for a colorful holiday look.
Best Cake Flavors for Christmas Cake Pops
This recipe works with several different cake flavors.
Vanilla cake: A classic option that pairs well with almost any candy coating.
Chocolate cake: Delicious with red, green, or white candy melts.
Red velvet cake: Creates a festive red center beneath the candy coating.
Yellow cake: Rich, buttery, and easy to pair with vanilla frosting.
Spice cake: A cozy holiday variation with warm cinnamon and nutmeg flavors.
How to Store Christmas Cake Pops
Refrigerator
Place the finished cake pops in an airtight container and refrigerate for up to 5 days for best quality.
If stacking them, use parchment paper between layers.
Freezer
You can freeze undecorated cake balls for up to 2 months for best quality.
Store them in a freezer-safe container or bag.
Thaw in the refrigerator until firm but no longer frozen solid before dipping.
Room Temperature
For parties, keep cake pops in a cool indoor location and avoid direct sunlight or heat.
Because storage needs depend on the cake and frosting used, refrigeration is the safer default for homemade cake pops.
Can You Make Christmas Cake Pops Ahead of Time?
Yes! These are a great make-ahead Christmas dessert.
You can bake the cake a day in advance, allow it to cool, and store it covered.
The next day, crumble the cake, mix in the frosting, and shape the cake balls.
You can also prepare the cake balls ahead and keep them refrigerated until you’re ready to dip and decorate.
For the prettiest results, decorate the cake pops close to the day you plan to serve them.
How to Package Christmas Cake Pops for Gifts
Christmas cake pops make adorable homemade holiday gifts.
Once the candy coating has hardened completely, place each cake pop into a clear, food-safe treat bag.
Secure the bag around the stick with a festive ribbon or twist tie.
Arrange the wrapped cake pops in a decorative box or holiday container.
For a thoughtful finishing touch, add a small gift tag with the flavor and a note to keep the cake pops refrigerated.
These make lovely gifts for neighbors, teachers, friends, and family.
Frequently Asked Questions
Can I Make Christmas Cake Pops With Boxed Cake Mix?
Absolutely! Boxed cake mix works very well.
Bake the cake according to the package directions, allow it to cool completely, and then crumble it for the cake pop filling.
Do Cake Pops Need to Be Refrigerated?
Refrigeration is recommended for homemade cake pops, especially when they contain frosting.
Store them in an airtight container to help prevent drying and condensation.
Can I Use White Chocolate Instead of Candy Melts?
Yes, but real white chocolate behaves differently from candy melts.
For a firm, glossy coating, white chocolate may need to be tempered.
If coloring white chocolate, use oil-based food coloring designed for chocolate.
How Do I Keep Cake Pops From Falling Off the Sticks?
Make sure the cake balls are firm, avoid adding too much frosting, and secure the sticks with melted candy coating before dipping.
Can I Make Cake Pops Without a Cake Pop Stand?
Yes. You can use a sturdy, food-safe foam block or another secure holder with holes for the sticks.
Make sure the holder is stable enough to support the cake pops upright.
How Many Cake Pops Does One Box of Cake Mix Make?
A standard 9×13-inch cake can make approximately 24 cake pops, depending on the size of the balls and how much frosting is added.
Smaller cake balls may produce a larger yield.
Can I Freeze Finished Christmas Cake Pops?
You can, although freezing may affect the appearance of the candy coating.
For the best-looking decorations, freeze the undecorated cake balls and dip them after thawing in the refrigerator.
What Is the Best Candy Coating for Cake Pops?
Candy melts are a convenient choice because they are designed for dipping and setting without tempering.
Choose good-quality candy melts and avoid overheating them.
Final Thoughts
These Christmas Cake Pops are a fun way to turn a simple cake into something festive and special.
With their soft cake centers, colorful candy coating, and cheerful holiday decorations, they’re perfect for Christmas parties, homemade gifts, or a weekend baking project with the family.
Whether you make classic red and green cake pops, decorate them with edible holly, or cover them in colorful Christmas sprinkles, they’re sure to brighten your holiday dessert table.
Which would you make first—red Christmas cake pops or green ones?
Christmas Cake Pops
Ingredients
- 1 baked 9×13-inch cake completely cooled
- Up to 1/2 cup vanilla frosting
- 8 oz red candy melts
- 8 oz green candy melts
- 24 lollipop sticks
- Assorted Christmas sprinkles
- Edible holly decorations optional
Instructions
- Crumble the cooled cake into fine crumbs in a large mixing bowl.
- Gradually add vanilla frosting until the mixture holds together when pressed.
- Roll into approximately 24 balls, about 1.5 inches wide.
- Place on a parchment-lined baking sheet and refrigerate for 30 minutes.
- Melt a small amount of candy coating. Dip the tip of each lollipop stick into the coating and insert halfway into a cake ball.
- Chill until the sticks are securely attached, approximately 30 minutes.
- Melt the remaining red and green candy melts separately until smooth.
- Dip each cake pop into the melted coating, allowing excess to drip off.
- Immediately decorate with Christmas sprinkles or edible holly decorations.
- Place upright in a cake pop stand and allow the coating to set completely.