3-Ingredient Peanut Butter Fudge (Easy Microwave Recipe)
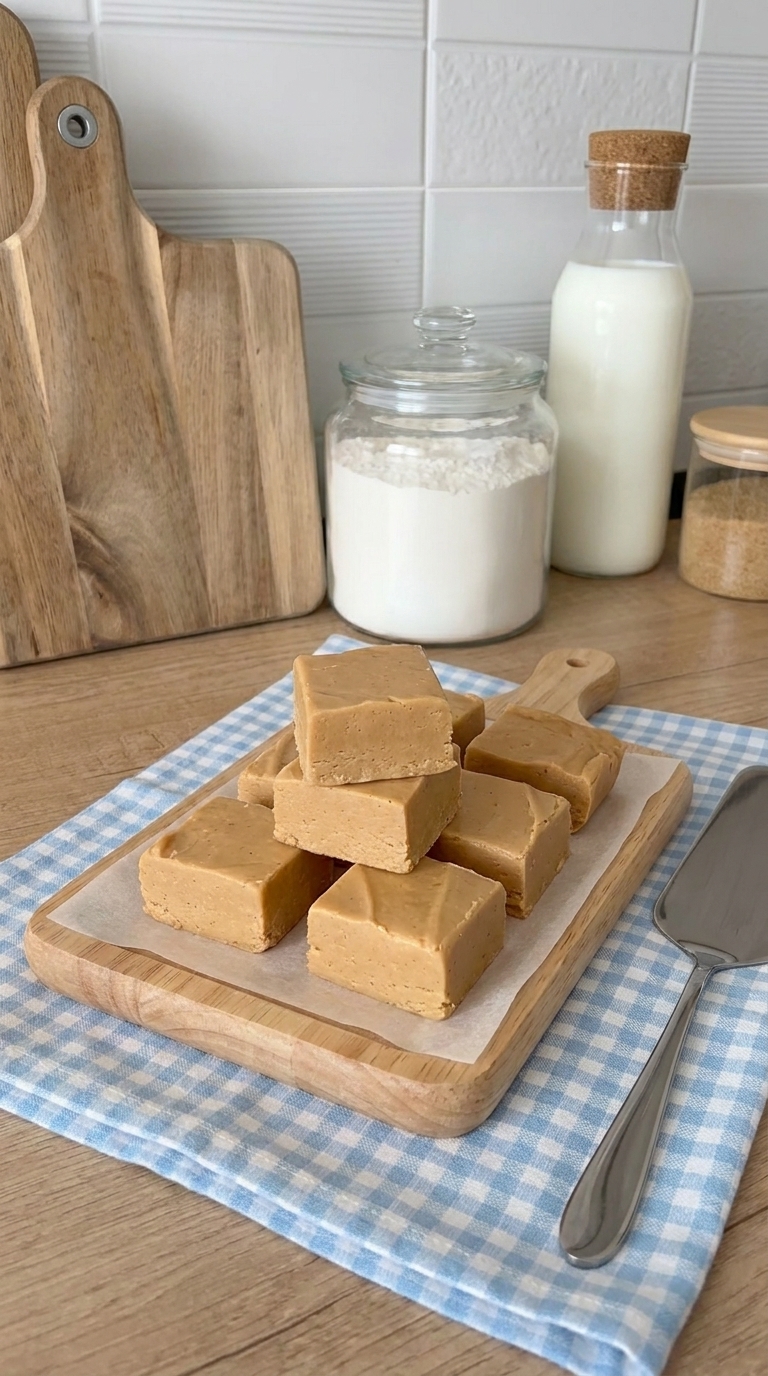
If you love peanut butter, this 3-Ingredient Peanut Butter Fudge might become your new favorite homemade treat! It’s rich, creamy, and packed with peanut butter flavor, and you only need three simple ingredients to make it.
My husband is the biggest peanut butter fan on the planet, and this is the fudge recipe I always come back to. No candy thermometer, no complicated stovetop cooking, and no standing over a pot waiting for sugar to reach the perfect temperature.
Just melt, stir, pour, and chill!
Made with sweetened condensed milk, peanut butter chips, and creamy peanut butter, this easy microwave fudge is perfect for Christmas candy trays, holiday gifts, bake sales, or an afternoon treat.
And because it takes only about five minutes to prepare before chilling, it’s especially convenient during the busy holiday season.
Recipe at a Glance
- Prep Time: 5 minutes
- Cook Time: Approximately 2 minutes
- Chill Time: 2 hours
- Total Time: Approximately 2 hours 7 minutes
- Yield: 16–20 squares
- Course: Dessert, Candy
- Method: Microwave, No-Bake
Why You’ll Love This Easy Peanut Butter Fudge
There are plenty of homemade fudge recipes out there, but this one keeps things wonderfully simple.
Only three ingredients. You don’t need powdered sugar, marshmallow creme, or a long list of ingredients.
No candy thermometer. Unlike traditional cooked fudge, this recipe doesn’t require boiling sugar to a precise temperature.
Ready to chill in minutes. The preparation is quick, and the refrigerator does most of the work.
Rich peanut butter flavor. Peanut butter chips and creamy peanut butter give every bite a delicious nutty taste.
Great for Christmas gifting. Cut the fudge into squares and package it in holiday candy tins or decorative boxes.
Easy to make ahead. Prepare it a day or two before a holiday party and keep it chilled until serving.
What Is 3-Ingredient Peanut Butter Fudge?
This easy peanut butter fudge is a shortcut version of traditional homemade fudge.
Classic fudge often involves cooking sugar, butter, and milk to a specific temperature before cooling and beating the mixture to create its characteristic texture.
This version skips that process.
Instead, sweetened condensed milk is combined with peanut butter chips and creamy peanut butter. The ingredients are gently melted together, spread into a baking pan, and refrigerated until firm.
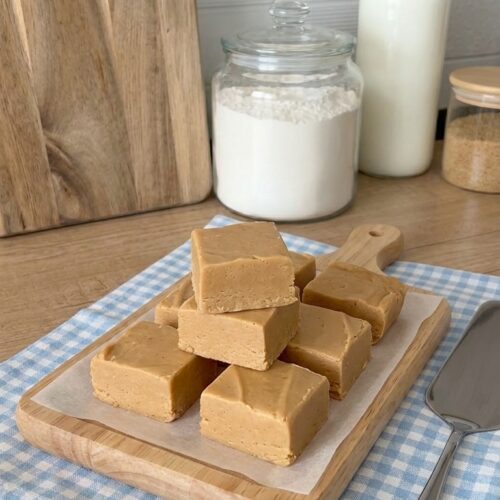
The result is a rich, smooth peanut butter candy that can be sliced into squares.
It’s an easy choice for beginner candy makers or anyone who wants homemade fudge without the extra steps.
Ingredients for 3-Ingredient Peanut Butter Fudge
You only need three ingredients, and they’re easy to find in most American grocery stores.
Ingredients
- 1 can (14 ounces) sweetened condensed milk
- 2 cups peanut butter chips (approximately 12 ounces)
- 1/2 cup creamy peanut butter
That’s it!
No extra butter, no powdered sugar, and no additional sweeteners are needed.
Ingredient Notes and Helpful Tips
Sweetened Condensed Milk
This thick, sweet milk helps create the creamy texture of the fudge and binds the ingredients together.
Be sure to use sweetened condensed milk, not evaporated milk.
Evaporated milk is much thinner and will not produce the same results.
Peanut Butter Chips
Peanut butter baking chips provide sweetness, structure, and a concentrated peanut butter flavor.
Use good-quality baking chips and check that they’re fresh.
The exact weight of 2 cups can vary by brand, so use the package weight when measuring.
Creamy Peanut Butter
Regular creamy peanut butter works well because its smooth consistency blends easily with the melted chips.
Natural peanut butter that separates significantly may affect the texture and firmness of the fudge.
For the most consistent results, use a well-mixed, shelf-stable creamy peanut butter.
Equipment You’ll Need
One of the best things about this recipe is that you don’t need much equipment.
- 8×8-inch square baking pan
- Parchment paper
- Medium microwave-safe bowl
- Rubber spatula
- Measuring cups
- Sharp knife for slicing
A microwave makes the process especially quick, but you can also melt the ingredients gently using a double boiler.
How to Make 3-Ingredient Peanut Butter Fudge
This homemade peanut butter fudge comes together in a few simple steps.
The most important thing is to melt the ingredients gently and allow enough time for the fudge to set completely.
Step 1: Prepare the Baking Pan
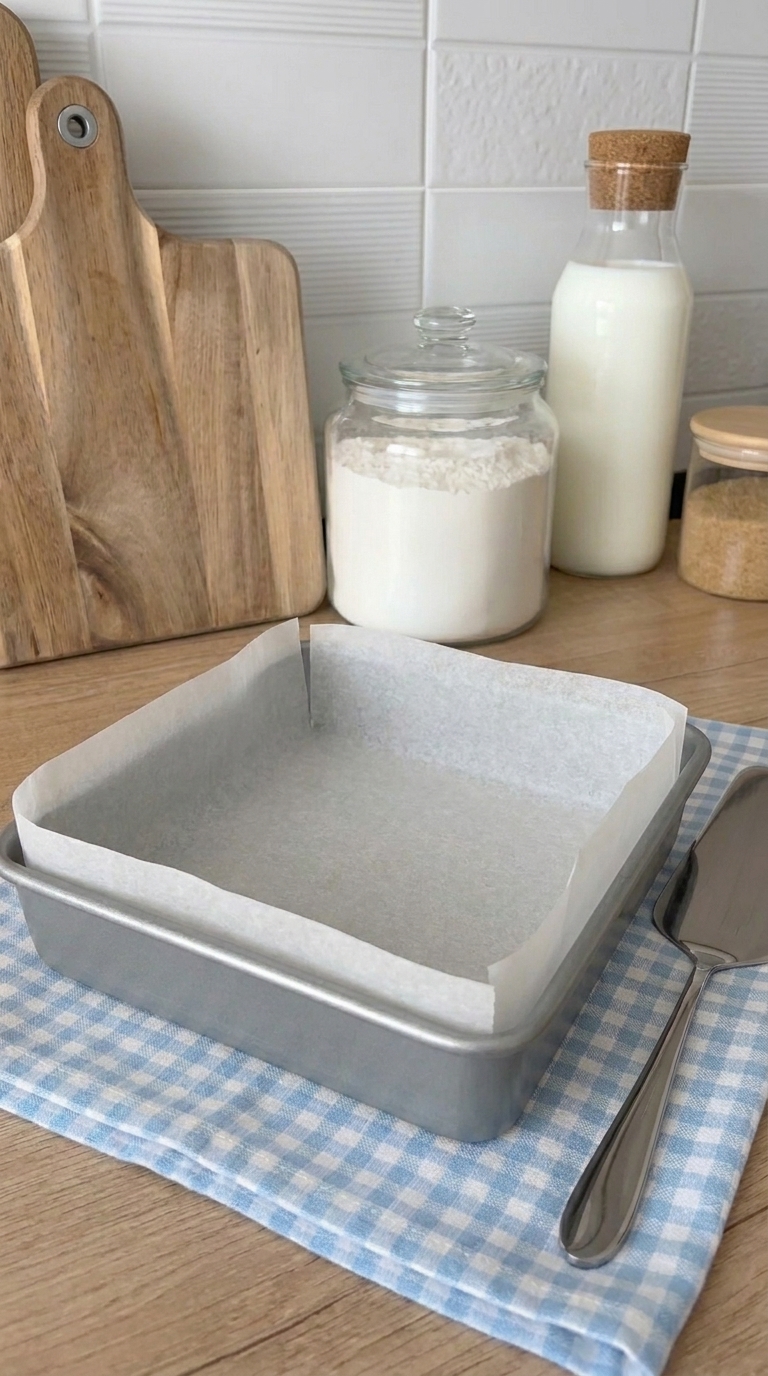
Line an 8×8-inch square baking pan with parchment paper.
Leave some parchment hanging over two sides of the pan.
These extra pieces act as handles, making it much easier to lift the fudge out once it has chilled.
Set the prepared pan aside.
Step 2: Combine the Ingredients
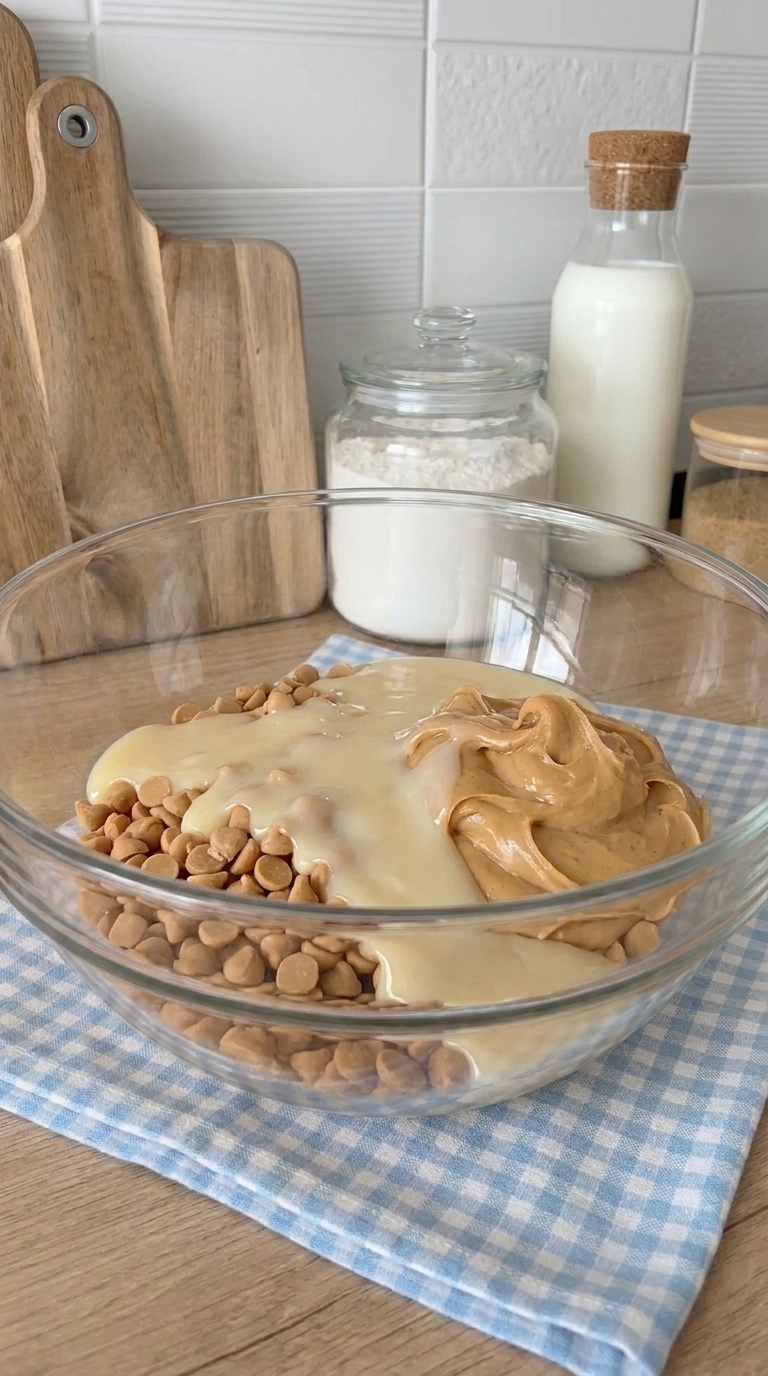
In a medium microwave-safe bowl, add the sweetened condensed milk, peanut butter chips, and creamy peanut butter.
Stir briefly to distribute the ingredients.
The mixture will be thick at first, but it will become smooth as the chips melt.
Step 3: Melt the Peanut Butter Mixture
Place the bowl in the microwave and heat on high for 1 minute.
Carefully remove the bowl and stir thoroughly.
If the peanut butter chips haven’t completely melted, return the bowl to the microwave in 15-second intervals.
Stir well after each interval until the mixture becomes smooth and creamy.
Important: Don’t overheat the mixture. Peanut butter chips can become thick or grainy when exposed to too much heat.
Step 4: Spread the Fudge Into the Pan
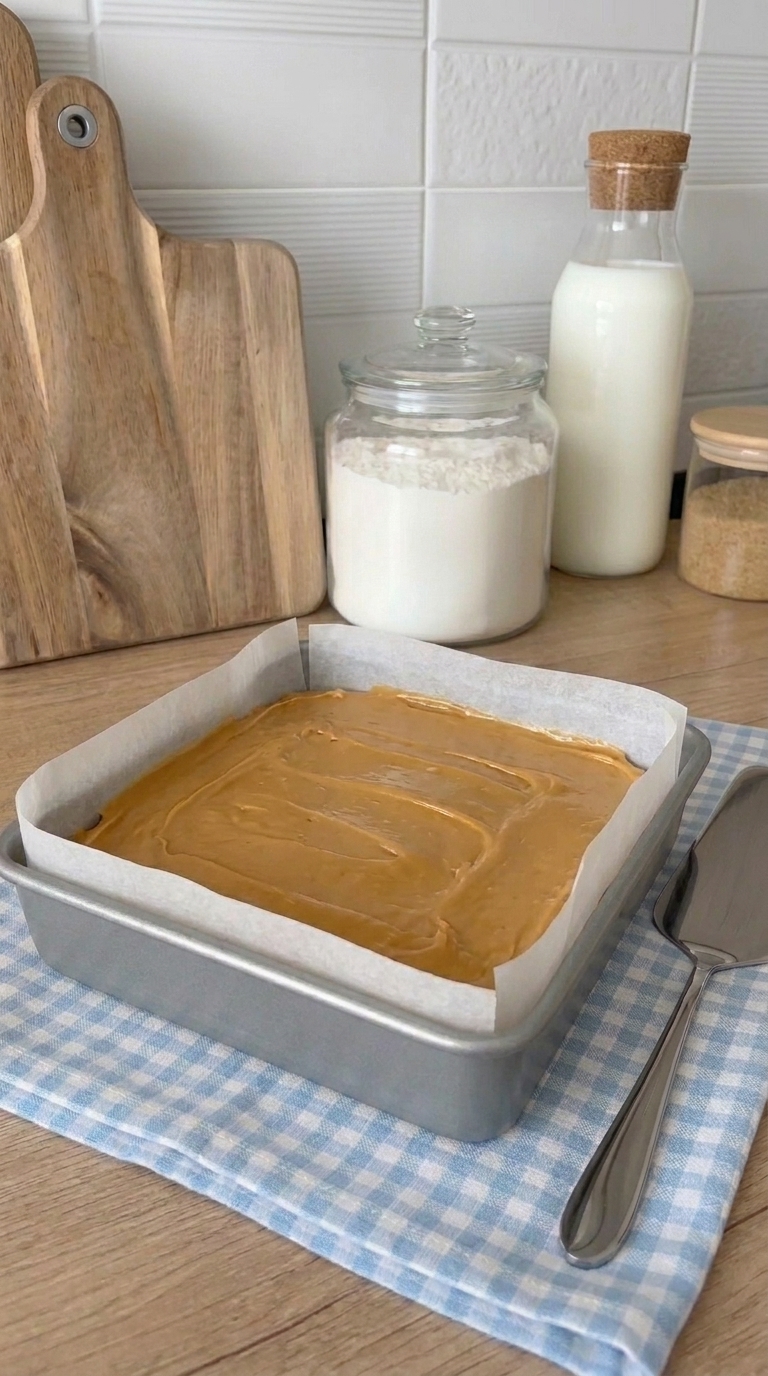
Immediately pour the warm peanut butter mixture into the prepared baking pan.
Use a spatula to spread it evenly into the corners.
Smooth the top to create an even surface.
If the mixture begins to thicken, work gently but quickly before it starts to set.
Step 5: Refrigerate Until Firm
Place the pan in the refrigerator for at least 2 hours.
The fudge should become firm enough to lift from the pan and cut into clean squares.
If the center still feels soft, refrigerate it longer.
Step 6: Cut Into Squares
Once the fudge has completely set, lift it out of the pan using the parchment paper handles.
Place it on a cutting board.
Use a sharp knife to cut the fudge into 16–20 squares, depending on your preferred serving size.
For cleaner cuts, wipe the knife between slices.
Serve immediately or store in an airtight container.
Tips for Making Perfect Peanut Butter Fudge
Even though this is a simple recipe, a few small details can help you get the best texture.
1. Use Sweetened Condensed Milk, Not Evaporated Milk
These two canned milk products look similar, but they’re not interchangeable.
Sweetened condensed milk is thick and sweet, while evaporated milk is thinner and unsweetened.
Using the wrong one can prevent the fudge from setting properly.
2. Don’t Overheat the Peanut Butter Chips
Microwave the mixture in short intervals once the initial minute is finished.
Stir thoroughly between heating intervals.
The residual heat often melts the remaining small pieces without additional microwaving.
3. Use Creamy Peanut Butter
Smooth peanut butter blends easily into the mixture and creates a more uniform texture.
Chunky peanut butter can be used for a variation, but the finished fudge won’t have the same smooth appearance.
4. Line Your Pan With Parchment Paper
Parchment paper makes removing the fudge much easier.
It also helps prevent the fudge from sticking to the bottom of the pan.
5. Let the Fudge Chill Completely
Don’t rush the chilling step.
The fudge needs enough time to become firm before slicing.
If it still feels soft after two hours, give it more time in the refrigerator.
6. Cut With a Sharp Knife
For neat squares, use a sharp knife and wipe the blade clean between cuts.
You can also let the chilled fudge sit at room temperature for a few minutes if it’s too firm to slice comfortably.
Why Isn’t My Peanut Butter Fudge Setting?
This is one of the most common questions when making microwave fudge.
If your fudge is too soft, several things may be responsible.
Not enough chilling time: Some batches need longer than two hours to become firm.
Incorrect ingredient measurements: Too much condensed milk or peanut butter can affect the final texture.
Different peanut butter brands: Natural peanut butter and other varieties may produce different results.
Overheating: Excessive heat can affect the texture of the peanut butter chips.
If your fudge is still soft after the recommended chilling time, refrigerate it for another hour or two.
If it remains too soft to cut, the ingredient balance may be the issue.
Common Peanut Butter Fudge Problems and Solutions
Why Is My Fudge Grainy?
Grainy fudge can result from overheating the peanut butter chips.
Melt the ingredients gently and stir frequently.
Avoid microwaving longer than necessary.
Why Is My Fudge Too Hard?
Fudge can become quite firm when refrigerated, especially if it contains a high proportion of baking chips.
Let it sit at room temperature briefly before slicing or serving.
Why Is My Fudge Oily?
Some peanut butter brands release more oil than others.
Using a well-mixed, shelf-stable creamy peanut butter can help reduce separation.
Why Is My Fudge Sticky?
Sticky fudge may not have chilled long enough or may contain too much liquid.
Measure the ingredients carefully and refrigerate until fully set.
Easy Peanut Butter Fudge Variations
The classic three-ingredient version is delicious on its own, but you can also use it as a starting point for other flavors.
Chocolate Peanut Butter Fudge
Drizzle melted semi-sweet chocolate over the chilled fudge for a chocolate-peanut butter combination.
You can also add a thin chocolate layer on top before chilling.
Salted Peanut Butter Fudge
Sprinkle a small amount of flaky sea salt over the top before the fudge sets.
The salt provides a delicious contrast to the sweetness.
Crunchy Peanut Butter Fudge
Use crunchy peanut butter instead of creamy peanut butter.
This adds small peanut pieces throughout the fudge.
Peanut Butter Chocolate Chip Fudge
Sprinkle mini chocolate chips over the warm fudge mixture before refrigerating.
Press them gently into the surface so they stay in place.
Holiday Sprinkle Fudge
Add red and green holiday sprinkles to the top before chilling.
This is an easy way to make the fudge look festive for Christmas candy trays.
How to Store Homemade Peanut Butter Fudge
Proper storage helps maintain the fudge’s smooth texture and flavor.
Refrigerator Storage
Place the fudge squares in an airtight container.
Separate layers with parchment paper to prevent sticking.
Store in the refrigerator for up to 2 weeks for best quality.
Can You Freeze Peanut Butter Fudge?
Yes!
Wrap the fudge tightly or place the squares in a freezer-safe airtight container.
For best quality, freeze for up to 2–3 months.
Thaw in the refrigerator before serving.
Can Peanut Butter Fudge Be Left at Room Temperature?
The fudge can be set out briefly for serving in a cool room.
For longer storage, refrigeration is recommended because the recipe contains dairy ingredients.
Avoid leaving the fudge in direct sunlight or a warm kitchen, where it may soften.
How to Package Peanut Butter Fudge for Christmas Gifts
Homemade peanut butter fudge makes a wonderful addition to holiday candy boxes.
Once the fudge is completely chilled and cut, arrange the squares in a decorative tin or food-safe gift box.
Place parchment paper between the layers to keep the pieces from sticking together.
You can pair this fudge with other homemade holiday treats, such as:
- Martha Washington Candies
- Chocolate Peanut Butter Balls
- Christmas Crack (Saltine Toffee)
- Peppermint Chocolate Bark
- Old-Fashioned Chocolate Fudge
For gifting, include a note that the fudge contains peanuts and milk and should be kept refrigerated.
Frequently Asked Questions
Can I Make Peanut Butter Fudge Without a Candy Thermometer?
Yes! This recipe doesn’t require a candy thermometer.
The ingredients are simply melted together and chilled until firm.
Can I Use Natural Peanut Butter?
You can try it, but natural peanut butter may affect the texture because its oil can separate.
For more consistent results, regular creamy peanut butter is recommended.
Can I Make This Fudge on the Stovetop?
Yes.
Combine the ingredients in a heatproof bowl set over a saucepan of gently simmering water.
Stir until melted and smooth, then pour into the prepared pan and refrigerate.
Keep the bottom of the bowl above the water.
Can I Use Chocolate Chips Instead of Peanut Butter Chips?
You can make a chocolate-peanut butter variation with chocolate chips, but the flavor and firmness may change.
For the original three-ingredient peanut butter fudge, peanut butter chips are recommended.
How Long Does Peanut Butter Fudge Take to Set?
Most batches need at least 2 hours in the refrigerator.
Some may require additional chilling time depending on the ingredients and pan depth.
Can I Double This Recipe?
Yes.
Double the ingredients and use a larger pan, such as a 9×13-inch pan.
The thickness and setting time may change slightly.
Is This Peanut Butter Fudge Gluten-Free?
The basic ingredients may be gluten-free, but always check the labels on the peanut butter chips, peanut butter, and condensed milk if preparing it for someone who needs to avoid gluten.
How Many Pieces Does This Recipe Make?
An 8×8-inch pan yields approximately 16–20 squares.
Cut smaller pieces if you’re making a holiday candy assortment.
More Old-Fashioned Candy Recipes to Try
If you love simple homemade sweets, you might also enjoy:
- Mammaw’s Martha Washington Candies
- Classic Peanut Butter Balls
- Old-Fashioned Chocolate Fudge
- Easy Christmas Chocolate Bark
- No-Bake Christmas Candy
Final Thoughts
This 3-Ingredient Peanut Butter Fudge is proof that homemade candy doesn’t have to be complicated.
With sweetened condensed milk, peanut butter chips, and creamy peanut butter, you can make a rich, smooth fudge with just a few minutes of preparation.
It’s perfect for Christmas candy trays, holiday gifts, family gatherings, or keeping a little something sweet in the refrigerator.
And if your family loves peanut butter as much as mine does, this recipe might disappear faster than you expect!
Do you like your peanut butter fudge plain, or would you add a little chocolate on top?
3-Ingredient Peanut Butter Fudge
Ingredients
- 1 can 14 oz sweetened condensed milk
- 2 cups peanut butter chips approximately 12 oz
- 1/2 cup creamy peanut butter
Instructions
- Line an 8×8-inch baking pan with parchment paper, leaving an overhang on two sides.
- Combine sweetened condensed milk, peanut butter chips, and creamy peanut butter in a microwave-safe bowl.
- Microwave on high for 1 minute, then remove and stir thoroughly.
- Continue microwaving in 15-second intervals, stirring after each, until completely melted and smooth.
- Pour the mixture into the prepared baking pan and smooth the top with a spatula.
- Refrigerate for at least 2 hours or until fully set.
- Lift the fudge out of the pan using the parchment paper and cut into 16–20 squares.
Notes
Regular creamy peanut butter gives the most consistent texture.
Avoid overheating the peanut butter chips.
Refrigerate until fully firm before slicing.
Store in an airtight container in the refrigerator for up to 2 weeks for best quality.
Freeze for up to 2–3 months for longer storage.