Fluffy Cast Iron Dinner Rolls with Herb Butter
The Ultimate Homemade Bread Upgrade
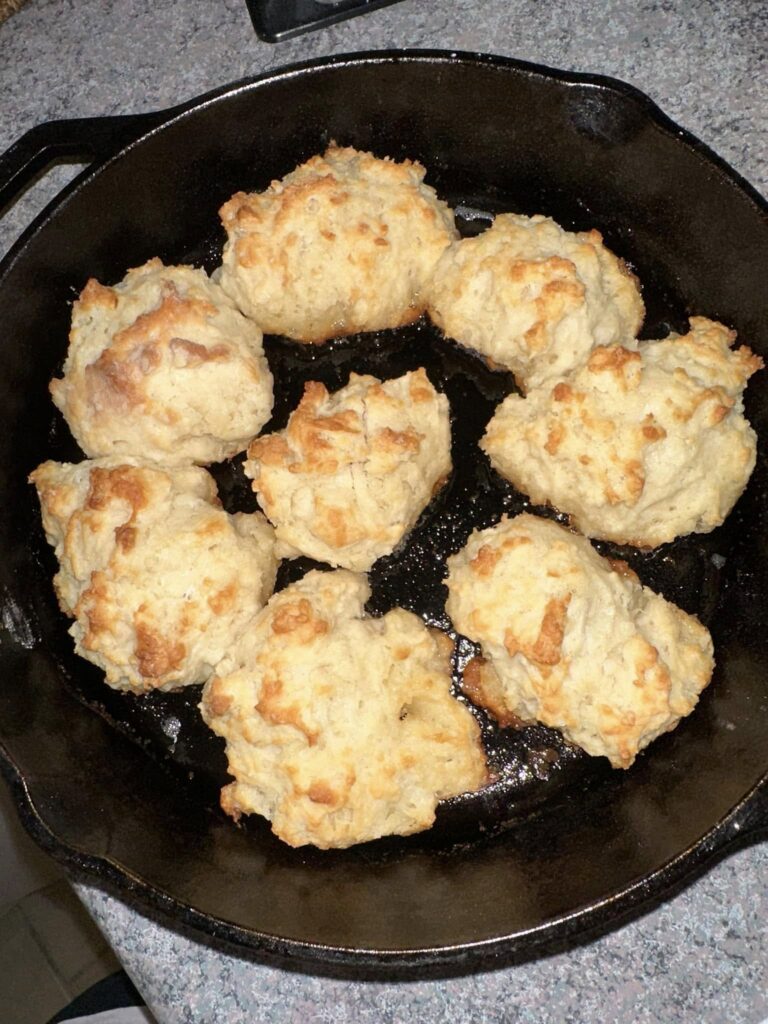
There is nothing quite like the aroma of fresh bread baking in your own kitchen. If you are still buying store-bought bread for your family dinners, it is officially time to stop! These homemade cast-iron dinner rolls are insanely fluffy, incredibly tender, and bake up perfectly golden every single time. Baking them in a well-seasoned cast iron skillet gives them a wonderfully crisp bottom crust that a standard glass or ceramic baking dish just cannot replicate.
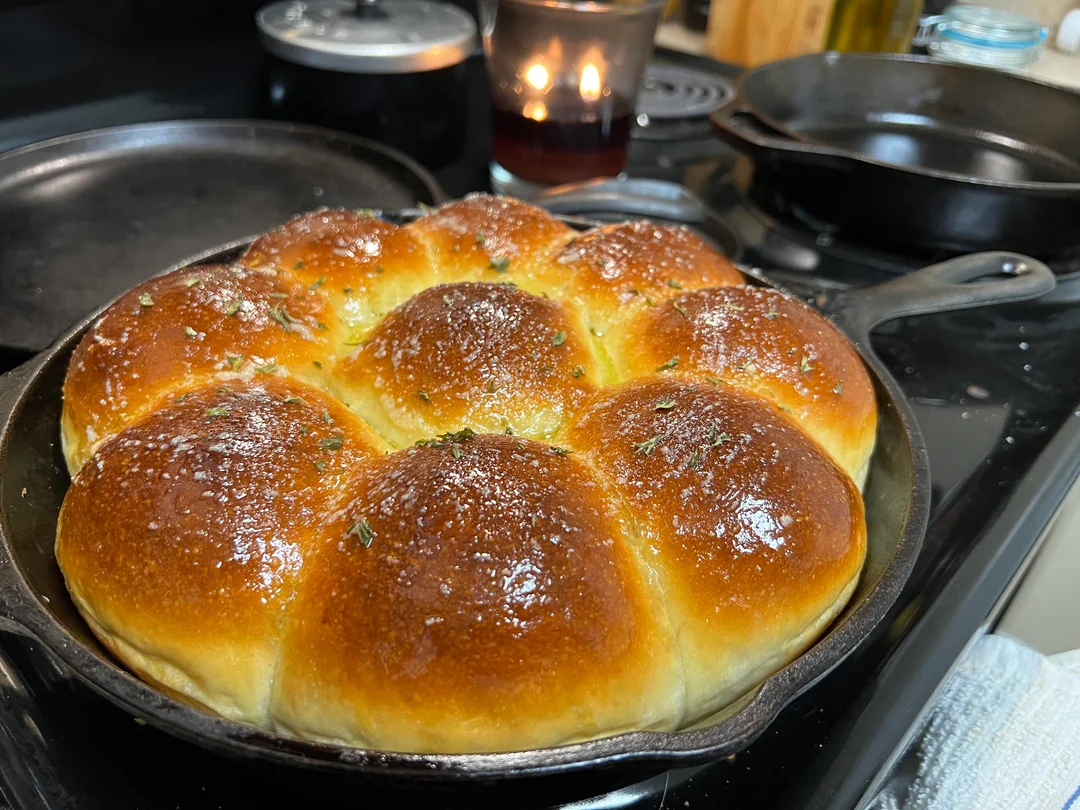
When they come out of the oven piping hot, they get generously brushed with a savory herb butter that melts right into the tops. My husband and daughter absolutely devour these, usually sneaking one straight from the hot pan before they even make it to the dinner table. They are the ultimate Southern comfort side dish, perfect for soaking up a rich sausage gravy or pairing with a classic Sunday roast.
While working with yeast can feel intimidating if you are a beginner, this dough is incredibly forgiving. I usually bring the soft dough together in the bowl using a sturdy stainless steel spatula before turning it out to knead. It rises beautifully, shaping into eight perfect, pillowy rounds that fill a standard 10-inch or 12-inch skillet flawlessly.
Why You’ll Love This Recipe
-
Better Than Store-Bought: You get that unparalleled, fresh-from-the-oven bakery taste that no plastic-wrapped bread can offer.
-
Perfectly Golden Crust: The heavy cast iron conducts heat evenly, ensuring the rolls bake up beautifully golden with a slightly crisp bottom edge.
-
Insanely Fluffy Interior: They have a pillow-soft, tender crumb that practically melts in your mouth.
-
Savory Herb Butter Finish: The melted herb butter brushed on top adds an incredible layer of savory flavor and a gorgeous, appetizing shine.
-
Family Favorite: Guaranteed to be a massive hit at the dinner table with both kids and adults alike.
Ingredients
-
Whole Milk: One cup, warmed to about 110°F. The fat in whole milk creates a richer, softer crumb than water.
-
Active Dry Yeast: One standard packet (2 1/4 teaspoons). This gives the rolls their incredible fluffy lift.
-
Granulated Sugar: A quarter cup to feed the yeast and add a very subtle sweetness to the dough.
-
Unsalted Butter: A third of a cup, melted and slightly cooled, plus extra for the herb butter topping.
-
Egg: One large room-temperature egg helps bind the dough and provides richness.
-
All-Purpose Flour: About 3 to 3 1/4 cups. You can also use bread flour if you prefer a slightly chewier roll.
-
Salt: One teaspoon to balance the flavors. Do not skip this, or your bread will taste entirely flat.
-
For the Herb Butter: 3 tablespoons of melted butter mixed with 1 teaspoon of fresh minced thyme (or parsley) and a half teaspoon of garlic powder.
Step-by-Step Instructions
Step 1: Bloom the Yeast
In the bowl of a stand mixer or a large mixing bowl, combine the warm whole milk, the active dry yeast, and one tablespoon of the granulated sugar. Give it a gentle stir and let it sit undisturbed for 5 to 10 minutes. It should become foamy and bubbly on top, which tells you the yeast is alive and active.
Step 2: Mix the Wet Ingredients
Once the yeast is bubbly, add the remaining granulated sugar, the melted butter, and the egg. Whisk everything together until the egg is fully incorporated and the mixture is smooth.
Step 3: Form the Dough
Add 3 cups of the all-purpose flour and the salt to the wet ingredients. Use a sturdy stainless steel spatula to bring the mixture together until a shaggy, sticky dough forms.
Step 4: Knead Until Smooth
If using a stand mixer, attach the dough hook and knead on medium-low speed for 5 to 7 minutes. If kneading by hand, turn the dough out onto a lightly floured surface and knead for 8 to 10 minutes. The dough should become smooth, elastic, and slightly tacky, but it should not stick completely to your fingers. Add the remaining 1/4 cup of flour only if the dough is overwhelmingly wet.
Step 5: First Rise
Form the dough into a smooth ball and place it in a large, lightly greased bowl. Cover the bowl tightly with plastic wrap or a warm, damp kitchen towel. Let the dough rise in a warm, draft-free spot for 1 to 1.5 hours, or until it has completely doubled in size.
Step 6: Shape the Rolls
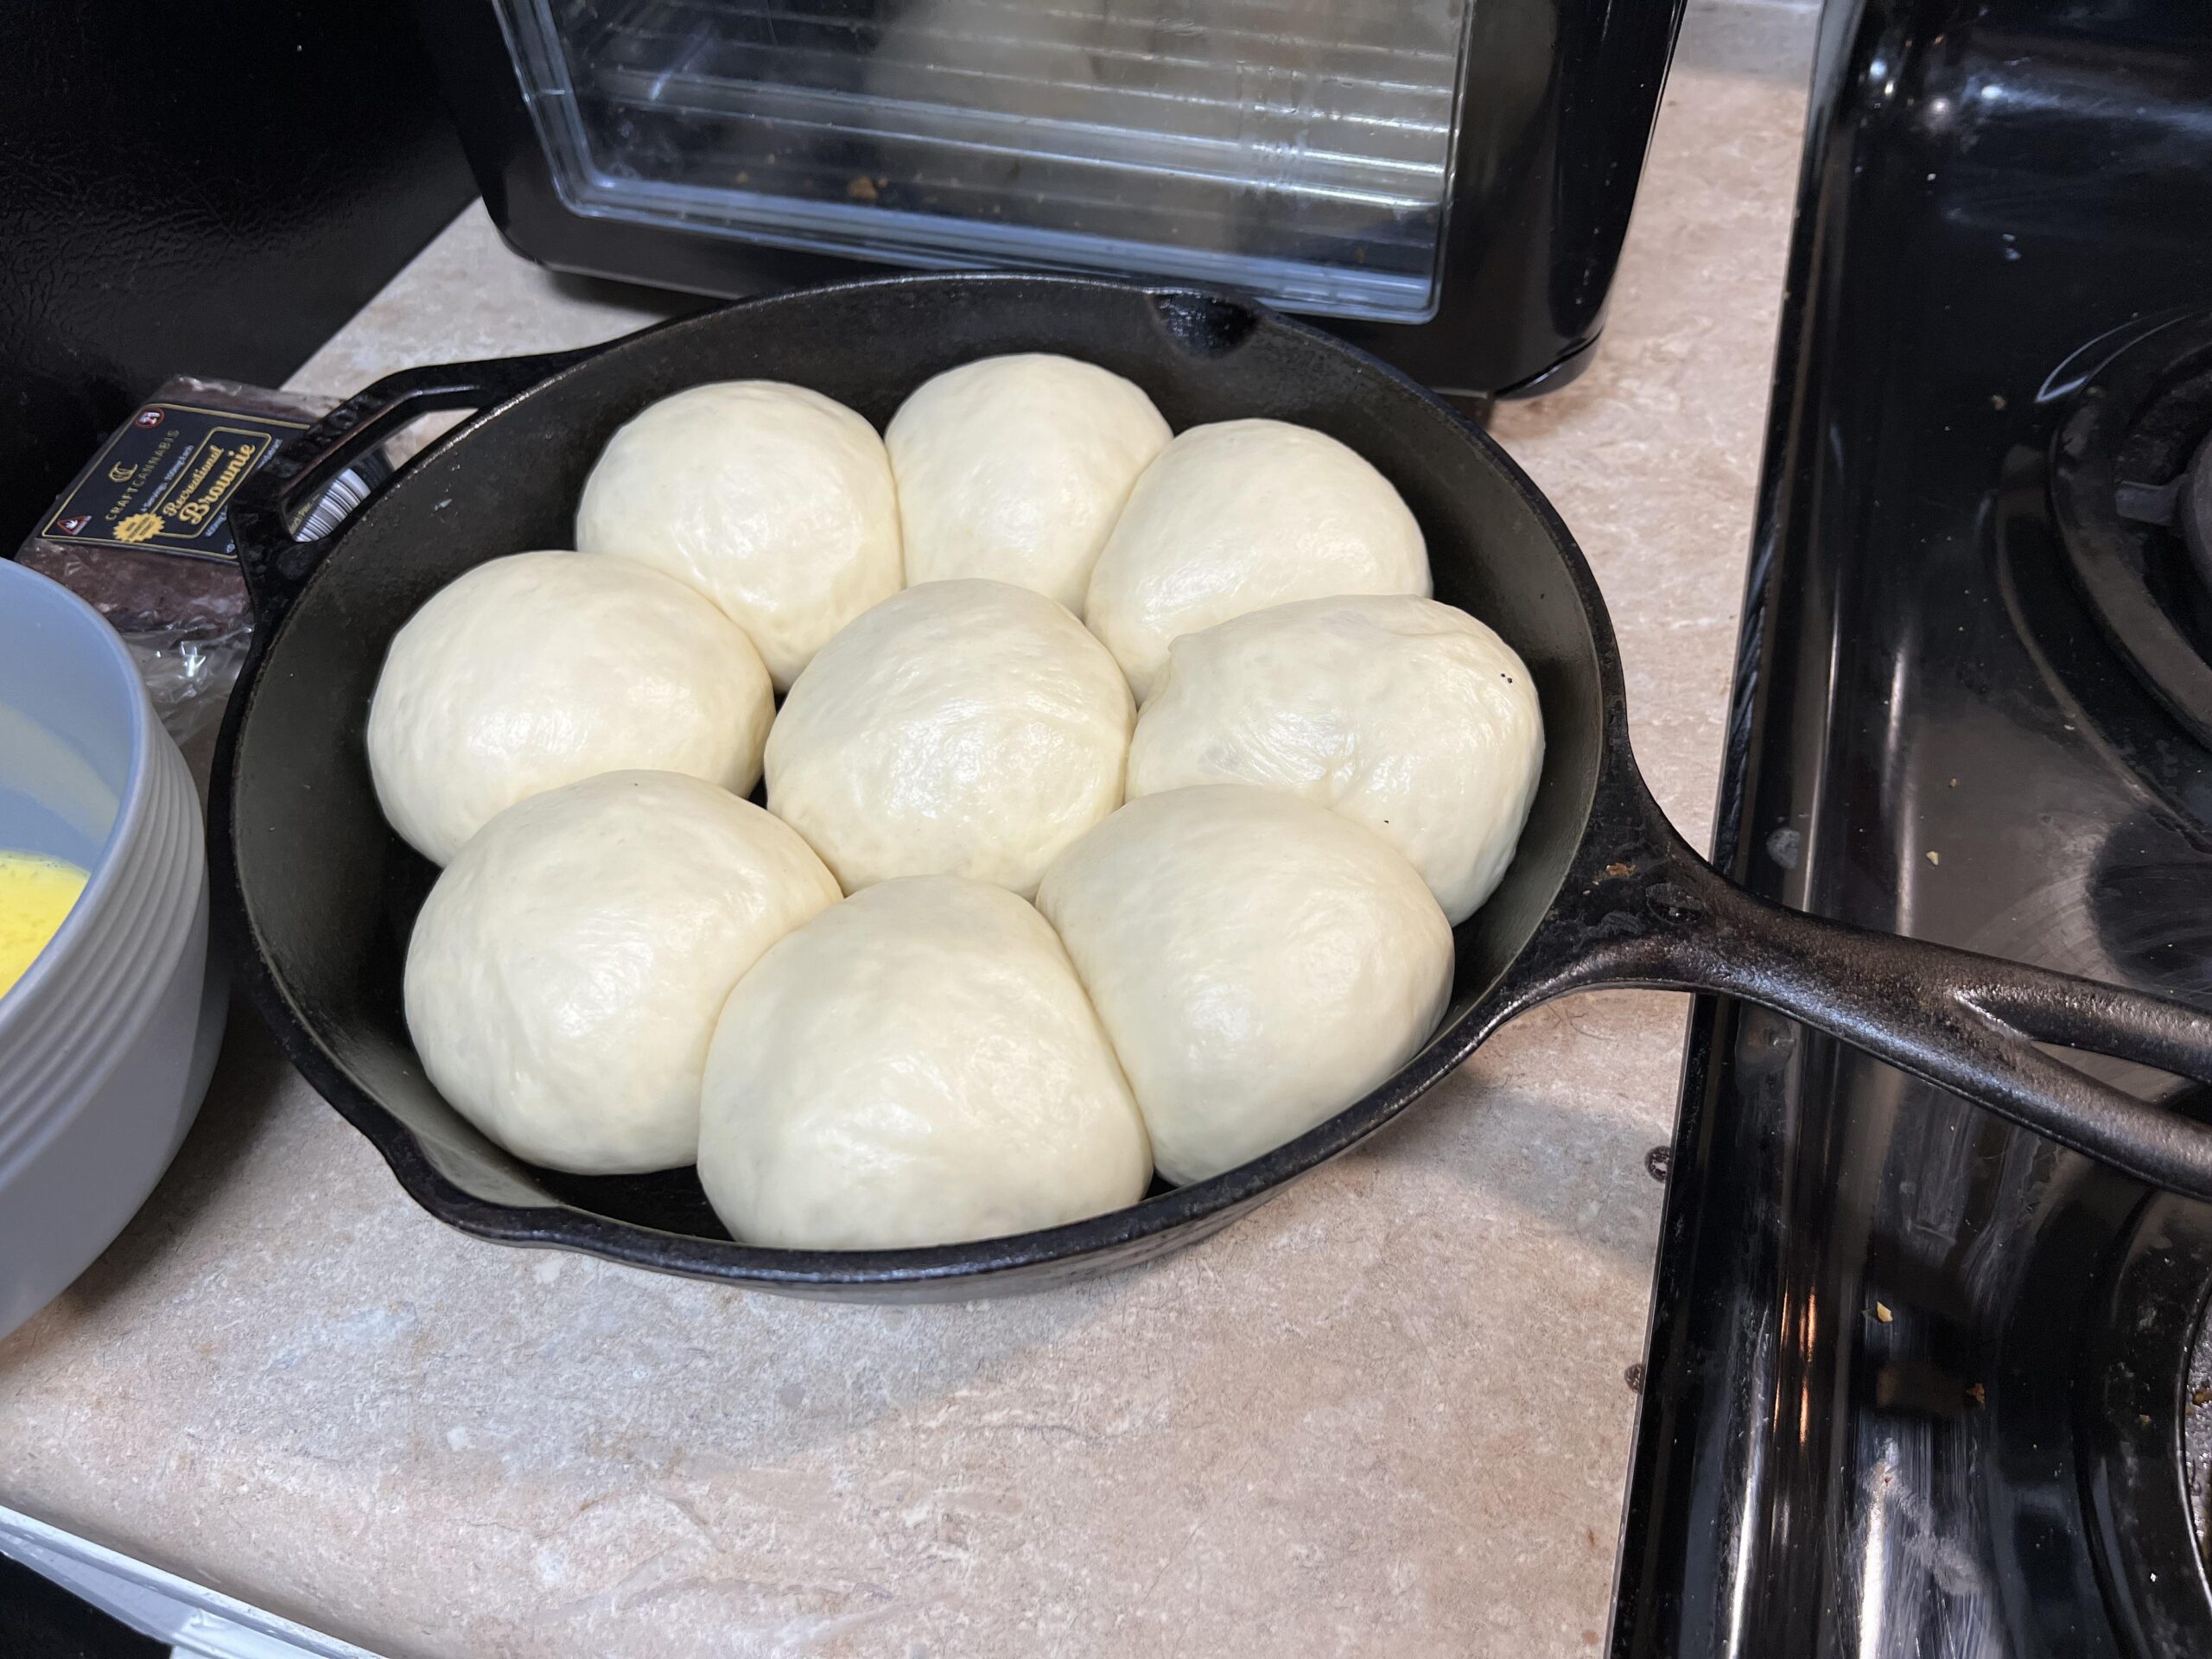
Punch the risen dough down gently to release the air. Turn it out onto your counter and divide it evenly into 8 equal pieces. Roll each piece into a tight, smooth ball by pulling the edges down and pinching them at the bottom.
Step 7: Second Rise in the Skillet
Lightly butter the bottom and sides of a 10-inch or 12-inch cast iron skillet. Place the 8 dough balls into the skillet, leaving a little space between them. Cover the skillet loosely with a towel and let the rolls rise for another 30 to 45 minutes, until they are puffy and touching each other.
Step 8: Bake to Golden Perfection
Preheat your oven to 375°F (190°C). Uncover the skillet and bake the rolls on the center rack for 20 to 25 minutes. They should be a deep, gorgeous golden brown on top.
Step 9: Apply the Herb Butter
While the rolls are in the oven, whisk together your 3 tablespoons of melted butter, garlic powder, and fresh minced thyme. As soon as you pull the hot skillet out of the oven, generously brush the tops of the rolls with the herb butter. Let them cool in the pan for 10 minutes before serving.
Expert Cooking Tips
-
Check the milk temperature: If your milk is too hot (above 120°F), it will kill the yeast and your dough will not rise. It should feel like warm bathwater, not hot coffee.
-
Measure flour correctly: Spoon the flour into your measuring cup and level it off. Scooping directly from the bag packs the flour down, resulting in dense, heavy rolls.
-
The windowpane test: To ensure you have kneaded enough, pinch off a small piece of dough and gently stretch it thin. If it forms a translucent “window” without tearing, the gluten is perfectly developed.
-
Use a well-seasoned skillet: A properly seasoned cast iron pan acts like a non-stick surface, ensuring your rolls pop right out without leaving half their bottom crust attached to the metal.
-
Don’t rush the rise: Yeast dough relies heavily on the temperature of your kitchen. If your kitchen is cold, the rise times may take longer. Focus on how the dough looks (doubled in size) rather than watching the clock.
Variations to Try
-
Honey Butter Rolls: Swap the granulated sugar in the dough for a quarter cup of honey, and brush the baked rolls with a mixture of melted butter and honey instead of herbs.
-
Cheesy Garlic Rolls: Fold a half cup of finely grated sharp cheddar cheese into the dough during the kneading process, and top with garlic butter.
-
Rosemary and Sea Salt: Swap the fresh thyme in the butter topping for finely minced fresh rosemary, and finish with a heavy sprinkle of flaky sea salt.
What to Serve With Cast Iron Dinner Rolls
These rolls are the ultimate companion to comfort food. Serve them piping hot alongside a bowl of creamy potato soup, use them to sop up the drippings from a slow cooker pot roast, or pair them with classic fried chicken and mashed potatoes. They also make incredible slider buns for leftover holiday turkey or baked ham the next day!
Storage & Reheating
Room Temperature
Place any leftover completely cooled rolls into a large, airtight plastic bag or container. Store them at room temperature for up to 3 days. Do not put them in the refrigerator, as the cold air will dry out the crumb and make them stale faster.
Freezer
These freeze beautifully! Wrap completely cooled rolls individually in plastic wrap, then place them all into a heavy-duty freezer bag. They will keep for up to 3 months. Thaw them at room temperature for a few hours before eating.
Reheating
To recapture that fresh-from-the-oven softness, wrap a roll loosely in a slightly damp paper towel and microwave it for 10 to 15 seconds. If reheating a whole batch, place them on a baking sheet, cover with foil, and warm in a 300°F (150°C) oven for about 10 minutes.
Frequently Asked Questions
Can I make the dough overnight?
Yes! You can do the first rise in the refrigerator. After kneading the dough, place it in a greased bowl, cover it tightly, and put it in the fridge overnight. The next day, let it sit at room temperature for an hour before punching it down, shaping the rolls, and proceeding with the second rise in the skillet.
Do I have to bake these in a cast iron skillet?
While cast iron gives the best crispy bottom crust and even baking, you can absolutely bake these in a standard 9×13 inch glass or ceramic baking dish. You may need to add a few extra rolls to fill the larger pan, or simply space them out more.
Why are my dinner rolls dense and heavy?
Dense rolls are usually caused by adding entirely too much flour during the kneading process, or by not allowing the dough to rise long enough. The dough should be slightly tacky when you finish kneading it.
Can I use instant yeast instead of active dry?
Yes, you can swap instant yeast in a 1:1 ratio. If using instant yeast, you do not need to let it sit in the warm milk for 10 minutes to bloom; you can simply mix all the dough ingredients together at once. Your rise times may also be slightly shorter.
Why did my rolls bake unevenly?
Ovens often have hot spots. To ensure perfectly even browning, rotate your cast iron skillet 180 degrees halfway through the baking time.
Final Thoughts
Baking bread from scratch is one of the most rewarding things you can do in the kitchen, and these cast iron dinner rolls make the process entirely foolproof. The combination of a perfectly fluffy, pillowy interior and a savory, herb-buttered crust is simply unbeatable. Once you pull a hot, golden skillet of these beautiful rolls out of your oven, you will never go back to the store-bought bags again. Happy baking!
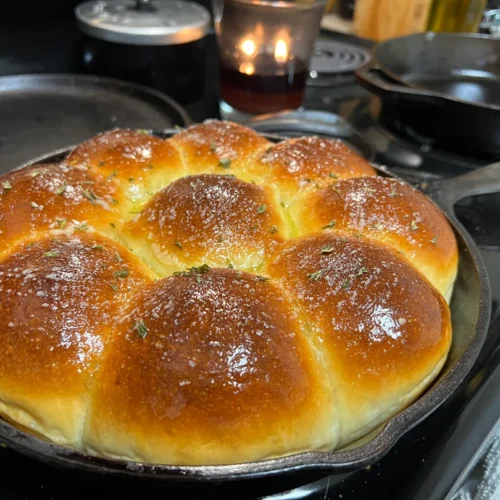
Fluffy Cast Iron Dinner Rolls with Herb Butter
Stop buying store-bought bread! These homemade cast-iron dinner rolls are insanely fluffy, incredibly tender, and brushed with a savory garlic and herb butter.
Ingredients
- 1 cup Whole milk warmed to 110°F
- 2 1/4 tsp Active dry yeast 1 packet
- 1/4 cup Granulated sugar divided
- 1/3 cup Unsalted butter melted and slightly cooled
- 1 large Egg room temperature
- 3 - 3 1/4 cups All-purpose flour
- 1 tsp Salt
- 3 tbsp Unsalted butter melted (for topping)
- 1 tsp Fresh thyme finely minced (or parsley)
- 1/2 tsp Garlic powder
Instructions
- In a large bowl, combine the warm milk, yeast, and 1 tablespoon of the sugar. Let sit for 5-10 minutes until bubbly and foamy.
- Whisk in the remaining sugar, the melted butter, and the egg until smooth.
- Add 3 cups of flour and the salt. Mix with a sturdy spatula until a shaggy dough forms.
- Knead the dough (using a stand mixer dough hook or by hand on a floured surface) for 5-8 minutes until smooth and elastic. Add the remaining 1/4 cup flour only if the dough is too sticky to handle.
- Place the dough in a greased bowl, cover loosely, and let rise in a warm place for 1 to 1.5 hours until doubled in size.
- Punch the dough down and divide it into 8 equal pieces. Roll each piece into a tight, smooth ball.
- Lightly butter a cast iron skillet. Arrange the dough balls in the pan. Cover and let rise for another 30-45 minutes until puffy.
- Preheat oven to 375°F (190°C). Bake the rolls for 20-25 minutes until deep golden brown on top.
- While baking, whisk together the remaining 3 tablespoons of melted butter, minced thyme, and garlic powder.
- Remove the skillet from the oven and immediately brush the hot rolls generously with the herb butter. Let cool slightly before serving.
Notes
If your dough is rising slowly, try placing the bowl in a cold oven with just the oven light turned on.
Do not overheat your milk, or it will kill the yeast. It should feel like warm bathwater.
Leftovers store best at room temperature in an airtight bag for up to 3 days.