Old Fashioned Peach Dump Cake — Warm Memories in a Skillet
There is a certain kind of magic that happens when you place a heavy, well-seasoned cast iron skillet onto the kitchen counter and begin to fill it with fruit. It brings back a rush of childhood memories—the sound of the heavy iron dragging across the stovetop, the sticky sweetness of peach juice on your fingertips, and the rich, warming aroma of spices drifting through the house on a quiet Sunday afternoon. Many of you in our Old Fashioned Family Recipes Facebook community have been asking for desserts that bridge the gap between convenience and true, traditional comfort. You want the deep, soul-satisfying flavors our grandmothers created, but perhaps without spending hours cutting cold shortening into pastry flour.
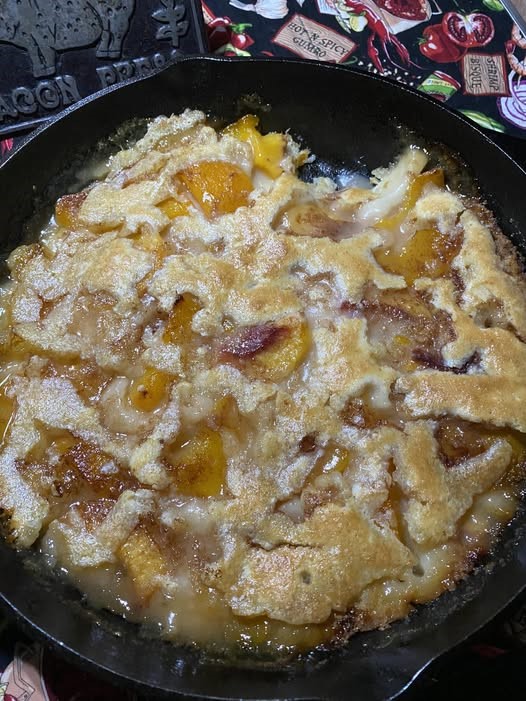
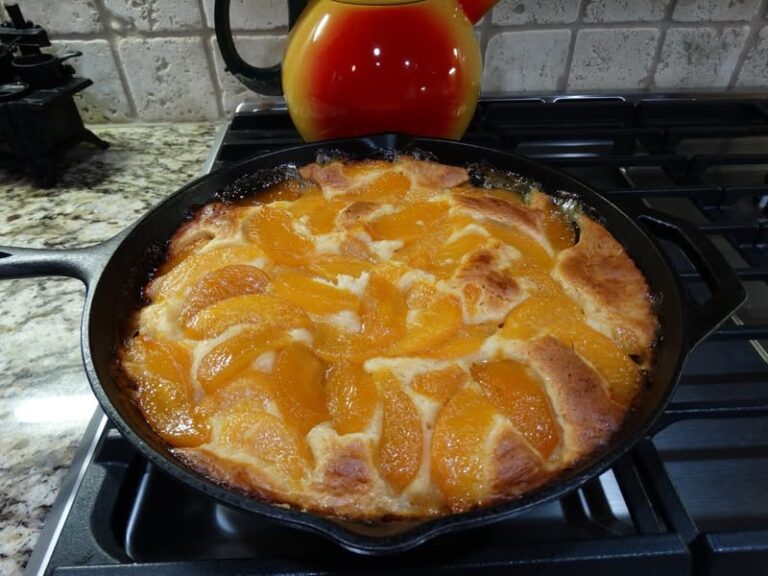
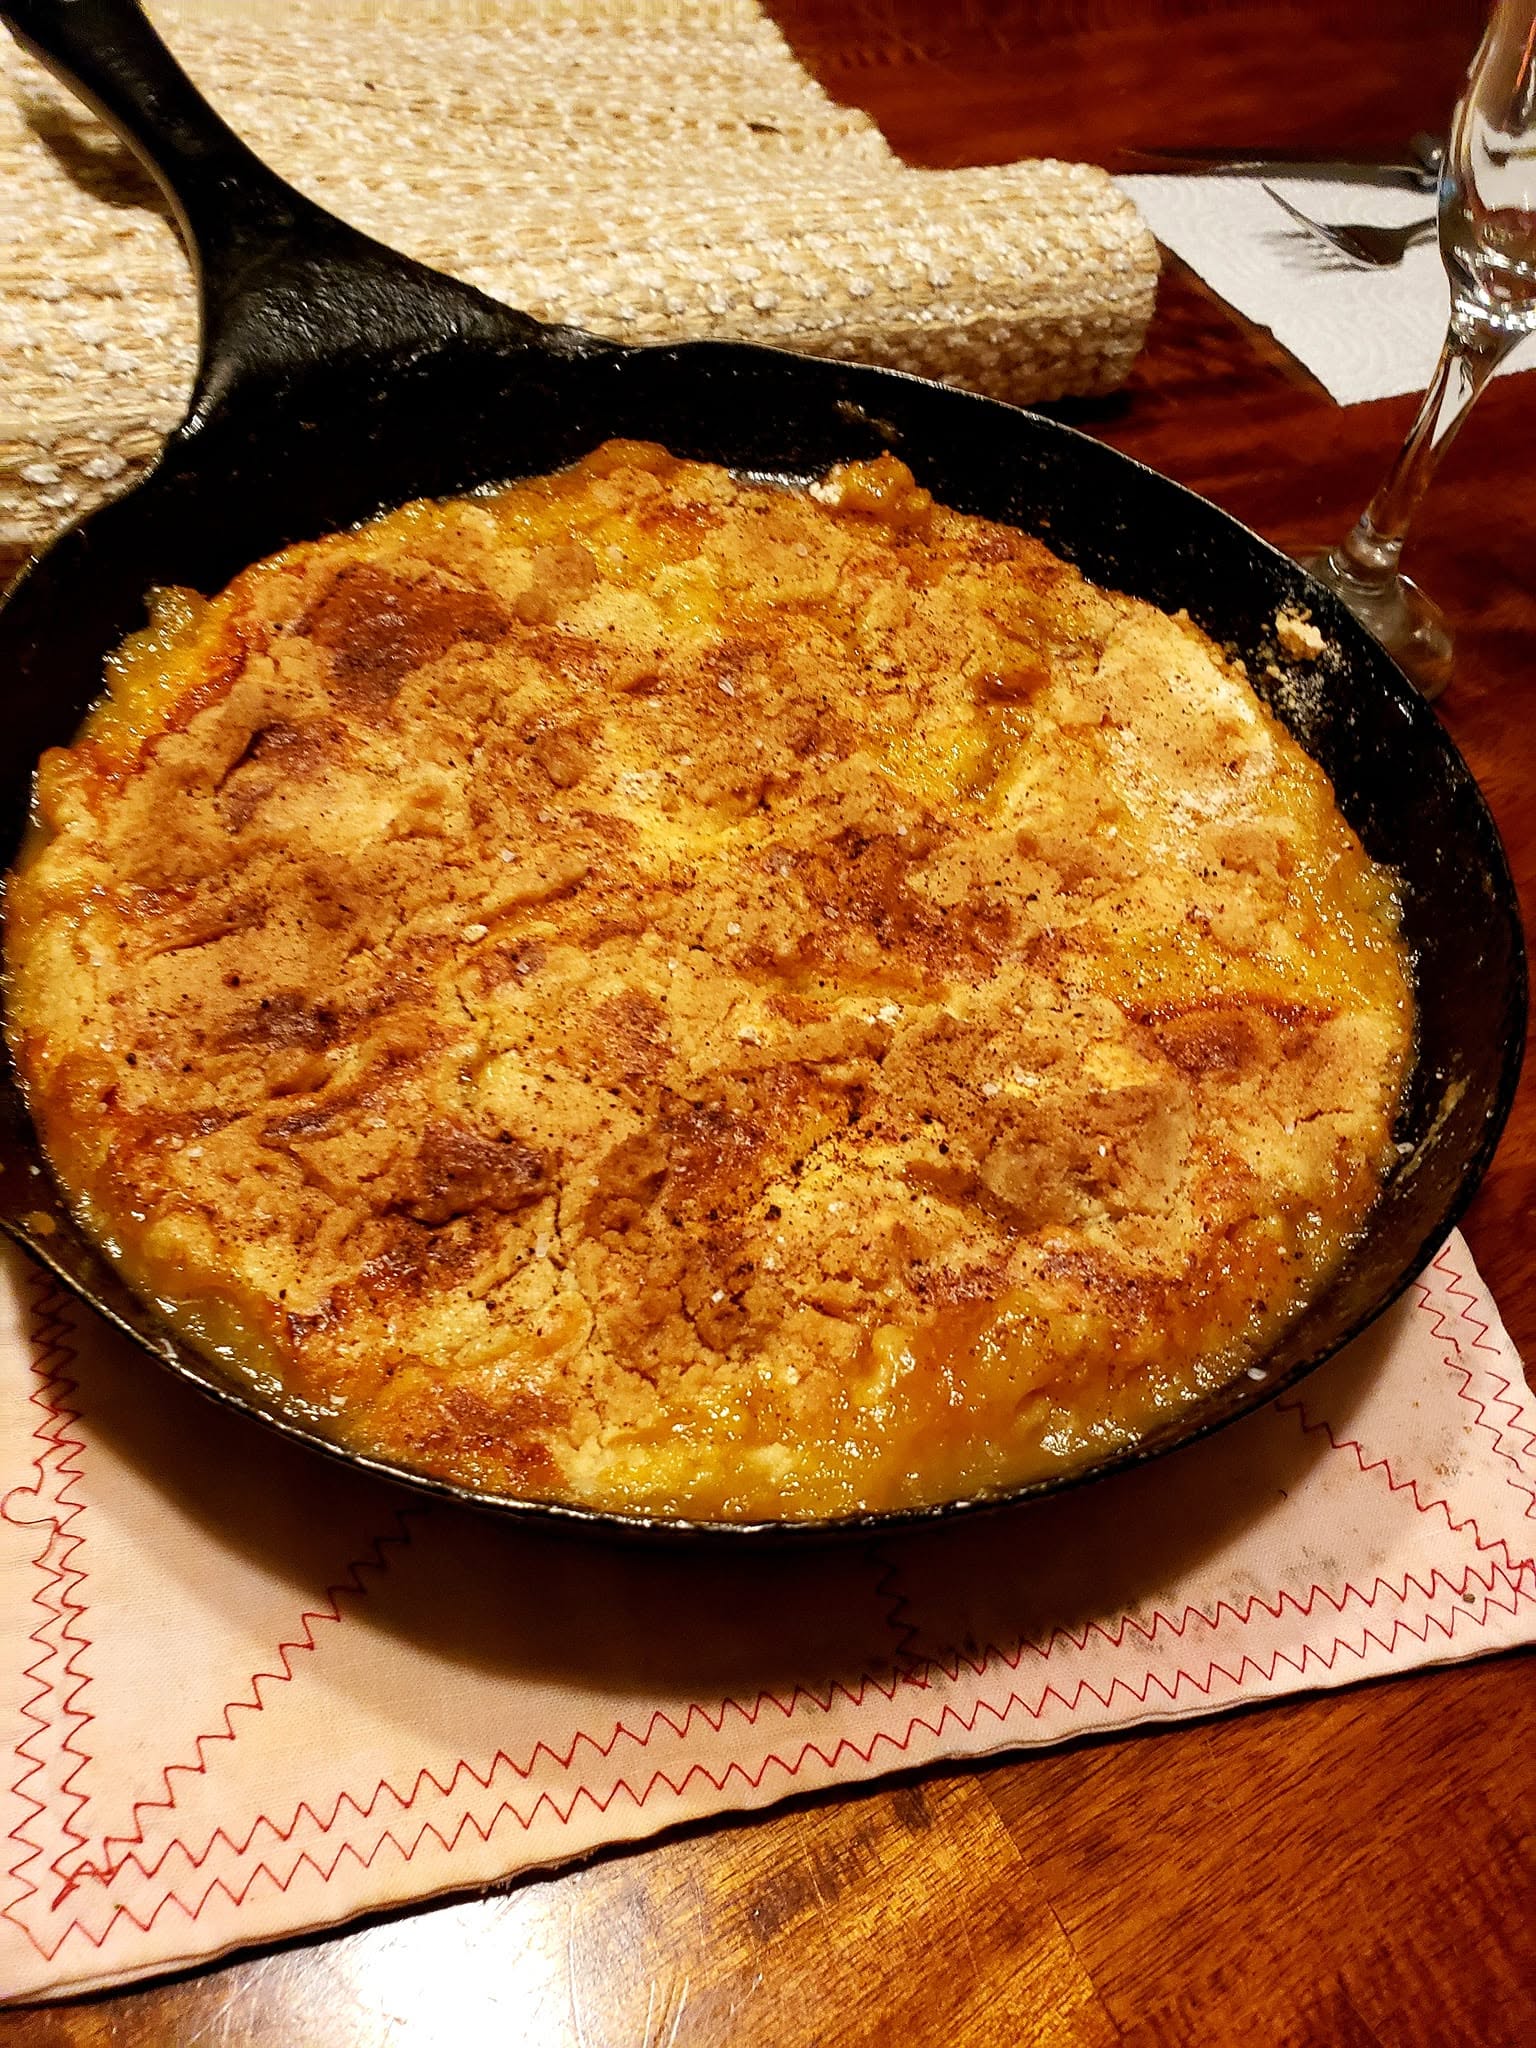
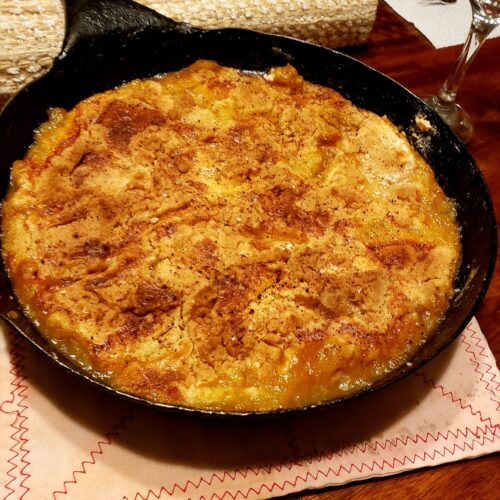
This old fashioned peach dump cake—which many folks rightfully call a cobbler when baked this way—is the perfect answer to that request. It relies on a method that feels almost like a kitchen secret, passed down through generations of resourceful home cooks. You simply layer the ingredients in a specific order and let the heat of the oven do all the heavy lifting. The result is a dessert that looks remarkably rustic and beautiful, with a bubbling, amber-colored fruit filling peeking around the edges of a golden, buttery, craggy crust. When you pull it from the oven, heavily dusted with warm nutmeg, the syrup will be actively boiling against the black iron, creating a deeply caramelized edge that is impossible to resist. It requires patience as it bakes, but the sensory reward of that warm, spice-scented kitchen is worth every single minute of the wait.
Why this recipe works
-
The specific liquid ratio creates the perfect crumb: By using two large cans of peaches but draining exactly one of them, you control the hydration of the dessert. If you leave all the syrup, the cake mix turns into a soggy, soupy pudding. If you drain both, you end up with dry, dusty pockets of raw flour. This precise balance ensures the steam rising from the bottom hydrates the dry cake mix just enough to form a tender crumb.
-
The “No Stir” rule builds distinct layers: It goes against every baking instinct to leave dry ingredients sitting on top of wet fruit without mixing them. However, keeping the layers distinct is the entire foundation of an old fashioned dump cake. The wet fruit stays on the bottom, caramelizing into a thick jam against the hot cast iron, while the dry mix on top absorbs the melting butter to create a crispy, biscuit-like crust.
-
Cold butter acts as a slow-release baster: Using a stick of cold butter, sliced into very thin squares and scattered evenly over the top, is crucial. As the skillet heats up in the oven, that cold butter melts slowly, seeping downward. It essentially fries the dry yellow cake mix, creating those beautiful golden, crackled patches you see on top.
-
The cast iron skillet provides intense, even heat: A thick iron skillet absorbs heat and radiates it steadily. This means the sugars in the peaches and the brown sugar layer do not just get hot; they actually caramelize against the heavy metal, creating slightly chewy, deeply flavorful edges that a thin glass Pyrex baking dish simply cannot achieve.
What you’ll need
-
Canned Sliced Peaches (Two 29-ounce cans): You need the large, heavy cans of sliced peaches packed in heavy syrup or their own natural juices. The thick syrup is what mixes with the brown sugar to create the bubbling cobbler filling. Remember, you will drain one can completely and leave the juices in the other.
-
Yellow Cake Mix: A standard 15.25-ounce box of yellow cake mix is the structural backbone of your crust. The yellow variety contains a richer, more buttery flavor profile than white or vanilla cake mixes, which complements the heavy fruit perfectly.
-
Cold Unsalted Butter: You need one full stick (half a cup) of butter. It must be very cold straight from the refrigerator so you can slice it cleanly into thin pats. Using unsalted butter allows you to control the final flavor, letting the sweetness of the fruit shine without a harsh, salty bite.
-
Light Brown Sugar: One-third of a cup sprinkled directly over the peaches adds a layer of deep, molasses-like warmth. As it bakes, it draws out the natural juices of the fruit and transforms the thin canning syrup into a thick, glossy caramel.
-
Vanilla Extract: A heavy splash poured right over the fruit elevates the canned peaches, giving them a rich, bakery-quality aroma that mimics a scratch-made fruit filling.
-
Ground Nutmeg: This is the finishing touch that gives the dessert its distinctly old fashioned character. A heavy dusting of nutmeg over the butter and cake mix before baking provides a woody, aromatic warmth that pairs beautifully with stone fruit.
Substitutions & Variations
If you need a gluten-free option, you can easily swap the standard box mix for a 1-to-1 gluten-free yellow cake mix; the texture of the crust will still turn out beautifully craggy and crisp. If you do not have canned peaches, you can use canned sliced apples or canned cherry pie filling, though you will want to omit the brown sugar if the pie filling is already heavily sweetened. For a spiced variation, you can add a pinch of ground cinnamon alongside the nutmeg, but allow the nutmeg to remain the dominant aromatic.
How to make Old Fashioned Peach Dump Cake
Step 1: Preparing the Cast Iron and the Fruit
Preheat your oven to 350°F. Take a heavy, 10-inch or 12-inch cast iron skillet and place it on your workspace. You do not need to grease the pan, as the liquid from the fruit will prevent sticking. Open your first large can of sliced peaches and pour the entire contents, syrup and all, directly into the bottom of the skillet. Open your second can, carefully drain away all the liquid down the sink, and add just the sliced fruit to the pan. Use a wooden spoon to spread the peaches out into an even layer so there are no empty gaps across the dark iron.
Step 2: Layering the Aromatics and Sugar
Take your vanilla extract and pour a generous splash directly over the layer of peaches. You do not need to measure perfectly; a heavy drizzle will do. Next, take your light brown sugar and sprinkle it evenly over the top of the fruit. The sugar will immediately begin to dissolve into the peach syrup. Do not be tempted to stir the sugar into the fruit. You want it to sit on the surface so it can bubble up through the crust later.
Step 3: Adding the Dry Cake Layer
Open your box of yellow cake mix. Carefully and slowly pour the completely dry powder over the top of the peaches and brown sugar. Use your hands or the back of a large spoon to gently pat the powder down, spreading it out until it reaches the very edges of the cast iron skillet. You want to completely obscure the fruit beneath a solid, even blanket of cake mix. I must repeat the most vital rule of this recipe: absolutely do not stir the pan. Leave the layers exactly as they are.
Step 4: Placing the Butter and Spices
Take your stick of cold butter straight from the refrigerator. Using a sharp knife, cut it into the thinnest slices you possibly can—aim for about twenty to twenty-four little squares. Lay these butter slices flat across the top of the dry cake mix, spacing them out as evenly as possible like a patchwork quilt. Try to cover as much of the surface area as you can. Finally, take your ground nutmeg and give the entire top of the skillet a heavy, even dusting. The dark speckles should sit prominently on top of the pale cake mix and butter.
Step 5: Baking to Golden Perfection
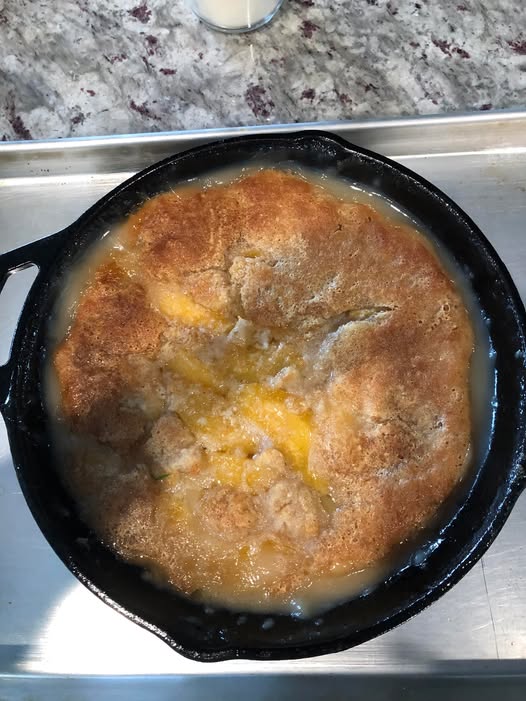
Carefully transfer the heavy skillet to the center rack of your preheated oven. Let it bake completely undisturbed for 45 minutes to an hour. You are looking for very specific visual cues to know it is done. The edges of the skillet should feature thick, amber-colored syrup rapidly bubbling up and over the crust. The top of the cake should look like a golden, cracked landscape, with darker brown spots where the butter melted and toasted the flour. Once it reaches that beautiful, craggy, golden state, pull the heavy iron skillet from the oven and set it on a thick heat-proof mat. Let it rest for at least fifteen minutes before serving so the molten fruit syrup can thicken and set.
Destiny’s tips
-
I always use a cold cheese slicer for the butter: Slicing a cold stick of butter into paper-thin squares with a knife can be tricky as the knife warms up. I use a wire cheese slicer to pull perfectly uniform, thin pats of butter that cover the cake mix much more evenly.
-
In my kitchen, patience is the final ingredient: It is incredibly tempting to dig a spoon into the cobbler the second it comes out of the oven, but the fruit syrup is boiling at that stage. I always let it sit for a full fifteen to twenty minutes; this allows the bubbling juices to settle and thicken into a proper glaze rather than a watery soup.
-
I always watch the edges: Because cast iron retains heat so aggressively, the outer rim of your dump cake will cook much faster than the center. I start checking at the 40-minute mark to ensure the sugar at the very edge is not crossing the line from dark caramel to burnt.
-
In my kitchen, I break up dry spots halfway through: If I peek into the oven at the 30-minute mark and see large patches of stark white, dry powder where the butter did not reach, I will take a small spoon and very gently press that dry powder down into the bubbling fruit juices just below it.
-
I always serve straight from the iron: There is no need to transfer this to a pretty serving dish. The rustic charm of this old fashioned dessert is fully realized when you set the heavy, warm cast iron skillet right in the center of the table and let everyone scoop out their own portion.
What to serve with Old Fashioned Peach Dump Cake
-
Vanilla Bean Ice Cream: A giant scoop of slowly melting, high-quality vanilla ice cream is the traditional companion, offering a cold, creamy contrast to the bubbling hot, spiced fruit.
-
Heavy Pouring Cream: For a less sweet but incredibly rich option, pour a few tablespoons of cold, unwhipped heavy cream directly over your warm portion in the bowl.
-
A Strong Cup of Black Coffee: The bitter, roasted notes of freshly brewed black coffee perfectly cut through the heavy sweetness of the brown sugar and yellow cake mix.
-
Unsweetened Iced Tea: A tall glass of deeply steeped, ice-cold black tea cleanses the palate between rich, buttery bites of the cobbler crust.
Frequently Asked Questions
Why did my dump cake turn out powdery on top?
A powdery top happens when the dry cake mix does not receive enough moisture to bake properly. This usually occurs if you did not slice your butter thin enough to cover the entire surface area, or if you accidentally drained both cans of peaches. If you notice dry spots while baking, do not stir; simply press the dry patches gently down into the bubbling fruit juice underneath.
Can I use fresh or frozen peaches instead of canned?
You can use fresh or frozen peaches, but you will need to fundamentally alter the recipe to create the necessary liquid. Canned peaches provide the exact ratio of heavy syrup needed to hydrate the dry cake mix from the bottom up. If you use fresh fruit, you must toss the peaches in sugar and water, and let them macerate until they release at least a cup and a half of liquid before layering the cake mix on top.
Why is it so important not to stir the ingredients?
Stirring ruins the magic of the dump cake texture. If you mix the wet fruit, the syrup, and the dry cake mix together, you will create a dense, gummy, uniform batter that bakes into a heavy pudding. Leaving the layers distinct allows the bottom to become a jammy fruit compote while the top bakes into a crisp, buttery, biscuit-like crust.
How do I store and reheat the leftovers?
Store any remaining peach cobbler directly in the skillet (if it is well-seasoned and won’t rust) covered tightly with foil, or transfer it to an airtight glass container. Keep it in the refrigerator for up to four days. To reheat, portion a scoop into a bowl and microwave for thirty seconds, or place the skillet back into a 300°F oven until the fruit begins to bubble again.
Old Fashioned Cast Iron Peach Dump Cake
Ingredients
- 2 29 oz cans sliced peaches (drain one can, keep the syrup in the other)
- A heavy splash of pure vanilla extract
- 1/3 cup light brown sugar
- 1 15.25 oz box yellow cake mix
- 1/2 cup 1 stick cold unsalted butter, sliced paper-thin
- Ground nutmeg for dusting
Instructions
- Prep: Preheat your oven to 350°F. Place a 10-inch or 12-inch cast iron skillet on your workspace.
- Layer the Fruit: Pour both the drained can of peaches and the undrained can of peaches directly into the bottom of the skillet. Spread them out evenly.
- Sweeten: Pour a splash of vanilla extract over the fruit, then sprinkle the light brown sugar evenly across the top. DO NOT STIR.
- Add the Mix: Pour the dry yellow cake mix evenly over the peaches, patting it down gently to completely cover the fruit layer to the edges. DO NOT STIR.
- Topping: Place the thin slices of cold butter evenly across the entire surface of the dry cake mix. Finish by heavily dusting the top with ground nutmeg.
- Bake: Bake uncovered for 45 minutes to 1 hour. The cake is done when the fruit syrup is actively bubbling around the edges and the crust is cracked, golden brown, and set.
- Rest: Remove from the oven and let rest for at least 15 minutes before serving to allow the bubbling juices to thicken.