Easy 7-Layer Magic Cookie Bars
The Ultimate Dump-and-Bake Holiday Dessert
When the holiday baking season hits its peak and your to-do list is a mile long, you need a dessert that looks impressive but requires absolute minimum effort. Enter the legendary 7-layer magic cookie bar. Often referred to as “Hello Dolly bars” or simply “magic bars,” these rich, gooey squares have been a beloved staple at potlucks, bake sales, and holiday cookie exchanges for decades.
The true magic of this recipe lies in its brilliant simplicity. There is no dough to chill, no precise measuring of baking powder or flour, and no need to drag out your heavy stand mixer. You simply build the layers directly in the baking pan and let the oven do all the heavy lifting. The sweetened condensed milk acts as a magical binder, bubbling up through the chocolate chips, butterscotch, and pecans to hold everything together in one decadent, chewy square.
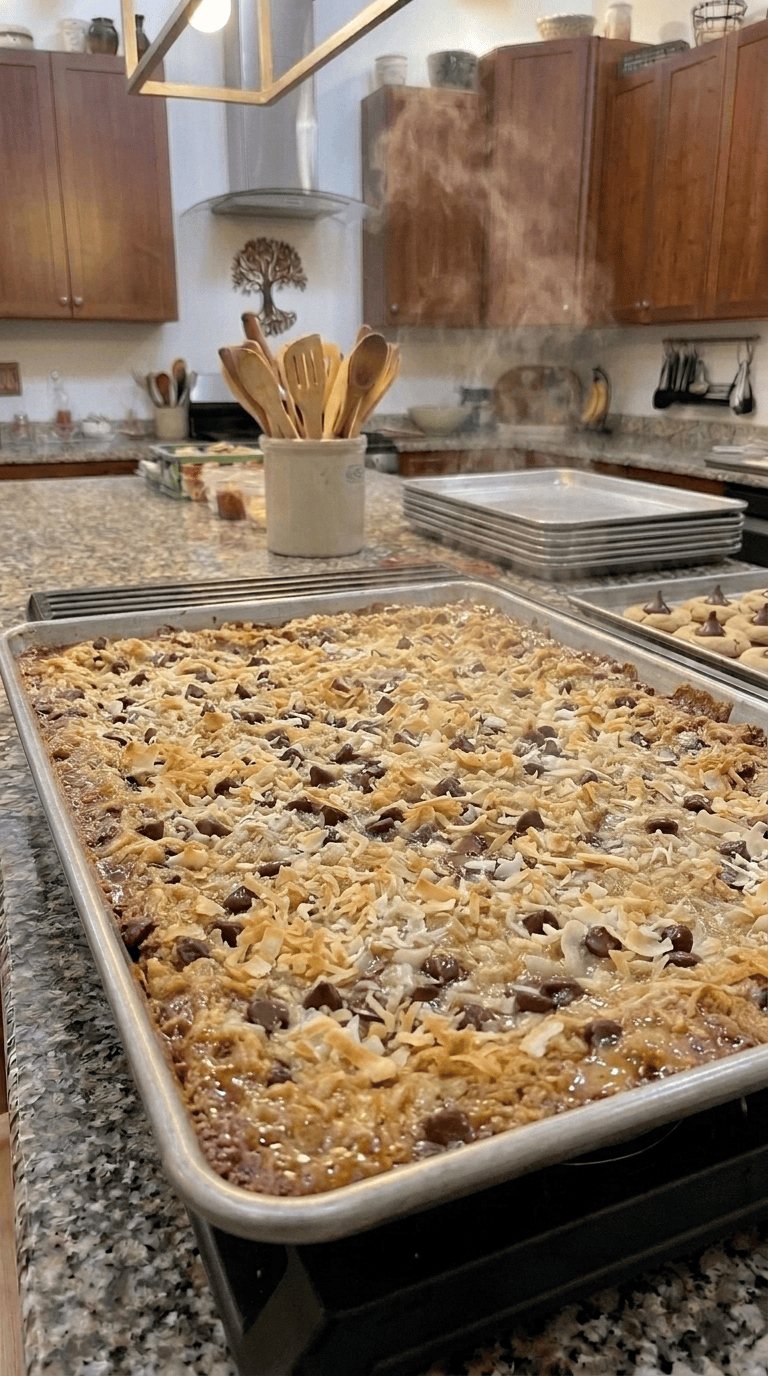
The resulting dessert is incredibly rich, offering a perfect harmony of textures and flavors. You get a buttery, crumbly graham cracker base, gooey melted chocolate, crunchy toasted nuts, and a golden, caramelized coconut topping. Because they are so dense and satisfying, a single pan yields plenty of portions to feed a hungry crowd. Whether you need a last-minute addition to a holiday party or just a sweet treat for a cozy weekend, these magic cookie bars are always the first thing to disappear.
Why You’ll Love This Recipe
-
Almost zero cleanup: You only need one small bowl to mix the crust, and the rest of the dessert is built straight in the baking pan.
-
Foolproof assembly: This is a fantastic recipe for kids to help with, as it just involves sprinkling ingredients in an even layer.
-
Incredibly rich flavor: The combination of butterscotch, semi-sweet chocolate, and toasted coconut creates a deeply satisfying, complex sweetness.
-
Feeds a crowd: Because they are so rich, you can easily cut a 9×13 pan into 24 or even 30 small squares.
-
Excellent make-ahead option: They taste even better the next day after the layers have fully set and the flavors have melded together.
Ingredients
-
Unsalted butter: Melted butter acts as the glue to hold your graham cracker crust together.
-
Graham cracker crumbs: You can buy pre-crushed crumbs in the baking aisle or pulse whole graham crackers in a food processor until fine.
-
Sweetened condensed milk: The magic ingredient! Do not confuse this with evaporated milk. This thick, sweet milk binds the bars together as it bakes.
-
Semi-sweet chocolate chips: Offers a rich, slightly bitter contrast to the sweet condensed milk.
-
Butterscotch chips: A classic addition that provides a wonderful caramelized, nostalgic flavor. (White chocolate chips are a great substitute).
-
Chopped pecans or walnuts: Adds a much-needed savory crunch to balance the gooey texture.
-
Sweetened shredded coconut: The final layer that toasts up beautifully in the oven, creating a slightly crisp, golden brown crown.
Step-by-Step Instructions
Step 1: Prepare the Pan
Preheat your oven to 350°F (175°C). Take a 9×13 inch rectangular baking pan and line it carefully with parchment paper. Make sure to leave a few inches of parchment paper hanging over the long sides of the pan. This creates a “sling” that will allow you to lift the entire sticky block of bars out of the pan once they cool, making slicing an absolute breeze.
Step 2: Build the Graham Cracker Crust
In a small mixing bowl, combine the melted unsalted butter and the graham cracker crumbs. Stir them together until the mixture resembles wet sand and all the dry crumbs are coated in butter. Pour this mixture into your prepared baking pan. Use your hands or the flat bottom of a measuring cup to press the crumbs firmly and evenly into the bottom of the pan to form a solid crust.
Step 3: Pour the Magic Binder
Open your can of sweetened condensed milk and pour it slowly and evenly all over the graham cracker crust. Use a rubber spatula to gently spread the thick milk so it reaches all the way to the edges and corners of the pan. You want a uniform layer so every single bite holds together perfectly.
Step 4: Layer the Chips and Nuts
Now it is time to build the layers! Sprinkle the semi-sweet chocolate chips evenly across the wet condensed milk. Follow that with an even layer of the butterscotch chips. Next, scatter the chopped pecans or walnuts over the chocolate and butterscotch layers, ensuring every corner gets some crunch.
Step 5: Top with Coconut and Press
For the final layer, sprinkle the sweetened shredded coconut evenly over the entire pan. Once all the ingredients are layered, take the palm of your hand or the back of a fork and gently press down on the coconut. You want to push the coconut, nuts, and chips slightly down into the sweetened condensed milk so they are securely anchored and don’t fall off after baking.
Step 6: Bake and Cool Completely
Bake in the preheated oven for 25 to 30 minutes. You are looking for the edges to be bubbling and the shredded coconut on top to turn a beautiful, deep golden brown. Remove the pan from the oven. This is the most important step: You must let the bars cool completely to room temperature in the pan before you try to slice them. If you cut them while warm, they will fall apart into a gooey mess.
Expert Cooking Tips
-
Parchment paper is mandatory: Sweetened condensed milk turns into incredibly sticky caramel in the oven. If you do not use parchment paper, these bars will permanently cement themselves to your baking pan.
-
Do not use evaporated milk: Evaporated milk is thin and unsweetened. It will turn your crust into a soggy soup. You must use thick, sticky sweetened condensed milk.
-
Press the layers down: Taking ten seconds to gently press the coconut and nuts down into the milk ensures your bars slice cleanly rather than crumbling apart.
-
Buy whole nuts: Buying whole pecans or walnuts and chopping them yourself ensures they taste fresher and have a better texture than pre-chopped bags.
-
For easier slicing: Once the bars have cooled to room temperature on the counter, pop the entire pan into the refrigerator for an hour. The chilled chocolate and caramel will slice into incredibly sharp, neat squares.
Variations to Try
-
S’mores Magic Bars: Swap the butterscotch chips and nuts for miniature marshmallows and chopped Hershey’s chocolate bars.
-
Peanut Butter Dream: Use peanut butter chips instead of butterscotch chips, and swap the pecans for chopped salted peanuts.
-
White Chocolate Macadamia: Use white chocolate chips instead of semi-sweet, and swap the pecans for roughly chopped toasted macadamia nuts.
-
Nut-Free Version: If you have a nut allergy in the family, simply omit the pecans and replace them with crushed pretzel pieces for that essential salty crunch.
What to Serve With 7-Layer Magic Cookie Bars
These bars are intensely sweet, rich, and dense. They pair best with beverages that can balance out the sugar. Serve them with:
-
A tall, ice-cold glass of whole milk.
-
A strong cup of black coffee or an unsweetened Americano.
-
A warm, comforting mug of Earl Grey or English Breakfast tea.
-
A scoop of vanilla bean ice cream (if you want to create an over-the-top dessert sundae!).
Storage & Reheating
Refrigerator
Magic cookie bars can be stored in an airtight container at room temperature for up to 4 days. However, they actually keep best in the refrigerator! Storing them chilled keeps them firm, chewy, and fresh for up to a full week.
Freezer
These bars are incredibly freezer-friendly. Cut the cooled block into squares, place them in a single layer on a baking sheet, and freeze until solid. Then, transfer the frozen squares to a zip-top freezer bag with wax paper between any layers. They will keep in the freezer for up to 3 months. Thaw them on the counter or eat them cold straight from the freezer!
Reheating
Because they are essentially made of melted chocolate and caramel, do not reheat these in the oven. If you prefer a gooey bar, microwave a single square for exactly 5 to 8 seconds, but no longer.
Frequently Asked Questions
Why did my magic cookie bars fall apart when I cut them?
Bars that fall apart were almost certainly cut while they were still warm. The sweetened condensed milk needs time to cool and solidify into a chewy binder. Always let them cool 100% to room temperature, or even chill them in the fridge, before slicing. Additionally, failing to press the toppings down into the milk before baking can cause the top layers to crumble off.
Can I use a different kind of crumb for the crust?
Absolutely! While graham crackers are traditional, you can easily substitute an equal amount of crushed vanilla wafers, Oreo cookies, Biscoff cookies, or even digestive biscuits for the crust.
Do I have to use butterscotch chips?
Not at all. Butterscotch provides a classic flavor, but if you dislike it, you can simply use 2 cups of semi-sweet chocolate chips, or use 1 cup of white chocolate chips, dark chocolate chunks, or peanut butter chips instead.
Why did my coconut burn in the oven?
Coconut can go from perfectly toasted to burnt very quickly. If your oven runs hot, or if your pan is placed too close to the top heating element, the coconut will scorch. Bake them on the middle rack, and start checking them at the 20-minute mark.
Can I make this recipe in a smaller pan?
Yes, but the layers will be much thicker, and the baking time will need to be increased slightly. If you want traditional, proportionate layers, it is best to halve the recipe if you are using a smaller 8×8 or 9×9 inch square pan.
Final Thoughts
When you need a guaranteed crowd-pleaser that requires almost zero effort, these 7-Layer Magic Cookie Bars will never let you down. The brilliant combination of a buttery crust, gooey caramel-like milk, melting chocolate, and toasted coconut hits every single craving in one delicious bite. They are the perfect low-stress baking project for the busy holiday season, and they look absolutely stunning on a cookie platter. Grab a pan and start layering!
7-Layer Magic Cookie Bars
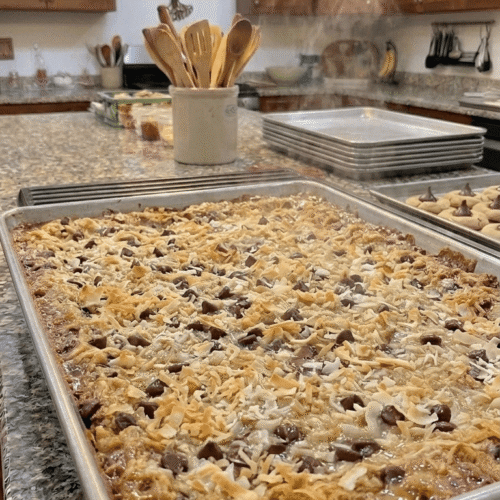
The easiest dump-and-bake holiday dessert! A buttery graham cracker crust topped with gooey sweetened condensed milk, chocolate, butterscotch, pecans, and toasted coconut.
Ingredients
- 1/2 cup Unsalted butter melted
- 1 1/2 cups Graham cracker crumbs
- 1 14 oz can Sweetened condensed milk (do not use evaporated milk)
- 1 cup Semi-sweet chocolate chips
- 1 cup Butterscotch chips or white chocolate chips
- 1 cup Chopped pecans or walnuts
- 1 cup Sweetened shredded coconut
Instructions
- Preheat your oven to 350°F (175°C). Line a 9x13 inch baking pan with parchment paper, leaving an overhang on the long sides for easy removal later.
- In a small bowl, mix the melted unsalted butter and the graham cracker crumbs until the mixture resembles wet sand.
- Pour the crumb mixture into the prepared pan. Use your hands or the bottom of a measuring cup to press the crumbs firmly and evenly into the bottom of the pan to form the crust.
- Pour the sweetened condensed milk evenly over the graham cracker crust. Use a spatula to spread it all the way to the edges.
- Layer the remaining ingredients evenly over the wet milk in this exact order: semi-sweet chocolate chips, butterscotch chips, chopped nuts, and finally the sweetened shredded coconut.
- Gently press down on the coconut layer with the palm of your hand or the back of a fork so that all the chips and nuts sink slightly into the condensed milk to bind.
- Bake for 25-30 minutes, or until the coconut is deeply golden brown and the edges are bubbling.
- Remove from the oven and let the pan cool completely to room temperature.
- Once entirely cooled, use the parchment overhang to lift the block out of the pan. Place on a cutting board and slice into 24 squares.
Notes
Crucial Step: Do NOT cut these bars while they are warm. They must be completely cooled, otherwise they will fall apart into a gooey mess. Chill in the fridge for the cleanest slices.
Parchment is Key: Sweetened condensed milk will stick like glue to an unlined pan. Always use parchment paper.
Milk Check: Make sure you buy Sweetened Condensed Milk, not Evaporated Milk. Evaporated milk will ruin the recipe.
Storage: Store in an airtight container at room temperature for 4 days, in the fridge for up to a week, or freeze for up to 3 months.